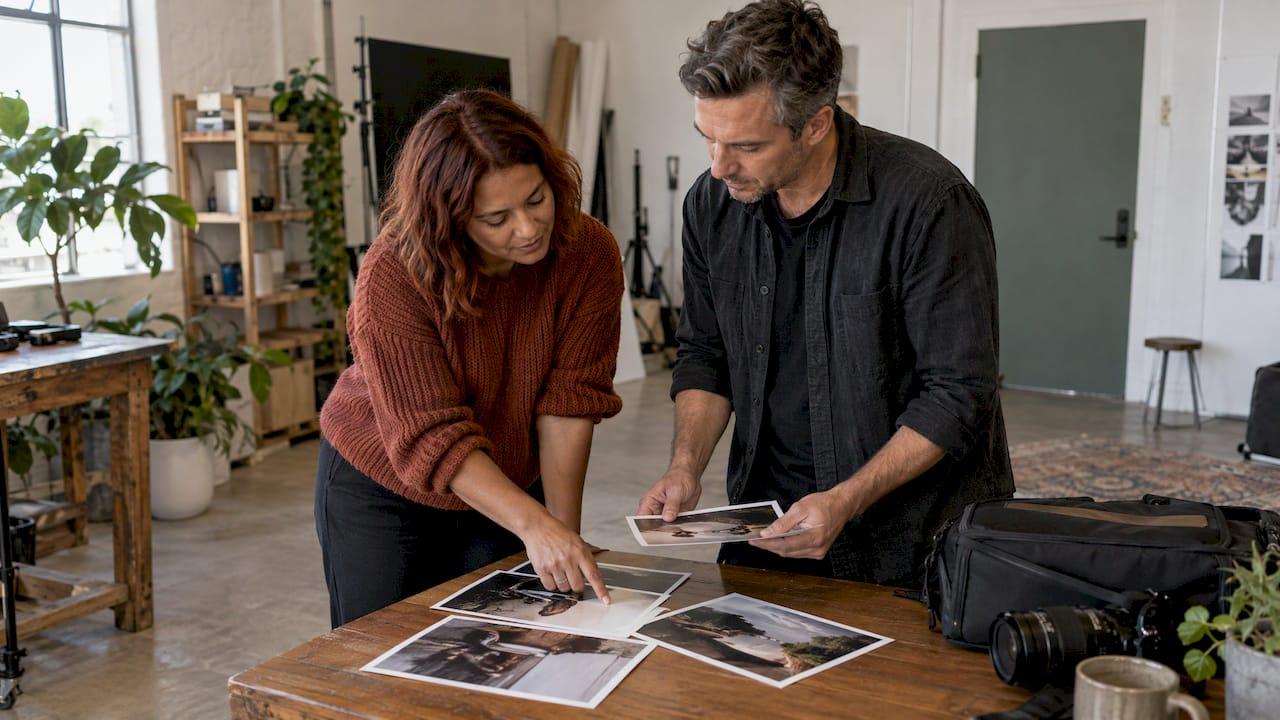
A content shoot goes well when the decisions are made before the day: why you need the images, who they are for, which frames you must leave with, and what happens if it rains. If you are an Auckland business owner, trainer or team lead, a short written plan and a photographer who guides you on the day will get you a library you can use for months. At Life in Style Photography we build every session around that plan, so you are never expected to know how to pose.
TL;DR
- Start with one clear purpose and one audience, then list the exact images and formats you need.
- Write a one-page brief and a shot list that names moments, not just categories.
- Schedule in blocks, leave slack, and give every outdoor scene an indoor backup, because Auckland weather changes quickly.
- Sort consent, venue permission and image-use terms in writing before shoot day.
- Back up files straight after the shoot and check the exports where you will actually use them.
Table of Contents
- Start with the purpose, not the props
- Write a one-page brief
- Build a shot list of moments
- Choose the location and the time of day
- Plan the schedule with slack
- Prepare for Auckland weather
- Sort permissions and privacy early
- Prepare the people
- Direction on the day
- After the shoot: files, selection and use
- Our approach to planning
- Book a planned shoot
- FAQ
- Sources
Start with the purpose, not the props
Most weak shoots begin with "we need new photos". A plan begins with a sentence such as: "We need a library of website, LinkedIn and Instagram images for our rebrand, usable for the next twelve months." One published brief guide recommends a specific purpose, a defined audience and a clear sense of what viewers should understand and do next. That applies as well to a personal trainer as to a record label.
Write down:
- Purpose: website refresh, launch, recruitment, social content, or a mix.
- Audience: who will look at these images and what should they feel?
- Where they will appear: website banner, social posts, email, print, event signage. This decides orientation (landscape or portrait) and how much empty space to leave for text.
- Who appears on camera: you alone, your team, clients, or a couple.
If you are a small business owner rebranding, our rebrand photoshoot checklist shows what a usable set looks like for NZ businesses.
Write a one-page brief
A brief is the document you and the photographer both read. The same guide lists the areas a useful brief covers: why, who, deliverables, formats, people on camera, usage, message, visual direction, production needs, responsibilities, approvals and what must happen before sign-off. It also makes a good point: a visible unanswered question is safer than an invisible assumption. If you are unsure whether you need vertical video frames or who approves the final selection, write the question in the brief.
For visual direction, collect a few reference images and note what you like about each: the light, the colour, the expression, the framing. "Like this" is not enough, but "soft window light and relaxed, mid-laugh expressions" is something a photographer can act on. Our 8-point photography brief for New Zealand clients is a copyable version.
Settle the deliverables in writing
NZ legal guidance for photography contracts suggests spelling out what is photographed, where, the date and duration, how many edited images you receive, the file format and delivery method, and how many rounds of edits are included. It also notes that if you expect RAW (unprocessed) files, you need to say so expressly, as many photographers do not supply them as standard. Most people want finished, edited images, so ask for those and for the sizes you need.
Build a shot list of moments
A shot list stops you finishing the day with twenty near-identical smiles. A New Zealand content-day guide suggests including hero shots, vertical video moments, wide shots of the space, details, team interactions, product close-ups, lifestyle moments and behind-the-scenes content, in both landscape and portrait formats, with cropping for social platforms in mind.
Turn those categories into moments. Instead of "team photo", write "the team around the whiteboard mid-discussion" and "a candid laugh at the coffee machine". Then leave room for what you cannot plan; the best frame often arrives between setups.
Example lists by type of shoot
| Shoot | Must-have frames | Extras worth asking for |
|---|---|---|
| Personal branding | Headshot, working at desk, with a client, close-up of hands or tools | Walking shot, vertical frames for stories |
| Fitness | Hero action shot, equipment detail, coaching moment, strong portrait | Before-and-after-style sequences, wide space shot |
| Team headshots | Consistent head-and-shoulders portraits, one relaxed alternative each | Group shot, team at work |
| Event | Arrivals, speakers, audience reactions, networking, branding signage | Detail shots of food and décor |
For fitness work, our fitness photoshoot ideas with a 10-shot brief and fitness branding photos guide go deeper. For personal brands, see these personal branding photo ideas.
Choose the location and the time of day
Pick a space that gives several looks: a studio, a café, a well-designed workspace with varied textures, or a spot with both indoor and outdoor options. The same content-day guide recommends scheduling key photography earlier in the day around natural light, starting with window-facing setups and saving softer afternoon light for lifestyle images.
For each location, note the address, access, parking, available light, power, noise, a changing area and a nearby indoor alternative, as a planning checklist suggests. If your team needs polished headshots on site, our guide to choosing on-location headshots explains how that works.
Plan the schedule with slack
Divide the day into blocks: arrival and preparation, core setups, changeovers, review, and pack-down. Give each an optimistic and a working time estimate, and schedule using the working estimate. Then add breaks. Overscheduling is the commonest mistake; a relaxed team almost always produces better content.
A simple half-day outline for a small team:
- 9:00 arrival, layout check and test frames.
- 9:30 individual portraits in window light, about ten minutes each.
- 11:00 break and wardrobe change.
- 11:20 working-environment and team interaction shots.
- 12:30 group photos and any outdoor frames.
- 1:00 wrap and file backup.
Our Half day Office photoshoot is built for exactly this kind of team day.
Prepare for Auckland weather
Auckland can move from sun to heavy rain within a single schedule. One New Zealand location guide recommends setting a weather trigger before the day, such as moving inside if rain lasts 30 minutes in any two-hour window, placing the backup scene beside the main scene on the schedule, and giving each outdoor scene a 20-minute reset for drying gear. Decide who makes the call, and agree the indoor option in advance so the day continues without argument.
Sort permissions and privacy early
If people are identifiable in your images, get agreement first. NZ guidance covers employee consent for promotional use of staff images, model releases for contractors or influencers, venue-owner permission, and customer notices for event photography. Also agree what happens on cancellation, postponement or bad weather, plus approval and turnaround times.
For teams, collect signed agreements from each person before the day. A digital consent form is a quick way to gather signatures from several people. Our guide to brand photoshoot planning and privacy for NZ small businesses covers the privacy side in more depth. For specific legal questions about your business, speak to a lawyer.

Prepare the people
People look better when they know what is coming. Send the moodboard, shot list, wardrobe notes and exact arrival instructions about two days before, and share the day's schedule. Provide water, a place to change and short breaks.
Wardrobe is the part people most often leave late. Bring at least two outfits: one that matches your brand colours and one more relaxed. See why in our posts on bringing two outfits to every photoshoot and what to bring to a photoshoot. Guidance on dressing for a professional setting is a good starting point for choosing smart, comfortable clothing.
Direction on the day
Camera-shy people are the norm, not the exception. What helps is a photographer who explains each pose, shows rather than tells, and keeps the pace easy. We photograph the first setup so we can recreate it, tick off each planned frame as it is captured, and back up images during a break, in line with a complete shoot-day checklist. Give the photographer one decision-maker on your side so feedback is not contradictory.
After the shoot: files, selection and use
Files should be copied off the cards straight away into a named folder and kept in at least two places. Then comes selecting: sort into keepers, maybes and rejects, apply basic corrections, retouch, and export for each use. For web use, sRGB is the usual colour setting, and it is worth checking dimensions, compression and naming. Look at the exports at 200% and in the real setting, such as your website or social template, before you publish.

One shoot can feed many channels: a portrait for LinkedIn, a candid for email banners, behind-the-scenes clips for short video. Plan those uses in the brief and you will not feel short of images in three months.
Our approach to planning
We plan every shoot around one idea: the plan should remove pressure, not add it. Careful preparation, clear guidance and attention to comfort are what let people relax in front of the camera, and relaxed people give you natural, vibrant images.
That is why we ask you for the purpose and the uses first, build a shot list of moments with you, and explain every pose as we go. You do not need to know how to pose, and you do not need to be photogenic. You need a clear brief and someone guiding you through the day.
We shoot headshots, personal branding, fitness, couples, weddings, maternity, baby and events across Auckland, on location or in studio, and the same planning logic applies to all of them.
Rowan Freeman
Book a planned shoot
If you would rather have the plan built with you, we offer fixed-price packages. Personal branding starts with the Starter Brand Session at 575 NZD, with Signature at 1035 NZD and Complete at 1495 NZD. Fitness shoots run from the Mini Shoot at 460 NZD to the Premium Shoot at 800 NZD on our fitness photography page. Team headshots start from 345 NZD for The Short one, and event coverage starts from 345 NZD.
Send us your purpose, your audience and your wish list through our site and we will shape the shoot around them.
FAQ
How far ahead should I plan a content shoot?
Allow enough time to write the brief, agree the shot list and collect consents, usually a couple of weeks for a team shoot. Send wardrobe and arrival details about two days before the day.
What should a shot list include?
Hero images, detail shots, people interacting, lifestyle moments and behind-the-scenes frames, in the formats you need for each platform. Name the actual moments you want rather than only categories.
Do I need written permission to photograph my staff?
If staff will be identifiable in promotional images, NZ contract guidance recommends getting their consent in writing. Venue owners and anyone else identifiable may also need to agree. Check your own situation with a lawyer.
What if it rains on shoot day?
Decide a trigger in advance, such as moving indoors if rain lasts 30 minutes, and keep an indoor option next to each outdoor scene on the schedule. Allow a short reset after outdoor sections.
Sources
- Content Shoot Brief: Deliverables, Usage & Approvals
- Photography Contracts: Key Clauses for NZ
- How to Plan a Content Day
- Photoshoot Checklist and Planning Templates
- Complete Photoshoot Checklist for Every Shoot
- New Zealand Film Location Scouting Guide
- How to Get Models for Photography
- From Photoshoot to Final Image