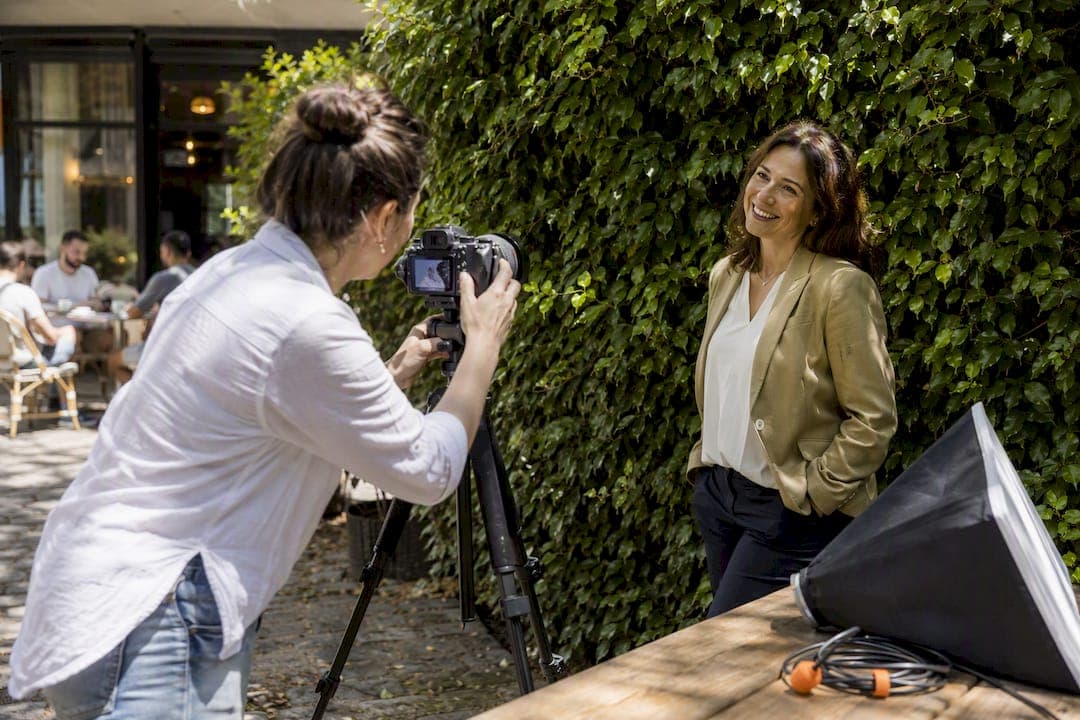
If you need fast, consistent portraits for a whole team, choose on-location headshots. If you want multiple polished looks for one person, a studio session usually serves you better. Either route can deliver studio-quality results when you work with an experienced photographer.
Three quick scenarios to place yourself:
- Team of 15+ staff: on-location almost always wins on cost and disruption.
- Executive or board member: studio gives tighter lighting control for a single, high-stakes portrait.
- Founder building a personal brand: on-location wins when your workspace tells part of your story.
Plenty of businesses land somewhere in between, running a hybrid approach that sends most of the team through an on-location day and books senior leaders into a studio separately.
Key Takeaways
Choosing between on-location and studio headshots comes down to group size, budget, and whether your workplace adds real brand value.
| Point | Details |
|---|---|
| Match format to group size | On-location suits teams over ten people; studio suits groups under eight or multi-look sessions. |
| Budget with a buffer | Allow five to eight minutes per person plus a 10 to 15% time buffer across the day. |
| Fix consistency before the shoot | Lock crop, background, and retouching standards ahead of time so every image matches. |
| Use artificial light for scale | Controlled lighting keeps a full day of headshots consistent regardless of weather. |
| Life in style Photography | Runs both on-location and studio headshot sessions in Auckland, with prep support and consistent retouching standards. |
Table of Contents
- Advantages of on-location headshots
- Advantages of studio headshots
- Cost, logistics and consistency: what to budget and how to enforce a visual standard
- How to run a smooth on-location headshot day
- One-page decision checklist: studio, on-location or hybrid
- Posing techniques and tips specific to on-location environments
- Managing natural vs artificial lighting conditions
- Equipment recommendations for on-location headshots
- Addressing common challenges on location
- Sources
Advantages of on-location headshots
The biggest win with on-location headshots is participation. When a photographer sets up in your office, staff don't need to book travel time, find parking, or take an afternoon off site. That single change dramatically increases how many people actually turn up for their slot, which matters enormously if you're trying to get 30 staff photographed before a website relaunch.
There's a brand argument too. A founder photographed at their own workbench, in their own studio, or against the exposed brick of their actual office tells a more specific story than a grey seamless backdrop ever will. That context does real work for personal branding and leadership pages, and you can see the effect in environmental portrait work where the setting carries part of the message.
On-location also tends to be cheaper per person once you cross a certain group size, because a day rate spreads the photographer's time and travel cost across everyone photographed.
- Minimal disruption: staff step away from their desk for minutes, not hours.
- Environmental storytelling for founders, agencies, and creative teams.
- Day-rate pricing that gets cheaper per head as the group grows.
- Portable lighting and collapsible backdrops that replicate a studio look almost anywhere.
Pro Tip: Ask your photographer to bring a neutral fabric or paper backdrop rather than relying on office walls. It's the single easiest way to get studio-consistent headshots without booking a studio.
Advantages of studio headshots
A studio session earns its cost back when control matters more than convenience. Fixed lighting rigs, blackout curtains, and a repeatable setup mean the photographer isn't fighting a window, a hallway, or fluorescent overheads. For a solo executive portrait or a personal branding shoot that needs several distinct looks, that control is hard to beat.
Studios also make sense for smaller groups. If you only need four or five people photographed, a day rate for on-location doesn't spread far enough to beat a studio's per-person pricing. And because the space is fixed, repeating the session later (a new hire, a refreshed look) is straightforward: same room, same lights, same crop.
- Complete lighting control, unaffected by weather or time of day.
- Best for multi-look sessions where one person needs several finished images.
- Often more cost-effective for small groups of four or five.
- Easy to repeat later with an identical setup for new hires or updates.
The trade-off is obvious once you say it out loud: studios ask people to come to the photographer, which is exactly the friction on-location removes.
Cost, logistics and consistency: what to budget and how to enforce a visual standard
Day rates generally suit larger groups; per-person pricing usually suits smaller bookings or one-off executive portraits. The crossover point depends on your photographer's rate card.
Time planning matters just as much as pricing. Budget several minutes per person for a simple headshot, and build in a moderate time buffer across the day for stragglers, wardrobe fixes, and unexpected delays. A few hours can cover a typical team size at that pace.
- Fix the crop and framing before the day, so every image is cropped the same way.
- Lock the background choice, ideally neutral or a subtle branded colour that ages well across future hires.
- Standardise retouching, deciding upfront whether it's light skin smoothing only or a fuller edit.
- Agree file naming (surname_role_date) so HR and marketing can find images without guessing.
- Confirm logistics: a room with power access, enough space for a 3 to 4 metre shooting distance, a waiting area away from the shoot, and privacy for anyone changing outfits.
How to run a smooth on-location headshot day
The best on-location days are won before anyone picks up a camera. Pre-production and clear scheduling do more to keep things on time than any piece of gear.
Pre-production, one to two weeks out:
- Choose a room with natural light or blank wall space, away from foot traffic.
- Send a single "Headshot Day Prep" email covering wardrobe (solid colours, avoid busy patterns, simple jewellery), timing, and where to wait.
- Appoint a liaison to manage the sign-in sheet and keep people moving to their slots.
On the day:
- Arrive early to check lights, backdrop, and power before the first slot.
- Build a one-way flow: check-in, then prep, then the shoot, then exit, so nobody backtracks through the queue.
- Use a short coaching script (chin forward, weight on the back foot, relax the shoulders) so each person gets consistent direction, not a different pep talk each time.
- Review the back of the camera every few people to catch lighting drift early, not after everyone's gone home.
Someone always runs late, and a buffer keeps the whole day from cascading.
Pro Tip: Give your liaison a printed list with names and time slots, not just a digital calendar. Paper survives a dead phone battery and a packed hallway far better than an app does.
Post-production: confirm file naming, batch retouching rules, and delivery timelines before the shoot, not after. Agree on crop ratios, file sizes, and image rights upfront to avoid rework, and archive the full set so future hires can be matched to the same style without rebooking the whole team.
One-page decision checklist: studio, on-location or hybrid
Use team size as your first filter. Fewer than eight people, lean studio. More than ten, on-location almost always wins on cost and time. Somewhere in between, it comes down to whether your workplace adds real story value, an open-plan design studio or a heritage building says something a plain backdrop can't.
Budget is the other lever. Growing organisations increasingly choose on-location specifically because day-rate pricing beats per-person studio fees once headcount climbs, and it removes the scheduling friction of sending each person to book their own appointment separately.
Before booking, ask your photographer three questions:
- How many minutes per person are you allowing, and what's the buffer?
- What's the delivery timeline, and in what file formats and crop ratios?
- What usage rights come with the images, internal use only, or wider marketing use too?
Posing techniques and tips specific to on-location environments
Posing on-location is harder than in a studio because you're rarely working with a clean, symmetrical space. A good photographer works with what's there rather than fighting it. Standing someone at a slight angle to a window, rather than square on, avoids the flat, passport-photo look that comes from facing a light source head-on.
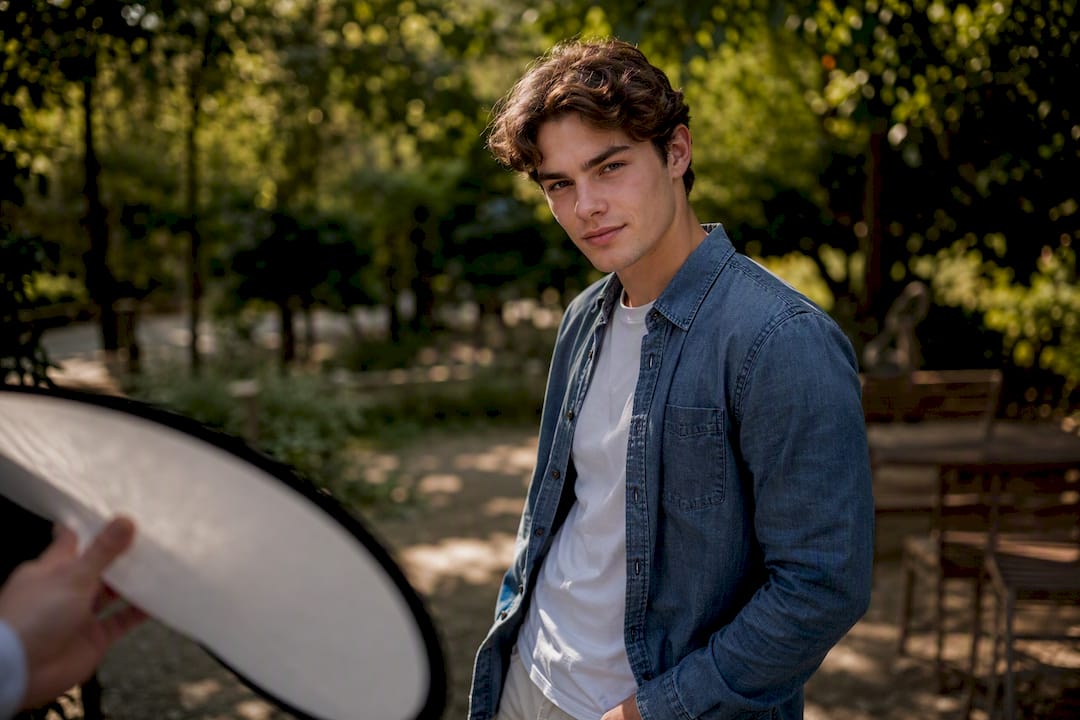
Weight distribution matters more outside a studio because uneven floors, narrow hallways, and desks crowd the frame. Shifting weight onto the back foot and turning the shoulders slightly away from the camera creates a slimmer, more relaxed silhouette, and it's a direction that works whether someone's standing in a boardroom or a car park.
Height differences between subject and camera also show up more on-location, where the photographer often can't set up a purpose-built platform. Shooting from slightly above eye level generally flatters most faces and keeps the background from towering behind the subject.
The other on-location advantage is movement. A studio backdrop invites a static, formal pose, but a workplace lets you shoot someone leaning on a doorframe, mid-conversation, or walking through a space, images that read as natural rather than staged. That variety is worth building into the shot list, even for a formal headshot day, because it gives marketing teams options beyond the straight-on corporate portrait.
Managing natural vs artificial lighting conditions
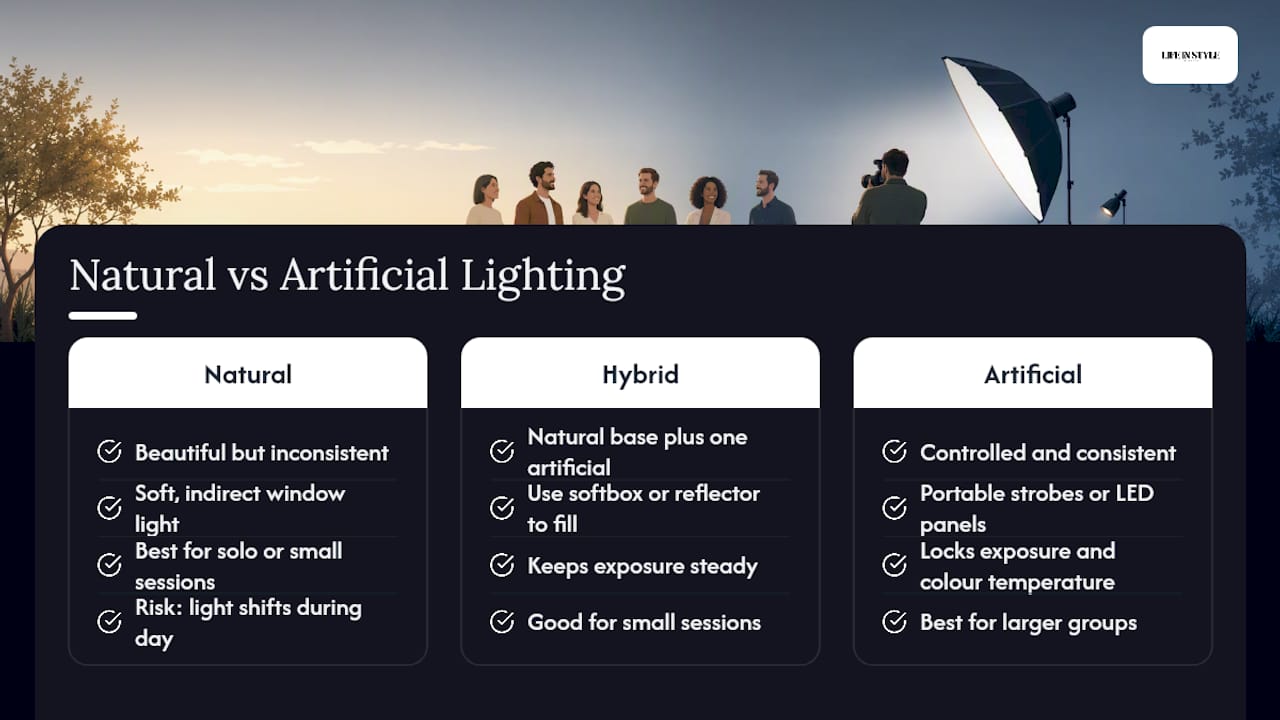
Natural light looks beautiful, but it's inconsistent, and inconsistency is the enemy of a team page that needs every photo to match. A cloud passing overhead between the fifth and sixth person photographed can shift colour temperature enough that the two images sit awkwardly side by side.
That's why controlled artificial lighting scales consistency better than ambient light, even when the background is a real office rather than a studio backdrop. A photographer bringing portable strobes or continuous LED panels can lock exposure and colour temperature for the entire session, regardless of what's happening outside the window.
That doesn't mean natural light has no place. Soft, indirect window light works well for a smaller session or a solo portrait, particularly in the hour or two after sunrise or before sunset when the light is warm and diffused. The risk is relying on it for a full day of back-to-back headshots, where the light will shift noticeably between the first person and the last.
The practical fix is simple: use natural light as a base and supplement it with a single artificial source, a softbox or reflector, to fill shadows and keep exposure steady regardless of what the sky does outside. For larger groups, skip the guesswork altogether and build the whole setup around artificial lighting, treating any window light as a bonus rather than the main source.
Equipment recommendations for on-location headshots
A portable kit needs to do everything a studio does, just foldable. At minimum, that means a full-frame camera body, a mid-range telephoto lens (something in the 70 to 135mm range flatters faces without the wide-angle distortion of a shorter lens), and at least one off-camera flash or LED panel with a softbox modifier.
Backdrops matter more on-location than in a studio, because there's no fixed infinity wall to fall back on. A collapsible fabric or paper backdrop, ideally in a neutral grey or a subtle branded colour, gives you a controlled surface anywhere: a boardroom, a warehouse, or a car park.
Power is the detail people forget. Battery-powered strobes or a reliable set of charged batteries matter enormously when the shoot location doesn't have an accessible power point, or when 30 people need photographing back-to-back without a recharge break. A lightweight stand kit that sets up and packs down in under a minute also keeps the day moving between locations within the same office.
Beyond the core kit, a reflector or diffuser panel is worth carrying even when using flash, since it softens harsh shadows without adding another light source to manage. None of this needs to be expensive or elaborate. What it needs to be is fast to set up and consistent from the first person photographed to the last.
Addressing common challenges on location
Weather is the most common disruptor for any shoot with an outdoor component. The fix isn't hoping for good weather, it's having a backup indoor space identified before the day starts, ideally a room with a blank wall and enough depth for the photographer to stand back from the subject.
Space constraints show up constantly in offices that weren't designed with photography in mind. Open-plan floors often lack a wall free of desks, cabinets, or exposed cabling. Walking the space with the photographer a few days ahead solves most of this, identifying one or two workable spots rather than discovering the problem on the morning of the shoot.
Noise and foot traffic are the quieter disruptors. A shoot set up near a kitchen or a busy corridor invites constant interruptions and distracted expressions. A one-way flow through the shoot area, check-in, prep, shoot, exit, staffed by a liaison, keeps people moving and stops a queue forming in view of the camera.
The last common snag is time overruns. Someone always takes longer than their slot, whether it's a wardrobe issue or nerves in front of the camera. Building a 10 to 15% buffer into the schedule absorbs this without pushing the whole day back, and it's far less stressful than trying to claw back lost minutes after lunch.
Publisher perspective and proof points
Running on-location and studio sessions side by side teaches you that the format matters less than the preparation. At Life in style Photography, our relaxed on-set approach is built specifically to help camera-shy staff and founders loosen up, which shows in the final images far more than the backdrop does. Browse examples in our headshot portfolio to see both styles side by side.
— Rowan Freeman
How Life in Style Photography can help
Life in style Photography runs both formats properly, so you're not choosing between convenience and quality. For teams, our on-location packages bring portable lighting and backdrops straight to your Auckland workplace, photographing everyone in short slots with no travel required. For individuals wanting several finished looks, a studio session gives you the lighting control that a single portrait deserves.

Every booking starts with a prep email covering wardrobe guidance and timing, plus scheduling support so your liaison isn't managing the day alone. Retouching standards and delivery timelines get confirmed before the shoot, not after. Have a look through our headshot photography services or the full range of packages to see what suits your team, then get in touch for a quote and a date on the calendar.
Sources
- On-Location vs Studio Corporate Headshots | K Dalton
- Why growing companies are moving to on-location headshots instead of sending employees to studios | TRG Headshots
- Employee headshots at the office: How to run a smooth on-location headshot day - Headshots By Sam
Recommended
- Auckland Headshot Photography portfolio - Auckland Portrait, Branding & Wedding Photographer | Life in Style Photography
- Services - Auckland Portrait, Branding & Wedding Photographer | Life in Style Photography
- Auckland Portrait, Branding & Wedding Photography Services - Auckland Portrait, Branding & Wedding Photographer | Life in Style Photography
- Personal Branding Photography portfolio - Auckland Portrait, Branding & Wedding Photographer | Life in Style Photography