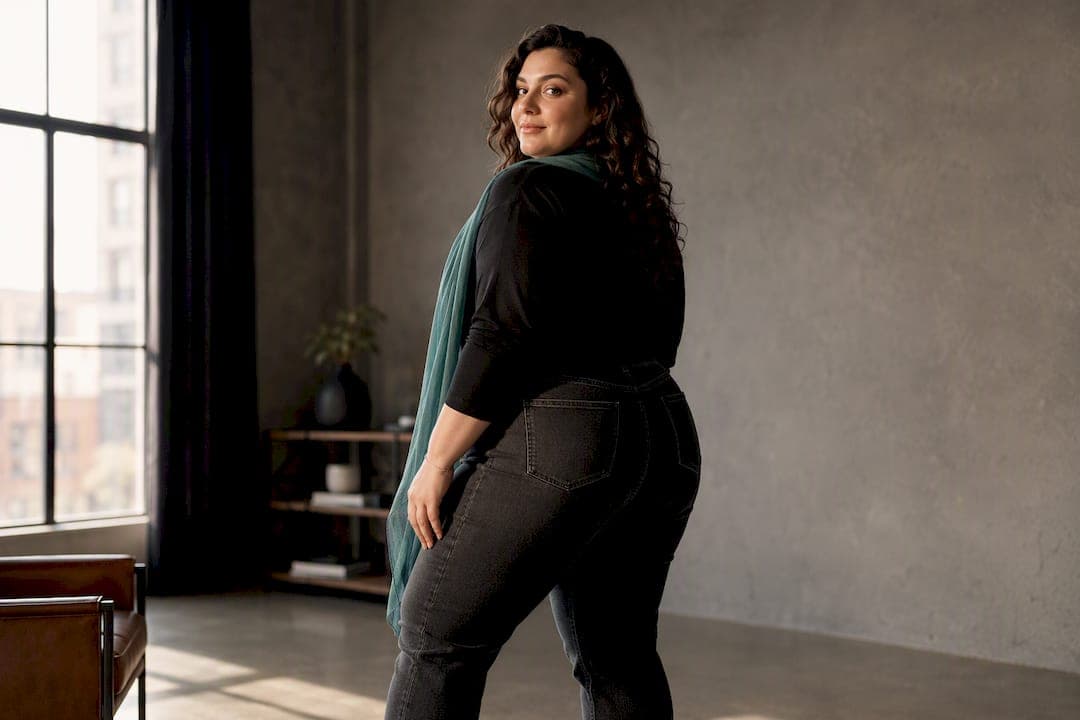
The most reliable way to look flattering in photos is to combine diagonal body lines, a slight weight shift onto one leg, and a camera angle that elongates rather than compresses your frame. No single pose does all the work: movement, expression and a relaxed jaw matter just as much as where your hips or shoulders sit. Below, you'll find twelve specific poses to practise, plus how to adapt them for different shoot types.
TL;DR:
- Diagonal body lines, slight weight shifts, and camera angles that elongate the frame are essential for flattering photos, with movement and expression playing key roles.
- Poses should be adapted based on shoot type, with subtle adjustments like hip pops for boudoir and staggered stance for full-length images.
- Fabric choice and styling, such as structured fabrics and vertical layering, significantly influence how body curves read on camera.
- Practicing poses in front of a mirror and planning outfit changes beforehand can improve confidence and result during the shoot.
- Photographers often give small, clear directional cues to help clients achieve natural, slimming lines without stiffness.
Table of Contents
- 1. Twelve flattering poses to practise right away
- 2. Adapting poses for portrait, couples, boudoir and full-length shoots
- 3. Styling and camera choices that make poses read better
- 4. Getting ready before the shoot with mirror drills and phrases
- 5. On-set examples and guidance from Life in Style Photography
- 6. Practical examples for standing, seated and three-quarter poses
- 7. Treating posing as a skill worth practising
- 8. Booking a session that puts these poses into practice
- Sources
- FAQ
1. Twelve flattering poses to practise right away
These poses work because they create diagonal lines through the body, which naturally draw the eye up and down rather than across. Each one takes seconds to learn in front of a mirror before you try it on camera.
- Weight shift stand: plant one foot slightly forward, shift weight onto the back leg, and let the front knee soften.
- Hip pop: push one hip toward the camera while keeping shoulders square to create a subtle S-curve.
- Three-quarter turn: angle your torso 45 degrees from the lens rather than facing it directly.
- Diagonal leg cross: cross one ankle slightly in front of the other while standing to slim the lower leg line.
- Seated lean: lean the upper body forward from the hips, elbows resting on knees, to avoid torso compression.
- Hand on hip: rest a hand on the hip with the elbow pointing back, not out, to define the waist.
- Chin forward and down: extend the chin slightly forward before dropping it, which tightens the jawline.
- Over-the-shoulder glance: turn the body away from the camera and look back over one shoulder.
- Arm away from torso: create a small gap between arm and body instead of pressing them together.
- Staggered stance: place feet in a wide, staggered line front to back rather than side by side.
- Soft arch: arch the lower back gently while standing or lying down to lengthen the silhouette.
- Walking motion: capture a mid-step shot instead of a static pose for natural, relaxed lines.
Pro Tip: Ask your photographer to shoot from slightly above your eyeline and a few steps back with a longer lens: it elongates the body and softens the angle of the jaw and chin.
2. Adapting poses for portrait, couples, boudoir and full-length shoots
The same core poses shift depending on what you're shooting and how much of your body is in frame. A headshot session calls for smaller, subtler adjustments than a full-length or boudoir shoot.
- Portrait and headshot: use the chin-forward technique and a slight three-quarter turn to keep focus on the face without a flat, square-on look, as covered in our headshot posing guide.
- Couples: swap static side-by-side stances for interaction, like a forehead touch or a laugh mid-conversation, which naturally creates diagonal lines between two bodies; see more in our posing for couples guide.
- Boudoir: Shotkit's boudoir posing guide recommends arching the back and popping the hip, along with props like a sheet or chair to frame and elongate the body.
- Full-length: prioritise the staggered stance and diagonal leg cross, since these read clearly at a distance where facial expression carries less weight.
- Seated: lean forward from the hips rather than sinking back, and keep one foot slightly ahead of the other to avoid a flattened silhouette.
Ask your photographer directly for these variations. A simple request like "can we try one with my hip popped and one leaning forward" gives them a clear direction to work from.
3. Styling and camera choices that make poses read better
Posing does half the work, but what you wear and how the camera is set up finishes the job. Garment fit and fabric behaviour genuinely change how a body reads in a photo, which academic research on plus-size clothing confirms is more than a styling preference.
- Choose structured fabrics over clingy ones: a bit of stiffness in the fabric holds its own shape instead of following every curve.
- Layer tonally, using similar shades top to bottom, which creates a vertical line instead of breaking the body into blocks.
- Avoid horizontal stripes or busy patterns across the widest part of the body.
- Pick necklines that open the chest, like a V-neck or wrap style, to draw the eye upward.
On the camera side, a slightly raised angle and a longer focal length reduce distortion and create a flattering compression, a point echoed in photographer guidance on dating photo angles. Soft, directional lighting also sculpts the body rather than flattening it under harsh, straight-on flash.
A garment's fit and material genuinely change how curves read on camera, according to research on plus-size clothing and body perception, which is why styling choices matter as much as the pose itself.

4. Getting ready before the shoot with mirror drills and phrases
A few minutes of practice at home makes a real difference once you're in front of a camera and feeling watched.
- Stand in front of a mirror and practise the weight shift stand, checking how your reflection changes as you move your back leg.
- Try the chin-forward-and-down movement slowly, watching how it changes your jawline from different angles.
- Practise walking toward and away from the mirror to find a natural, relaxed stride.
- Say a few phrases out loud that you can use on set, like "can we try that again with my shoulder dropped" or "can I walk this time instead of standing still".
- Plan your outfit changes and shoot order the night before so the day itself feels less rushed.
Pro Tip: Bring two or three outfit options and ask for one relaxed "movement" shot and one close-up early in the session, so you loosen up before the more posed shots.
5. On-set examples and guidance from Life in Style Photography
Photographers often describe posing direction as a conversation rather than a set of orders. Instead of saying "pose here", a photographer might ask a client to "take two steps to the left" or "drop that shoulder a fraction", which reduces stiffness and produces more natural lines. A common on-set fix is swapping a square-on stance for a three-quarter turn: the same client, same outfit, but the new angle instantly slims the torso and softens the pose. Clear, small requests like these help camera-shy clients relax without feeling instructed.
6. Practical examples for standing, seated and three-quarter poses
Curvier bodies photograph best when the pose creates visible space and diagonal lines rather than flattening everything into one plane.
For a standing pose, the weight shift stand paired with a hip pop is one of the most repeatable options: front knee soft, hip pushed toward the lens, shoulders square. For a seated pose, lean forward from the hips with elbows on knees rather than sinking into the chair, which keeps the torso from compressing. A three-quarter pose works by turning the body 45 degrees away from the camera while the face turns back toward it, a technique Shotkit's boudoir guide also recommends for creating shape and separation. For diagonal leg placement, cross one ankle slightly in front of the other when standing, or angle both knees the same direction when seated, since a straight-on knee position tends to widen the leg line. Photographers consistently point to these small adjustments, diagonal legs, three-quarter torso turns and minor hand or shoulder tweaks, as the simplest changes with the biggest visual payoff.

7. Treating posing as a skill worth practising
Posing is a skill you build, not a test you pass or fail. Online spaces can distort how people see their own bodies, but they also carry more body-diverse content than they used to, and research from the Classification Office reflects that mixed reality. Practise the poses that feel comfortable to you, and let the rest go.
— Rowan Freeman
8. Booking a session that puts these poses into practice
You don't need to arrive with a memorised list. Some photography sessions work around each client's comfort, so poses come from guided, relaxed direction rather than a script you're expected to already know.

Browse the couples photography packages or get in touch to enquire about a session that fits your goals.
Sources
For more context, see the Classification Office's youth body-image research, Shotkit's boudoir posing guide, and NZ Herald's coverage of plus-size representation.
- Digital Reflections: The Online Experience and its Influence on Youth Body Image in Aotearoa
- Tips & Poses for Flattering Plus Size Boudoir Photography
- Negotiating the Plus-Size Store
FAQ
What is the most flattering style for plus size?
Structured fabrics, tonal layering and necklines that open the chest tend to photograph best, since they create vertical lines and hold their shape on camera. Combined with a diagonal pose, these choices consistently read as flattering across most body shapes.
How to not look chubby in photos?
Shift your weight onto one leg, turn your torso to a three-quarter angle, and create small gaps between your arms and your body instead of pressing them together. A slightly raised camera angle and a longer focal length also reduce distortion in the final image.
How to not look frumpy plus size?
Avoid squaring your whole body to the camera and instead angle your shoulders and hips slightly differently from each other. Structured, well-fitted clothing paired with a soft back arch or hip pop adds shape without needing to change your outfit.
What are some flattering poses for plus-size couples?
Swap static side-by-side stances for interaction, such as a forehead touch, a walking shot, or a mid-laugh moment, which naturally creates diagonal lines between both people. Asking your photographer for a movement-based shot rather than a held pose usually produces the most natural result.