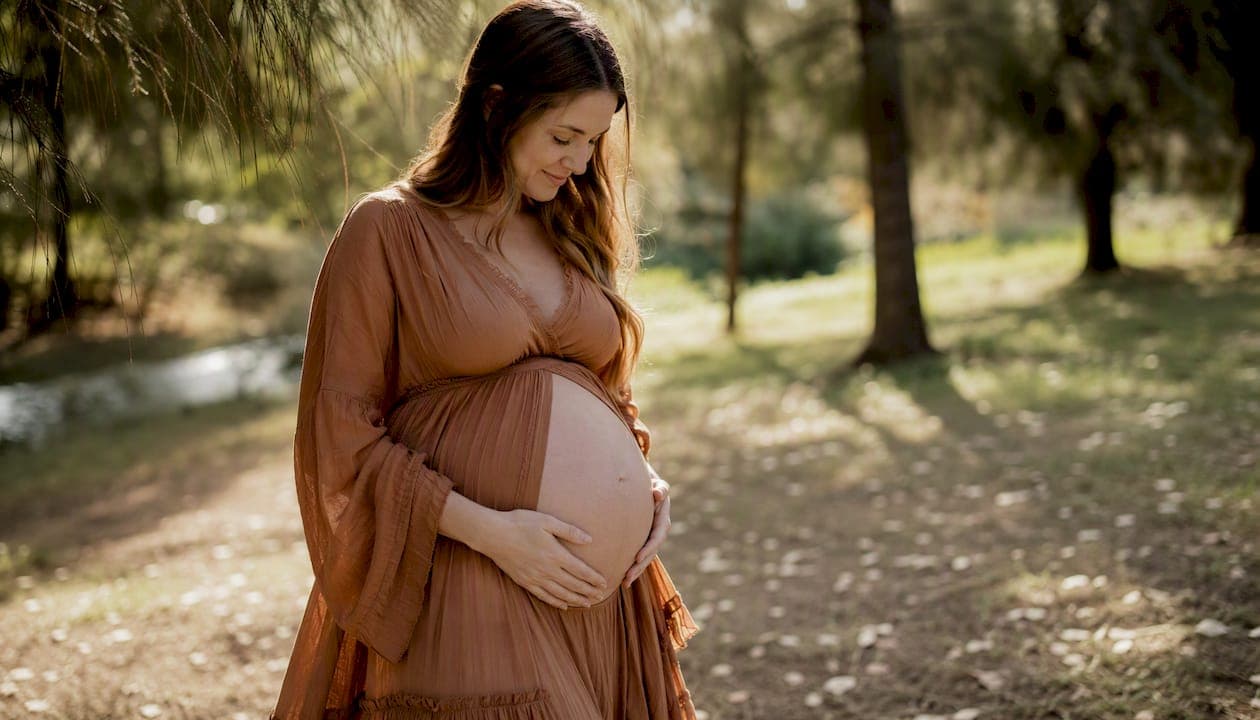
Start with three poses: a side profile with hands on the bump, a gentle 45-degree hold, and an embrace from behind. These flatter almost every body shape, take less than a minute to direct, and give you the emotional range a maternity gallery needs. Book the session between 28 and 34 weeks, keep the client comfortable, and build outward from there.
TL;DR:
- Use the 28 to 34-week window for sessions to ensure the bump is well defined without excessive fatigue.
- Poses like the profile with the S-curve and gentle-hold 45-degree are universally flattering and encourage natural, relaxed expressions.
- Involving partners and siblings requires quick, natural prompts such as kissing the bump or leaning ear to belly to evoke genuine reactions.
- Adjust poses for different body types and pregnancy stages, favoring seated or reclining positions late in pregnancy or for fuller figures.
- Technical choices like shooting at f/3.5 to f/4.0, using 50mm to 85mm lenses, and shooting slightly below chest height enhance the final images.
Table of Contents
- Best solo maternity photo poses to try first
- Partner poses that keep the bump the centre of attention
- How to include older siblings in maternity photos
- Adapting poses for different bodies and pregnancy stages
- What to wear and which props actually help
- Lighting and camera settings that flatter the bump
- A simple session plan and shot list you can follow
- On-set notes from behind the camera
- Book a relaxed, guided maternity session in Auckland
- Sources
Best solo maternity photo poses to try first
Solo shots carry most maternity galleries, so they need to work hard. The poses below cover the classics and give you the small variations that separate a stiff photo from one that feels genuinely warm.
- Profile with the S-curve. Turn the body 45 degrees to the camera, one hand resting above the bump and one below. This angle reveals the full curve of the bump and creates a natural S-curve that reads as more slimming than a straight-on shot. Ask her to shift weight onto her back foot and drop the front shoulder slightly. Micro-variation: tilt the chin down a touch and have her look just past the lens rather than directly into it.
- Gentle-hold 45-degree pose. Similar starting position, but this time both hands cradle the bump from underneath. Hands on the belly frame the bump and give the subject something natural to do with them, which matters more than it sounds because idle hands are what make maternity photos look awkward. Shift her weight forward slightly and ask for a soft exhale before the shutter clicks. That small breath release relaxes the shoulders every time.
- Over-the-shoulder editorial look. Have her turn her back three-quarters to the camera, then turn just the head back toward the lens. This works particularly well with flowy fabric, since a slight breeze or a helper fanning the hem adds movement across the frame. Keep the shoulder closest to camera dropped and relaxed.
- Seated bump-forward pose. For anyone who is tired of standing, seated poses on a stool, bench, or the floor let the bump lead the frame while taking weight off swollen feet. Reclining on a bed or chaise, propped on one elbow, works as a calmer alternative and photographs beautifully in soft window light.
- Walking and silhouette shots. Ask her to walk slowly toward or away from the camera along a path or driveway. Shoot in burst mode so you catch the natural mid-stride moment rather than a posed step. For silhouettes, position her between the camera and the light source, and if she's wearing a flowy dress, a fast shutter speed around 1/500 or quicker freezes fabric mid-throw for a dramatic, editorial frame.
Partner poses that keep the bump the centre of attention
Couple poses do double duty. They need to show connection between partners while still making the bump the obvious focal point of the frame.
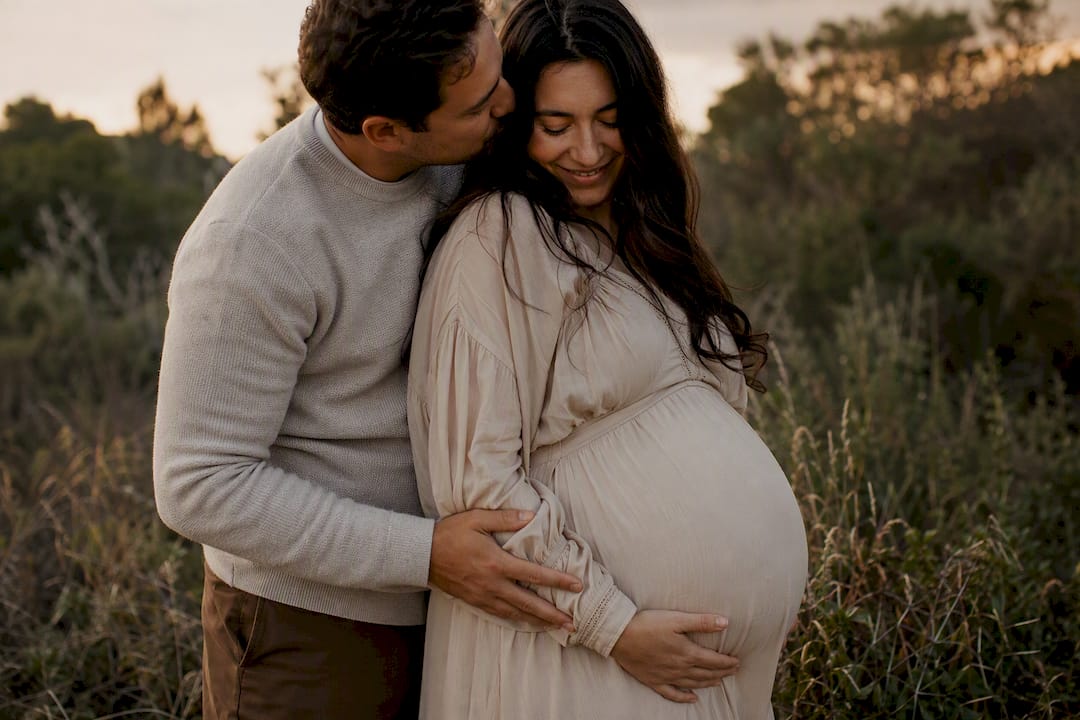
- Embrace from behind. The partner stands behind, wraps both arms around, and rests hands over hers on the bump. Angle the camera slightly to the side so both faces are visible and the hands read clearly against the belly.
- Forehead-to-forehead and kiss on the bump. These prompts tend to produce the most natural expressions because they don't require anyone to "perform" for the camera. Ask the partner to lean down and kiss the bump while she looks down at them. Give it a few seconds. Genuine laughter usually follows on the second or third attempt.
- Walking hand-in-hand. One hand joined, the other resting on the bump. Shoot in burst mode as they walk, since candid frames from movement almost always outperform anything posed on the spot.
- Seated couple poses. For a quieter, more intimate feel, seat both partners close together, her leaning back into his chest, both hands on the bump. This is a good choice late in a session once energy starts to dip. Couples who want more inspiration for this kind of framing can browse romantic couples photography pose ideas for further prompts that translate well to maternity work.
How to include older siblings in maternity photos
Sibling shots are unpredictable by nature, so lean on prompts that work fast and don't rely on kids holding a pose.
- Kiss the belly. Have the older child kneel or crouch beside mum and plant a kiss on the bump. Keep the camera low, at the child's height, so the framing feels intimate rather than looking down on them.
- Ear to belly. Ask the sibling to lean their ear against the bump, "listening" for the baby. This one reliably produces genuine, unscripted smiles from mum.
- Family walking or seated cluster. Position the family so the bump stays visible between bodies rather than blocked by an arm or a sibling's head. Scheduling the sibling portion early in the session, while children still have energy, and shooting in burst mode increases the odds of a usable frame considerably. Keep an assistant or grandparent nearby to wrangle attention between takes.
Adapting poses for different bodies and pregnancy stages
Not every pose suits every body or every stage of pregnancy, and the best photographers adjust rather than force a client into a pose that doesn't fit her.
- First trimester: the bump is subtle, so fitted clothing and side lighting help define the shape without needing dramatic posing.
- Late third trimester: energy runs low and standing gets uncomfortable fast, so lean on seated and reclining poses, saving standing blocks for short bursts.
- Fuller figures: a slightly wider stance, camera positioned at chest height rather than looking down, and soft flowing fabric all create a more flattering line.
- Petite frames: shoot from just below eye level rather than a high angle, which tends to shorten the body and flatten the bump's profile.
What to wear and which props actually help
Wardrobe choices matter more than most expectant parents expect, and a few simple rules keep the gallery cohesive.
- Fitted dresses show the bump's true shape; flowy fabrics like chiffon, silk, or tulle add movement, especially outdoors.
- Stick to soft neutrals or jewel tones. Busy prints compete with the bump for attention and rarely photograph well in a series.
- Bring low heels or comfortable socks, water, and a small touch-up kit for hair and lip colour between poses.
- Simple accessories, like a delicate necklace or a partner's jacket draped over shoulders, add texture without distraction.
- For family sessions, coordinate colour tones loosely rather than dressing everyone identically. It reads as intentional, not costumed.
Lighting and camera settings that flatter the bump
Technical choices shape the final image just as much as the pose itself, and a few adjustments make a noticeable difference.
- Keep the body angled at 45 degrees to the lens rather than square on. It's the same principle behind the S-curve pose, and it's slimming for almost any body type.
- Shoot at apertures between f/2.0 and f/4.0 for solo portraits, since a shallow depth of field separates the subject cleanly from the background. Stop down to f/3.5 to f/4.0 for couples or family groups so everyone stays in focus.
- Favour 50mm to 85mm lenses for portraits. Wide-angle lenses in the 24mm to 35mm range tend to distort the belly and face up close, which undoes all the careful posing.
- For silhouettes or fabric movement, shoot with the light source behind the subject and watch your exposure carefully. Golden hour gives a warm rim light; overcast days give flatter but more forgiving light for skin tones.
Pro Tip: Shoot slightly below chest height rather than at eye level. It elongates the torso and makes the bump read stronger in the frame, especially in profile shots.
A simple session plan and shot list you can follow
A 60 to 90 minute session runs smoothly when it follows a loose order rather than jumping between setups.
- Warm-up standing poses (10 to 15 minutes). Start with easy profile and gentle-hold poses. Beginning with simple standing poses builds confidence before moving into anything more intimate, and showing camera previews early helps clients relax into the rest of the shoot.
- Partner block (15 to 20 minutes). Move into embrace, forehead-to-forehead, and walking poses.
- Sibling and family block (10 to 15 minutes). Do this early enough that children still have patience, but after the couple has warmed up.
- Seated and reclining poses (15 minutes). A good rest point partway through, especially in the third trimester.
- Fabric, movement, and silhouette shots (10 to 15 minutes). Save these for last since they take a few attempts to nail.
Aim for three or four variations per pose block before changing outfits or locations, and scheduling the session between 28 and 34 weeks keeps the bump well defined while the client remains comfortable enough to move through each setup.
On-set notes from behind the camera
Most clients arrive nervous, particularly if they've never been the subject of a photoshoot before. The fix isn't more direction, it's less. Showing someone the back of the camera after the first few frames does more to settle nerves than any amount of coaching, because it lets them see they already look good.
Camera-shy clients respond best to a gradual build. Start with poses that don't require touching or closeness, like a solo profile shot, then ease into the embrace and kiss-on-bump prompts once the initial stiffness has worn off. Rushing straight to intimate poses before someone feels at ease on set almost always shows up in the final images as tension around the eyes and shoulders. Couples looking for a sense of what relaxed, guided direction looks like in practice can browse personal branding portfolio work that shows the same principle applied across a different genre.
— Rowan Freeman
Book a relaxed, guided maternity session in Auckland
Life in Style Photography runs maternity sessions the same way described above: a warm-up to settle nerves, guided prompts rather than vague direction, and camera previews along the way so you can see how good the images already look. Sessions are available on location around Auckland or in studio, with package options covering solo, partner, and family frames in one booking.
Comfort sits at the centre of how each session runs. Breaks are built in, water and touch-ups are encouraged, and there's never any pressure to hold a pose longer than feels good. If you're ready to lock in a date before the third trimester makes standing poses harder, get in touch through the maternity and baby photography page to check availability and see full package details on the photography packages page.
Sources
- Your posing guide for maternity sessions | Digital Photography School
- Maternity photography posing guide | PhotographyIcon
- How to pose expecting mothers for flattering maternity photos | PhotographyTalk
Recommended
- Auckland Maternity and baby photography - Auckland Portrait, Branding & Wedding Photographer | Life in Style Photography
- Auckland Maternity and baby photography - Auckland Portrait, Branding & Wedding Photographer | Life in Style Photography
- 5 Tips to Look Your Best in Professional Headshots - Auckland Portrait, Branding & Wedding Photographer | Life in Style Photography
- Auckland Fashion Photographer - Auckland Portrait, Branding & Wedding Photographer | Life in Style Photography