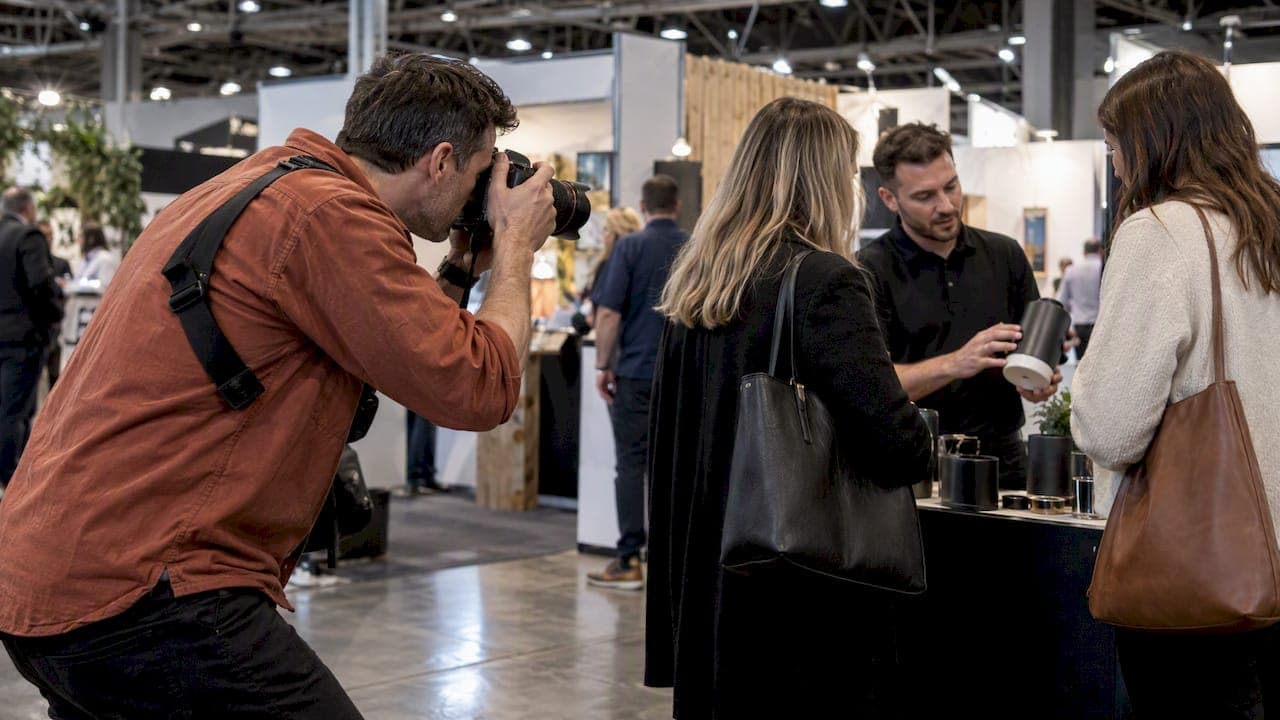
Agree a practical shot list with organisers, protect sponsor visibility, and bring low-light kit. Those three actions deliver usable trade-show galleries. The rest comes down to timing, consent, and a delivery workflow that respects everyone's deadlines.
TL;DR:
- Match deliverables to use: press kits need captioned, high resolution hero images, sponsor reports need visible branding, and social posts need vertical crops.
- New Zealand’s Privacy Act 2020 governs personal information handling; honor reasonable removal requests and check the organizer’s policy before photographing children.
- When possible, shoot to dual cards, copy files at breaks, verify them before formatting, and agree on same day hero images and full gallery deadlines.
Table of Contents
- Building a trade show shot list that actually gets used
- Equipment and camera settings for trade-floor conditions
- Scouting the venue before doors open
- Composition and the shots organisers reuse most
- Handling light across a trade floor
- Working with exhibitors, organisers and consent on the day
- Backup, editing and delivery timelines that work
- Our checklist and on-floor priorities
- Why planned event coverage is marketing infrastructure, not just memory
- Book event photography that delivers usable results
- FAQ
- Sources
Building a trade show shot list that actually gets used
A shot list only earns its place if it's built around how the images will be used afterwards, not just what happened on the day. We start every trade show brief by asking what the gallery needs to do: fill a sponsor report, feed social media same-day, or supply a press kit for journalists.
Six pillars cover almost every trade show brief:
- Venue and setup shots that establish scale and context
- Branding and signage, including sponsor logos and stand graphics
- Speakers and panel sessions
- Product demos and close-up detail shots
- Candid networking and audience engagement
- Wide atmosphere and b-roll for video or recap content
A corporate event photography checklist should do more than prove an event happened. It needs to generate assets for websites, social media, sponsor decks and future promotions, which means priorities have to be set before the doors open.
Before the event, confirm three things with organisers and exhibitors:
- Who must appear in the gallery (VIPs, sponsors, key speakers)
- Which moments cannot be missed (ribbon cuttings, product reveals, keynote slots)
- What format and turnaround the recipients expect
Intended usage changes everything downstream. A press kit needs captioned, high-resolution hero shots. A sponsor report needs branding visible in candid frames. Social media wants vertical crops and fast turnaround, often same-day. Setting these expectations early means you're shooting with the end use in mind, not retrofitting a gallery after the fact.
Equipment and camera settings for trade-floor conditions
Trade floors are unpredictable: harsh overhead lighting in one aisle, dim booths in the next, and constant movement everywhere. A versatile kit matters more than a large one.
- A wide zoom (16-35mm equivalent) for booth and atmosphere shots
- A standard zoom (24-70mm equivalent) as the workhorse lens for most coverage
- A short telephoto (70-200mm equivalent) for candid crowd shots and speaker coverage from a distance
For low-light halls, we lean on auto ISO with a capped ceiling, usually around 6400 on modern full-frame bodies, paired with a shutter speed no slower than 1/160s to freeze movement. Aperture choices depend on the shot: wide apertures (f/2.8 to f/4) separate subjects from busy backgrounds in portraits, while product close-ups often benefit from f/5.6 or narrower to keep detail sharp across the frame.
Continuous autofocus with subject tracking and a fast burst mode catch handshakes, laughter and demo moments that pass in a second. Custom white balance readings taken on arrival save hours of colour correction later.
Flash is situational. TTL works well for fast-moving candid coverage where exposure changes shot to shot, while manual flash with a small softbox or bounce card suits controlled portrait setups at a stand.
Pro Tip: Carry a spare battery and card in a jacket pocket, not just your bag, so a quick change never means missing the shot.

Scouting the venue before doors open
A short walk-through before the event prevents most on-floor problems. Arriving early to check sightlines, power access and background clutter is worth the extra hour.
- Walk the floor to spot sightline obstructions, trip hazards and messy backgrounds near key stands
- Confirm photography zones, press pass requirements and any exhibitor restrictions with organisers
- Check drone or elevated photography rules, which many venues restrict entirely
- Review the floorplan and exhibitor briefs to map a shooting route and timing around keynote slots
- Identify parking, kit drop-off points and a safe staging spot near the stand you're covering
Exhibitor manuals often list photography deadlines, stand lighting notes and submission requirements. An exhibitor manual from a comparable event is a useful reference for the kind of logistics and fees that show up repeatedly across trade shows.
Composition and the shots organisers reuse most
Certain frames get reused far more than others, so they're worth getting right every time.
- A booth wide shot should show branding clearly while including a few people interacting with the stand, which reads as active rather than empty
- Product close-ups work best when they show the item in use, not just sitting on a table, with enough light to reveal texture and finish
- Speaker coverage needs three frame types: an establishing shot of the stage and audience, an action shot mid-gesture or mid-slide, and a clean portrait for later use in recaps
- Candid networking shots land best when shot from a slight angle rather than head-on, letting sponsor signage sit naturally in the background without looking staged
Timing matters as much as framing. The few seconds after a demo finishes, when people turn to talk to each other, consistently produce the most natural candid frames of the day.
Handling light across a trade floor
Ambient light varies wildly between aisles, stages and sponsor booths, so the first step on arrival is always a quick read of what's available before deciding whether to supplement it.
- Bright, evenly lit halls often need nothing more than a bounce card to soften shadows on faces
- Dim stand lighting usually calls for off-camera flash bounced off a nearby wall or ceiling, which keeps light soft without overpowering the booth's own ambience
- A single continuous LED panel works well for quick portraits or social content, since it lets both subject and photographer see the result in real time
Colour casts from stage lighting and LED screens are one of the most common headaches on a trade floor. Shooting raw files, taking a custom white balance reading on-site, and using gels sparingly when adding flash all help bring mismatched light sources back into a consistent palette during editing.
Pro Tip: Keep a grey card in your pocket. A ten-second reference shot at the start of each stand saves far more time in editing than it costs on the floor.
Working with exhibitors, organisers and consent on the day
A short briefing conversation with each exhibitor before shooting starts prevents most disputes later. Confirm who must appear in frame, where logos and branding need to stay visible, and when demos are scheduled so you're not shooting a quiet stand mid-afternoon.
- Ask which people are must-shoot (sponsors, VIPs, key clients) and which prefer not to be photographed
- Confirm logo and signage placement so branding reads clearly in wide and candid shots
- Check demo and presentation timings against your route so nothing gets missed
Journalists value a press kit with captioned, high-resolution images and company background ready to go, since it removes the guesswork from using an exhibitor's photos in coverage.
Consent matters throughout. New Zealand's Privacy Act 2020 sets the legal backdrop for handling personal information, and professional practice is to honour a reasonable request to remove someone's image even when an event's terms technically allow photography. Photographing children needs extra care, and checking whether an organiser has a specific policy in place is worth the two minutes it takes. Wearing visible ID and coordinating politely with other suppliers on the floor also goes a long way toward a smooth day for everyone.
Backup, editing and delivery timelines that work
Losing a card halfway through a trade show is the kind of mistake that's entirely avoidable with a simple routine.
- Shoot to dual cards where your camera supports it, and copy files to a laptop or portable drive at every break
- Run a quick checksum or file count check before formatting any card
- Tether or pull quick selects when organisers need same-day social assets, pairing them with a simple preset for fast consistent colour
- Cull aggressively, keeping only frames that are sharp, well-composed and usable
- Caption and tag images with exhibitor names, sponsor details and session titles as you go, since this saves significant time during sponsor reporting later
- Deliver in agreed stages: same-day hero shots for social, followed by a full edited gallery within the window promised to organisers
Most trade show clients expect a short turnaround on a handful of hero images, with the complete gallery following over the following days. Agreeing that window upfront avoids the awkward follow-up email asking where the photos are.
Our checklist and on-floor priorities
Running portrait setups from inside a busy stand doesn't need to be disruptive. A single LED panel and a simple backdrop, tucked into an unused corner, is enough to deliver polished headshots for delegates without pulling attention away from the main stand activity.

We balance candid and posed work throughout a shoot, because galleries that are entirely posed feel stiff, and galleries that are entirely candid can miss the clean, usable shots that sponsors and press actually need.
A compact pre-event checklist keeps the day on track:
- Confirm kit: backup bodies, spare batteries, cards and a lighting kit suited to the venue
- Gather contacts: organiser, sponsor liaison and exhibitor stand managers
- Lock in the must-shoot list and timing of key moments
- Test the backup workflow before you leave the car
Pro Tip: Run through your must-shoot list one more time ten minutes before doors open. It's the cheapest insurance against missing the one shot everyone asks about afterwards.
Why planned event coverage is marketing infrastructure, not just memory
Treating a trade show gallery as a one-off record undersells what good coverage can do. A well-planned shoot becomes raw material for sponsor decks, press releases and a season's worth of social content, which is a very different brief from simply documenting a day.
We build every event shoot around that reuse, which is part of why clients tell us the process feels considered rather than rushed.
— Rowan Freeman
Book event photography that delivers usable results
We cover events and trade shows with a relaxed, well-planned approach that results in natural, usable photos without making subjects feel like they're performing for the camera. Our event photography services page outlines what's included, from full-day coverage to shorter stand-focused sessions, with pricing available on request depending on scope.

Deliverables typically include a curated gallery alongside a smaller set of fast-turnaround hero shots suited to same-day social posting, and you can browse examples of past coverage on our events portfolio before getting in touch. If you'd rather start with a quick conversation about your event's shot list and timing, reach out through the Event Photography Services page and we'll work out a plan that fits your stand and your sponsors.
FAQ
What is the "20/60/20 rule" in photography?
There's no single, widely agreed definition of a ratio rule in photography, and it isn't a standard framework used in trade show or event coverage. If you've seen it referenced elsewhere, treat it as a rough personal guideline rather than an industry standard, since event shot lists are better built around organiser priorities and intended usage than fixed ratios.
What are some basic tips for taking good photographs?
Good photographs usually come down to clean composition, reliable focus, and light that flatters the subject rather than fighting it. At a trade show, that means scouting backgrounds in advance, keeping a tested backup workflow running, and shooting with the final use of the image in mind, whether that's a press kit, a sponsor report or a social post.
What are the best tips for event photography?
The most useful habits are agreeing a shot list with organisers before the event, scouting the venue for light and layout issues, and setting clear delivery timelines so social teams and sponsors know what to expect and when. Treating the gallery as a reusable marketing asset, with captions and metadata added as you go, also saves considerable time afterwards.
How should photographers handle consent and privacy at events?
Professional practice is to honour reasonable requests to have an image removed, even where an event's own terms permit photography, and New Zealand's Privacy Act 2020 provides the legal backdrop for handling personal information collected this way. Extra care is worth taking around photographing children, including checking whether the organiser has a specific photography policy in place.
Sources
- Corporate event photography checklist — Zillwood
- Privacy Act 2020 — New Zealand legislation
- What is a media kit? — Lisa Masiello