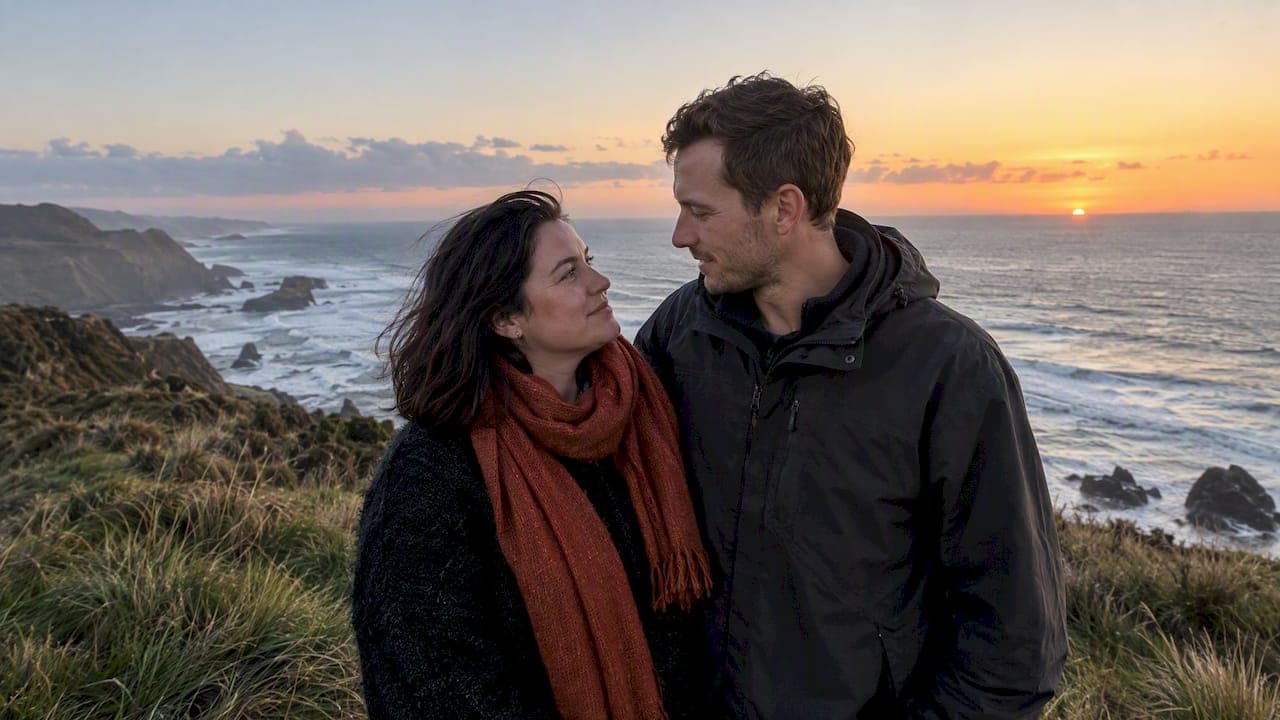
Golden hour is the warm, side-lit window when the sun sits roughly 6° to −4° above the horizon, ideal for glowing portraits and landscapes, while blue hour is the cooler, softer light that follows or precedes it, running roughly −4° to −6°, suited to moody cityscapes and ambient-lit scenes. Both occur around sunrise and sunset, and both overlap with civil twilight. Choosing between them comes down to the mood and subject you're after.
TL;DR:
- Because latitude, season, and weather shift both windows, check exact sun elevation times for your location and shooting date before leaving.
- Blue hour often needs a tripod; start near f/8, 5 to 10 seconds, and ISO 100, then bracket exposures for bright lights and dark skies.
- Arrive 20 to 30 minutes before golden hour for portraits, or at least 15 minutes before blue hour to frame city scenes while visibility remains.
- Clouds can erase golden hour color or soften portrait light, while thin high clouds may prolong blue hour color by catching residual sunlight.
- Keep shooting through sunset rather than waiting for a perfect moment; the shift from warm light to cool shadows can last only a few minutes.
Table of Contents
- What golden hour and blue hour actually mean
- The science and timing behind the colour shift
- How duration and timing shift with season, latitude and weather
- Choosing golden hour or blue hour for your shot
- Camera settings for golden hour and blue hour
- Planning your shoot: tools, calculators and scouting
- Shoot recipes for golden hour and blue hour
- Choosing the right moment for your story
- How we use golden and blue hour on location
- Let us handle the timing for your next shoot
- FAQ
- Sources
What golden hour and blue hour actually mean
These two terms get thrown around loosely, so it helps to anchor them to something measurable rather than a vague feeling about "nice light." PhotoPills defines golden hour as the period when the sun's elevation sits between 6° and −4°. During this window, sunlight travels through more atmosphere than at midday, scattering out the blue wavelengths and leaving the warm oranges and reds that give portraits and landscapes their glow. Shadows stretch long, contrast softens, and the light tends to come from the side rather than overhead, making golden hour a popular choice for people and scenery alike.
Blue hour follows a tighter, cooler band. The same source places it between −4° and −6° of sun elevation, the stretch after the sun has dipped below the horizon (or before it rises) when direct sunlight no longer reaches the scene. What's left is indirect skylight, scattered and cool, producing the deep blues and purples that give the phase its name. There's no harsh shadow to manage because there's no direct source, which is why blue hour photos often feel calmer and more uniform than golden hour ones.
A quick comparison makes the practical differences clear:
- Colour temperature: golden hour runs warm (oranges, yellows), blue hour runs cool (blues, purples).
- Light direction: golden hour light is directional and casts long shadows, blue hour light is diffuse with almost no shadow.
- Typical exposure: golden hour often allows handheld shooting, blue hour usually needs a tripod or image stabilisation because ambient light levels drop fast.
- Best subjects: golden hour suits portraits, couples, and landscapes with texture, blue hour suits skylines, architecture, and scenes with artificial lights.
- Overlap: both phases sit within civil twilight, though golden hour extends slightly into daylight hours as well.
Neither phase is objectively better. They're tools for different jobs, and knowing which one you need before you arrive on location saves you from standing around waiting for light that was never going to suit your shot.
The science and timing behind the colour shift
The numbers behind golden and blue hour aren't arbitrary; they come from where the sun sits relative to the horizon, and that single measurement, sun elevation, explains almost everything about how the light behaves. According to PhotoPills, golden hour spans a sun elevation of 6° to −4°, while blue hour spans −4° to −6°. Those thresholds matter because they map directly onto the recognised twilight phases astronomers and photographers both use: civil twilight runs from sunset to roughly −6° elevation, nautical twilight continues to −12°, and astronomical twilight extends to −18°, after which the sky is considered fully dark. Golden and blue hour both sit inside civil twilight, which is why they share a border rather than a gap.

The colour shift itself comes down to physics. At midday, sunlight travels through a relatively short slice of atmosphere to reach your lens, and that keeps colours closer to neutral white. As the sun drops towards the horizon, its light has to pass through a much longer path of air, and that longer path scatters short wavelengths, the blues and violets, far more than it scatters the longer red and orange wavelengths. This is Rayleigh scattering, the same effect that makes the sky blue at midday and red at sunset. During golden hour, enough direct sunlight still reaches you that the warm, scattered-out light dominates the scene. Once the sun drops below the horizon for blue hour, there's no direct beam left at all, just indirect skylight bouncing around the upper atmosphere, and that skylight skews cool because it's essentially the blue end of the spectrum reflecting back down.
This is also why golden hour feels gradual while blue hour feels like it has a ceiling. Golden hour duration depends on how fast the sun's elevation angle changes, which in turn depends on latitude and season. Blue hour, bound by a tighter elevation range, tends to be shorter and more consistent in length, though PhotoPills notes that both phases vary significantly with latitude, season and atmospheric conditions, so a photographer planning a shoot anywhere, including across New Zealand, needs to check the actual numbers for that date and place rather than relying on a rule of thumb.
Understanding this mechanism gives you something rules of thumb can't: the ability to predict what you'll get. If the sun is within the golden-hour elevation band, you can expect warm tones and long shadows. If it is within the blue-hour band, prepare for cooler light and consider using a tripod.
How duration and timing shift with season, latitude and weather
Golden hour and blue hour don't last the same length of time everywhere, and treating them as fixed windows is one of the most common planning mistakes. Because both phases are defined by the sun's elevation angle rather than by clock time, how quickly the sun crosses that angle, and therefore how long each phase lasts, depends on your latitude and the time of year.
At higher latitudes, the sun's path through the sky is shallower near sunrise and sunset, so it takes longer to move through the golden and blue hour elevation bands. That means longer golden and blue hours in summer at higher latitudes, sometimes stretching well past an hour, while locations closer to the equator tend to get a faster, steeper sunset and correspondingly shorter golden and blue hour windows year-round. Near the solstices, this effect becomes even more pronounced: summer evenings can hold onto golden light for an extended stretch, while winter transitions can compress into a shorter, more urgent window.
Practical seasonal examples help here. In summer, morning golden hour might begin while most people are still asleep, and evening golden hour can run late, with warm light lingering well into the evening before blue hour takes over. In winter, both windows shift earlier and tend to move through their elevation ranges faster, so the whole golden-to-blue transition can be noticeably shorter. Seasonal daylight patterns in New Zealand reflect this clearly: summer evening golden hour can extend past 8:00 pm, morning golden hour may fall around 5:30am to 7:00am depending on the time of year, and twilight itself commonly runs 30 to 45 minutes after sunset in clear conditions.
Weather adds another layer. Cloud cover can mute or completely blot out a golden hour's warm colours, but it can also diffuse the light in ways that suit soft portrait work, and a thin layer of high cloud at sunset sometimes extends the colourful part of blue hour by catching residual light long after the sun has dropped. Haze and atmospheric particles, common near coastlines, can deepen the reds of golden hour while shortening how long the colour holds.
The practical takeaway is simple: arrive earlier than you think you need to, and keep shooting through the transition rather than waiting for a single "perfect minute." The most interesting shifts, the moment warm light fades and cool shadow takes over, often last only a few minutes, and if you're not already set up and shooting, you'll miss them entirely.
Choosing golden hour or blue hour for your shot
The light you choose should follow the story you're trying to tell, not the other way around. Golden hour's warmth naturally reads as inviting, nostalgic, and energetic; it flatters skin tones, adds texture to landscapes through long shadows, and tends to make people feel more at ease in front of a lens because the light itself feels gentler. Blue hour, by contrast, reads as calm, mysterious, or even a little dramatic; its even, shadowless quality suits scenes where you want the mood to feel composed and deliberate rather than spontaneous.
That emotional difference maps onto subject choice fairly predictably:
- Headshots and couples sessions usually favour golden hour, since the warm side light flatters faces and the directional quality adds dimension without harsh shadows.
- Architecture and skyline shots usually favour blue hour, because the balanced ambient light lets building lights and sky colour sit together without one overpowering the other.
- Landscapes with texture, think rolling hills, rock formations, or crop fields, benefit from golden hour's long shadows, which reveal surface detail that flat midday light hides.
- Street and urban photography often works well in blue hour, when shopfronts, streetlights, and traffic trails provide colour and contrast against the cooler sky.
Composition technique shifts between the two phases as well. In golden hour, backlighting is your biggest creative lever: placing your subject between you and the sun creates rim light around hair and shoulders, and shooting directly into the light (with some flare control) can produce soft, glowing silhouettes. Reflective surfaces, water, wet pavement, glass, pick up the warm colour and extend it through the frame. In blue hour, the challenge flips: you're usually balancing ambient sky light against artificial sources like streetlights, shop windows, or building interiors, and getting that balance right is what separates a flat blue-hour shot from a striking one. Underexposing slightly for the sky while letting warm artificial lights hold their own colour often creates the most engaging contrast.
Pro Tip: When shooting golden hour portraits, position your subject with the sun behind them for a soft rim light, then use a reflector or even a white card to bounce warm fill light back into their face.

If you're still deciding which phase suits a particular shoot, ask what the final image needs to communicate. A warm, personal, connection-driven portrait points towards golden hour. A composed, atmospheric, slightly cinematic scene points towards blue hour. Plenty of sessions benefit from both, which is why planning to shoot through the full transition, covered later in this guide, tends to give you the most usable variety from a single outing.
Camera settings for golden hour and blue hour
Each phase asks for a different technical approach, mostly because the available light drops so sharply between them.
- Set white balance deliberately rather than relying fully on auto. For golden hour, the "Daylight" or "Cloudy" presets around 5500K to 6500K tend to preserve the warmth rather than neutralising it the way full auto white balance sometimes does; for blue hour, a slightly cooler custom setting around 3500K to 4500K keeps the blues rich without turning the whole frame an unnatural purple.
- During golden hour, keep your aperture in the f/2.8 to f/5.6 range for portraits to isolate your subject against the warm background, and lean towards f/8 to f/11 for landscapes where you want front-to-back sharpness and strong shadow definition.
- Meter off the subject's skin or the mid-tones of the scene, not the bright sky, since golden hour's direct sunlight can trick your camera's meter into underexposing faces when the subject is backlit.
- For blue hour, switch to a tripod-led workflow early, since ambient light levels fall fast and handheld shots below roughly 1/30 second start showing motion blur even with stabilisation.
- Use longer shutter speeds, typically 1 to 30 seconds depending on the scene, paired with a lower ISO (100 to 400) to keep noise under control while the tripod handles the exposure time.
- Expose for the highlights, not the shadows, in blue-hour cityscapes, because recovering blown-out streetlights or window glow in post-production is far harder than lifting shadow detail.
- Bracket exposures where a scene has a wide dynamic range, such as a skyline with bright building lights against a darkening sky, then blend the frames in post to hold detail in both the highlights and the sky gradient.
- Keep ISO as low as your shutter speed and tripod stability allow, since blue hour's dim, even light is one of the few lighting conditions where noise becomes a real concern, and a touch of in-camera or post-production noise reduction goes a long way without destroying fine detail.
Handheld golden hour shooting works because there's still enough direct light to keep shutter speeds reasonably fast, often 1/250 second or quicker even at moderate ISOs. Blue hour removes that margin almost entirely, which is why a stable tripod and a slower, more deliberate shooting pace become part of the technique rather than an optional extra.
Planning your shoot: tools, calculators and scouting
Good golden and blue hour photography is mostly won before you ever pick up the camera. A simple four-step planning workflow covers most of what you need:
- Pick your date and location first, since both phases shift in timing and duration depending on where and when you're shooting.
- Use a sun calculator to pull the exact elevation-based times for golden hour and blue hour on that date, rather than guessing from a generic sunrise or sunset time.
- Scout your vantage point in advance, ideally at a similar time of day beforehand, so you know where the sun will sit relative to your composition and where shadows will fall.
- Set a firm arrival time that's earlier than you think you need, along with a simple equipment checklist, so you're not setting up a tripod while the light you came for is already fading.
Tools built specifically for this kind of planning take most of the guesswork out. PhotoPills-style calculators map a location and date directly to sun-elevation based golden and blue hour windows, often with an augmented-reality view that shows exactly where the sun or moon will sit relative to your framing. Sites that list local sunrise, sunset and twilight tables are useful for a quick daily check, especially when you want the plain-language times rather than raw elevation figures. Between the two, you get both the precision (elevation angles, exact minute-by-minute shifts) and the convenience (a simple table to glance at the night before).
A short mobile-app checklist before you head out: confirm the date-specific golden and blue hour times, check the moon phase and moonrise or moonset time if you want it in frame or want to avoid its light washing out a dark sky shot, check the weather forecast for cloud cover, and confirm your scouted vantage point still has the access and composition you planned for. Moonrise matters more than it might seem, since a bright moon rising during blue hour can add unplanned light to a scene you expected to be darker, which is either a bonus or a problem depending on your composition.
Shoot recipes for golden hour and blue hour
These three recipes cover the most common assignments and can be adapted on the spot once you're comfortable with the underlying settings.
- Golden-hour portrait recipe: arrive 20 to 30 minutes before your calculated golden hour start time to set up and test exposure. Use a lens in the 50mm to 85mm range for flattering compression, start around f/4, 1/250 second, ISO 100 to 200, and adjust from there. Position your subject with the sun behind or to the side for rim light, and keep poses simple: walking, a slow turn, or a seated pose near a reflective surface like water or pale pavement to bounce extra warmth into the shadows.
- Blue-hour urban skyline recipe: set up your tripod at least 15 minutes before blue hour begins so you can test framing while there's still some light to see by. Start around f/8, 5 to 10 seconds, ISO 100, and bracket two or three exposures to cover both the darker sky and the brighter building lights. Wait for streetlights and building interiors to switch on, usually within the first few minutes of blue hour, since a skyline with lights on reads far more dynamic than one still mostly dark.
- Transition recipe: start shooting around 20 minutes before sunset and keep your camera active continuously through sunset and into blue hour, adjusting shutter speed and ISO every few minutes as the light drops. This single continuous session captures the warm glow of late golden hour, the brief in-between moment as colours shift, and the cool saturation of blue hour, giving you a genuine range of usable frames from one outing rather than committing to just one look.
Choosing the right moment for your story
Warm, golden light suits people, texture, and anything that benefits from a flattering, directional glow; cool, blue light suits skylines, architecture, and scenes built around artificial lights against a darkening sky. Rather than picking one phase and packing up, plan to shoot continuously through the transition from late golden hour into blue hour, since that short window often produces the most varied and interesting frames of the whole session. A sun-elevation calculator takes the guesswork out of exactly when each phase begins and ends for your date and location, which is the single most useful habit you can build into your planning routine.
How we use golden and blue hour on location
When we plan a portrait or couples session, timing is one of the first things we work out, often building the whole shoot schedule around golden light before sunset. We talk clients through what to expect beforehand: where we'll be standing, how the light will shift as the session goes on, and why we sometimes keep shooting a little past sunset to catch the softer blue tones that follow. One approach we rely on often is starting a couples session in open shade earlier in the evening, then moving to an open, west-facing spot as golden hour properly sets in, which gives us a natural progression from soft, even light into warmer, more dramatic tones without the couple needing to move far or change what they're doing.
— Rowan Freeman
Let us handle the timing for your next shoot

Planning around sun angles, scouting locations, and adjusting settings every few minutes takes practice, and it's exactly the part of a shoot we handle so you don't have to. Whether you want a quick golden-hour portrait or a longer session that carries through into blue hour, we build the schedule around the light rather than asking you to guess at timing yourself.
- The Short one and The Standard one suit a focused portrait session when you want strong images without a long time commitment.
- Full Session (Most Popular) and Extended Session give couples more time to capture a wider range of moods from one booking.
- During a timed session, we guide you on positioning, movement, and simple wardrobe choices that hold up well in warm or cool light, so you're never left wondering what to do in front of the camera.
If you'd like a session built around the best light for your photos, have a look at our Photography packages to find the option that fits, and get in touch to lock in a date.
FAQ
What's the difference between golden hour and blue hour?
Golden hour is the warm, direct sunlight period with the sun between roughly 6° and −4° elevation, while blue hour is the cooler period after sunset or before sunrise, with the sun between about −4° and −6° elevation. Golden hour suits portraits and landscapes with warm tones and long shadows, while blue hour suits cityscapes and scenes with artificial lights against a cool, even sky.
What is the difference between golden hour and magic hour?
"Magic hour" is generally used as an umbrella term that covers both golden hour and blue hour, the full stretch of changing light around sunrise and sunset. Some photographers use it interchangeably with golden hour specifically, so it's worth checking context, but technically it spans both the warm and cool phases.
How long after sunset is blue hour?
Blue hour typically begins once the sun has dropped to around −4° elevation, which is usually a short while after sunset, and lasts until roughly −6° elevation. The exact timing and length shift with latitude and season, and in clear conditions twilight commonly runs 30 to 45 minutes after sunset, though checking a sun calculator for your specific date and location gives a far more accurate window.
Does blue hour still exist?
Yes, blue hour happens every day at both sunrise and sunset, defined by the sun's elevation rather than by season or location, so it's a consistent, repeatable window you can plan around. Its length and intensity vary with weather, latitude, and time of year, but the phase itself is always there to work with.