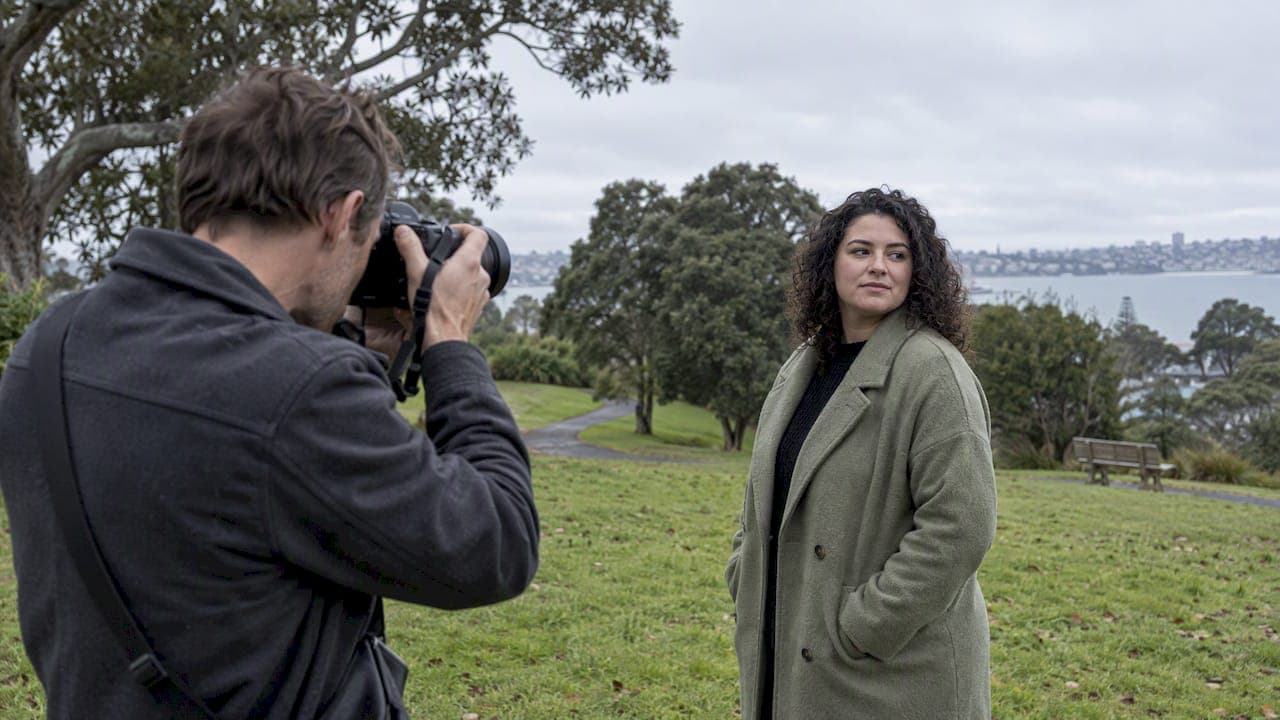
Cloudy days often give you better light than sunshine, especially for portraits, forest scenes and macro work, because clouds diffuse sunlight into a soft, even source with none of the harsh shadows direct sun creates. Start with suitable ISO, a shutter speed fast enough for handheld portraits, an aperture that balances depth of field and light, and switch your white balance to Cloudy. Composition and a few editing moves will bring back the contrast and mood that flat light tends to soften.
TL;DR:
- For handheld portraits, start at ISO 400 to 800, faster than 1/125s, f/2.8 to f/5.6, and Cloudy white balance; check the histogram.
- Use a tripod for waterfall exposures, dim interiors, or group portraits that need narrow apertures; choose a polarizing filter for foliage and water.
- Create depth by turning subjects toward the brightest patch of sky, using contrasting backgrounds, or adding reflector fill, rather than relying on absent shadows.
Table of Contents
- Why cloudy days make good light
- Practical camera settings and exposure workflow for cloudy days
- What to photograph and short project ideas for grey days
- Composition and lighting techniques to add shape and contrast
- Editing techniques to restore depth, colour and mood
- Essential kit for cloudy-day shooting
- On-set tactics from Rowan Freeman
- A short perspective on embracing overcast light
- How Life in Style Photography makes cloudy-day portraits work for you
- FAQ
- Sources
Why cloudy days make good light
Clouds act like a giant softbox between you and the sun. Instead of a small, intense light source casting hard shadows, the light scatters across the whole sky, so it reaches your subject from many directions at once. That evens out skin tones, softens shadows under eyes and noses, and keeps colours accurate because you are not fighting the warm or cool casts that come with direct sun at different times of day.
This quality of light suits certain subjects far better than full sun does:
- Portraits benefit from the lack of harsh shadows and squinting, giving a calmer, more natural expression.
- Forest and garden scenes hold detail in both the bright canopy and the darker undergrowth, which is difficult in dappled sunlight.
- Waterfalls and moving water look smoother because the lower contrast suits longer exposures.
- Macro and product details show true colour and texture without blown highlights on glossy surfaces.
The trade-off is fewer hard shadows to use as a design element, so you gain reliability but need to work harder on composition and editing to create depth. That is a fair exchange for most practical shoots. Overcast light also reduces the dynamic range your sensor has to cope with, which is part of why cloudy skies work as a natural softbox for forest and macro subjects without chasing golden hour.
Practical camera settings and exposure workflow for cloudy days
Overcast conditions are forgiving, but a quick, repeatable workflow saves you from murky or washed-out results. Begin with your settings, then confirm exposure with the histogram rather than trusting the preview screen alone, since screen brightness varies in outdoor light.
For most handheld portrait and lifestyle work, these starting points hold up well:
- Set ISO between 400 and 800 to keep enough shutter speed without introducing excessive noise.
- Keep your shutter speed above 1/125s for handheld portraits to avoid motion blur.
- Choose an aperture between f/2.8 and f/5.6 depending on how much background separation you want.
- Switch white balance from Auto to the Cloudy or Shade preset, or dial in a Kelvin value around 6000 to 7000K, to counter the cool, blue cast overcast skies add to skin tones.
Starting ISO 400 to 800, shutter above 1/125s and an aperture of f/2.8 to f/5.6 gives you a reliable base exposure for handheld portraits on grey days, and histogram checks catch clipped highlights or crushed shadows before you leave the location.
Bring out a tripod when the situation calls for a slower shutter speed than you can hold steady: long exposures on waterfalls or streams, interiors with low ambient light, or group portraits where everyone needs to stay sharp at a narrower aperture. The histogram stays your best friend throughout. A balanced curve with detail in the shadows and highlights, rather than a spike jammed against either edge, tells you the exposure will hold up once you start editing.
What to photograph and short project ideas for grey days
Overcast weather removes the pressure to chase a single golden hour window, so you can shoot steadily for most of the day. That makes it a good time to run focused projects rather than wandering with a camera.
Try these starting points, then build your own variations:
- Shoot a set of tight headshots and environmental portraits using a reflector angled below the chin for a subtle catchlight.
- Head into a forest or garden and photograph the canopy and undergrowth together, using the even light to hold detail in both.
- Find a waterfall or stream and shoot a long exposure for silky water, then a fast shutter version for comparison.
- Walk a coastal path or headland and frame moody, textured shots that deliberately exclude flat, featureless sky.
- Photograph wet foliage, market stalls or food stalls outdoors shortly after rain, when colours look saturated and surfaces carry natural shine.
Each of these works as a 30 to 90 minute session, which makes them easy to slot into a weekend. Scouting locations and reframing flat light as a creative constraint turns a grey afternoon into a productive shoot rather than a wasted one, and the same thinking applies whether you are working on rainy day photoshoot ideas or planning a longer outdoor session.
Composition and lighting techniques to add shape and contrast
Even light removes your built-in shadow lines, so direction and depth have to come from composition and smaller, deliberate lighting choices instead.
A few techniques consistently add shape back into flat-light images:
- Position your subject against a contrasting background, whether that is a dark tree line behind a light shirt or a pale wall behind dark clothing, to create separation without relying on shadow.
- Look for the brightest part of the sky and treat it as your main light source, turning your subject so that side of their face catches slightly more light than the other.
- Shoot under an awning, beside a wall or in a doorway, where the structure gives you a soft directional edge that flat open sky cannot.
- Use a reflector, a white card, or a touch of off-camera flash as rim light to lift your subject away from the background.
- Compose to cut out dull, featureless sky, or lean into interesting cloud texture and treat it as a deliberate part of the frame rather than empty space.
Pro Tip: Turn your subject 15 to 20 degrees away from flat overhead cloud and toward the brightest patch of sky you can find. That small adjustment creates a soft falloff across the face that reads as natural shaping rather than flat light.
Reflectors and white cards earn their keep here. Reflector placement and catchlight positioning are standard on-set tactics for keeping portraits looking natural rather than flat, and they cost far less effort than waiting for a break in the clouds.

Editing techniques to restore depth, colour and mood
Cloudy-day files usually need a different editing approach than sunny ones. Global Auto adjustments tend to flatten the mood further rather than restoring it, so selective work pays off.
Build your edit in layers rather than one sweeping correction:
- Apply contrast through curves rather than a single slider, lifting the highlights slightly and deepening the shadows to add depth without crushing detail.
- Use local dodge and burn, or adjustment masks, on the subject's face and key areas to sculpt light the scene did not naturally provide.
- Increase vibrance conservatively rather than pushing saturation hard, since muted colours need a lift, not a complete change of character.
- Warm the white balance toward the Cloudy preset or around 6000 to 7000K to counter the blue cast, and check the histogram again to confirm midtones sit where you want them.
- Consider a monochrome conversion when the light is genuinely flat and colour is not adding anything. Black and white can turn a grey, low-contrast file into something moody rather than dull.
Selective layers and histogram-aware adjustments keep tonality accurate while you rebuild the depth that overcast light naturally compresses, which matters more here than it does with a high-contrast sunny file.
Essential kit for cloudy-day shooting
A handful of accessories make a genuine difference on grey days without adding much weight to your bag.
- A tripod lets you shoot longer exposures for water and low-light interiors, and work at narrower apertures without raising ISO too far.
- A reflector or a small LED panel adds a catchlight and a touch of fill where the flat sky cannot reach.
- A polarising filter deepens foliage and water tones and can add texture back into an otherwise flat sky. Polarising and ND filters are routinely taught in landscape field exercises for exactly this reason, alongside hands-on practice with long exposures.
- An ND filter extends your exposure time for silky water or deliberate motion blur, even in the lower light cloudy days already provide.
- A rain cover, a microfibre lens cloth and a dry bag protect your gear if the cloud turns to drizzle, which is common on the kind of day that gives you this light in the first place.
On-set tactics from Rowan Freeman
On a grey day, we lean harder on positioning and reflectors because the sky is not going to do the shaping work for us. A reflector held low and slightly forward of the client gives a soft catchlight in the eyes, which reads as warmth and energy even under a flat sky. We keep settings simple: a base exposure dialled in before the client arrives, then small adjustments as cloud cover thins or thickens through the session.
Short, specific briefs help too. Asking someone to laugh at a memory rather than just smile gives a far more natural result than a posed grin, and it works whether the light is golden or grey. Clients who feel guided rather than directed relax faster, and that shows in the final images regardless of what the sky is doing that day.

A short perspective on embracing overcast light
We would rather shoot a considered portrait under cloud than a rushed one chasing a sunset. Flat light rewards patience with technique: a reflector, a good background choice, a few curves in editing. Weather is not the variable that makes or breaks an image, your composition and your attention to the subject are.
Pick one of the short projects above and run it this week. Thirty minutes with a reflector and a willing friend will teach you more about shaping light than another hour spent waiting for the sun.
— Rowan Freeman
How Life in Style Photography makes cloudy-day portraits work for you
We photograph people in various weather conditions, and overcast days often result in some of the best portrait sessions. Soft, even light flatters skin and keeps colours true, which is exactly why we do not reschedule a shoot just because the sky has turned grey.

If you have been putting off a professional shoot while you wait for a clear forecast, you can proceed regardless of the weather. Our headshot sessions and couples photography both work beautifully in soft overcast light, and our relaxed, guided approach means you never need to know how to pose. Get in touch and sessions can be planned around light conditions that suit you, not just the forecast.
FAQ
Is cloudy weather good for photoshoots?
Yes, cloudy weather is often better than direct sun for portraits, forest scenes and macro work because the light is soft and even, reducing harsh shadows and squinting. It does flatten some natural contrast, which you can restore through positioning, reflectors and editing.
What is the 2/3 rule for pictures?
The rule of thirds divides your frame into a three by three grid and places key subjects or horizon lines along those gridlines or their intersections rather than dead centre. On cloudy days it is particularly useful for pushing a dull sky to a smaller third of the frame while giving more space to ground-level detail or your subject.
How to edit photos taken on cloudy days?
Edit with selective adjustments such as curves, local dodge and burn, and masked contrast rather than a single global Auto fix, since Auto adjustments tend to flatten mood further on low-contrast files. Warm the white balance slightly, lift vibrance conservatively, and check the histogram to confirm your midtones are balanced.
How to show fog in photos?
Fog shows up best against a darker background or subject, since the contrast between the two is what makes the fog itself visible in the frame. Keep your subject reasonably close to the camera and let the background fade into the haze for a sense of depth.
What camera settings work best for cloudy days?
Start with ISO 400 to 800, a shutter speed above 1/125s for handheld shots, and an aperture between f/2.8 and f/5.6, then switch your white balance to the Cloudy preset. These starting points hold up well across most overcast portrait and lifestyle situations, with a tripod coming out for longer exposures.
Sources
- Overcast vs Sunny Days: Portrait Photography Light Guide
- Lightroom basics: a histogram hack for ideal white balance