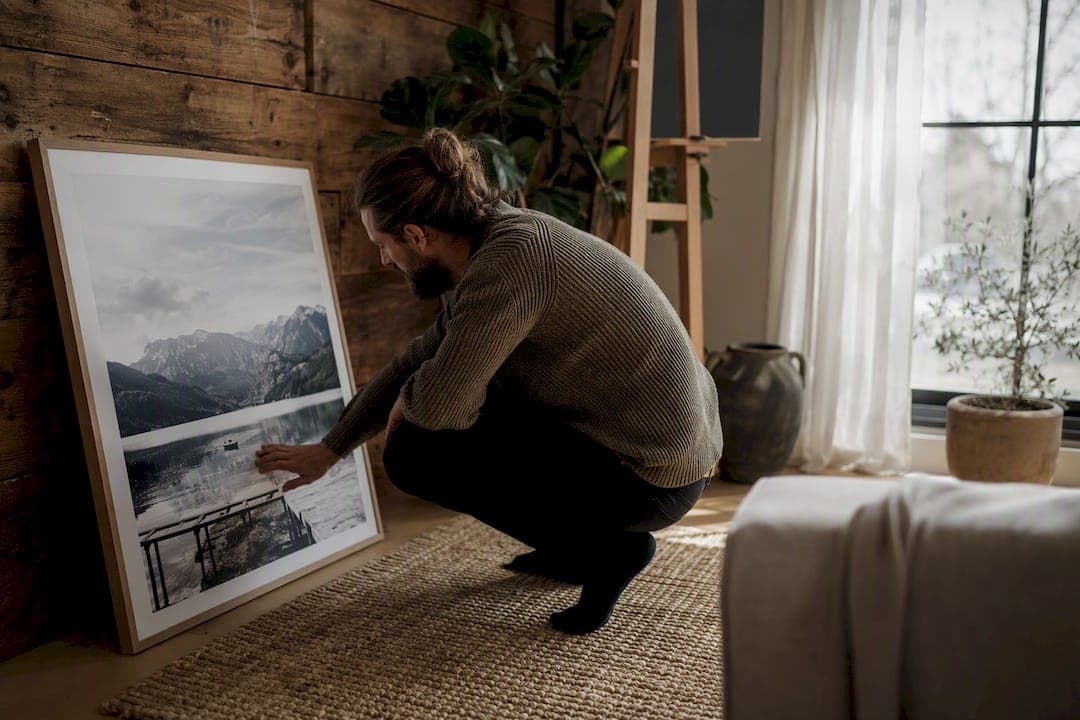
A media wall photo is a professional portrait, couple, family or event image, shot and printed specifically to be the focal artwork on a wall. The best next step is booking a photographer who can supply high-resolution files, print options and a proper visualisation before you commit to a size. From there, the decisions that matter are sizing, layout, print finish and installation.
TL;DR:
- Choosing high-resolution files and proper visualization before printing ensures the media wall will look professional and scale correctly on your wall.
- The ideal print size for a prominent wall focal point is roughly two-thirds of the furniture's width, typically starting at A1 for multi-person images.
- Visualizing scale with a single photo and an accurate measurement helps prevent the risk of a print being too small or overwhelming the space.
- Durable material options like aluminium or acrylic are better suited for humid or sun-exposed rooms, and anti-reflective glazing improves glare management.
- Proper installation with consistent spacing and height guidance ensures a polished look, and professional hanging service is recommended for heavier or complex layouts.
Table of Contents
- Why choose a professional photographer for media-wall images
- How to choose sizes and layouts for your media wall
- How to visualise scale: a quick photo and measurement method
- Print, material and framing options for media-wall photography
- How to choose a photographer and package for media-wall work
- Installation and hanging tips for a confident finish
- Pricing expectations and what affects cost
- Tips for arranging photos by theme or story for impact
- Maintenance and care of framed photos to preserve quality
- Ideas for updating or refreshing media wall photos periodically
- A note on working with clients and visualisation
- How to book Life in Style Photography for media-wall photos
- Sources
Why choose a professional photographer for media-wall images
Anyone can print a phone photo poster-sized and hang it up. Most people regret it within a year, because phone files lack the resolution and dynamic range that large-format printing demands. A professional shoot is built around the final output from the start: lighting is set to hold detail in shadows and skin tones once blown up to a metre wide, and files are captured at a resolution that survives that scale without pixelation.
There's a second, less obvious advantage. A relaxed, engaged shooting style gets genuine expressions out of people who normally freeze in front of a camera, and those natural moments are what make a group of images feel like they belong together on a wall rather than a random scatter of snapshots.
A photographer who works from a considered portfolio also thinks about your wall as a series, not a single image:
- Consistent colour grading across every shot in the set
- Retouching that holds up under close viewing at large scale
- Composition choices that leave room for framing and cropping later
- A shooting brief that anticipates which images will end up side by side
Browsing a portfolio before booking gives you a fair sense of whether that consistency is actually there.
How to choose sizes and layouts for your media wall
Get the size wrong and everything else about the display feels off, no matter how good the photo is. As a rule, artwork should fill roughly more than half of a blank wall's width to read as a genuine focal piece, and when it's going above a sofa or sideboard, aim for about two-thirds of that furniture's width, according to Pearson's Impasto Photography.
For a single portrait or a couple, that might mean starting around A2. For a family group, a work event, or anything with several faces you want to remain recognisable up close, A1 (594 x 841 mm) is a sensible starting point, and many studios go larger still for prominent, multi-person pieces. The reasoning is simple: shrink a group shot too far and faces lose the pixel detail that makes the print worth having.
Once size is settled, layout decides how the wall feels:
- Grid layout: even rows and columns, best for a uniform set (headshots, a team, a family series)
- Salon wall: mixed sizes and orientations arranged for visual movement, good for storytelling collections
- Linear series: a single row, ideal for a hallway or above a long piece of furniture
Keep spacing between grouped pieces at roughly 5–8 cm, and hang the visual centre of the arrangement at about 145–150 cm from the floor, adjusting upward slightly if your ceilings run high, per PrintNZ's hanging guidelines.
Pro Tip: If you're mixing sizes in a salon layout, keep one consistent measurement, such as spacing or a shared top edge, so the eye has an anchor point even when the frames themselves vary.
How to visualise scale: a quick photo and measurement method
You don't need a tape measure obsession or a trades background to work out what will fit. One photo and one accurate number does most of the work, based on the visualisation approach used by Parnell Gallery.
- Stand square to the wall and take a straight-on photo in natural daylight, including any furniture or fixed feature nearby, with the camera held level rather than tilted up or down.
- Measure one reliable dimension, the wall's width or a doorway's width, and note your ceiling height or the height of any furniture in the shot.
- Send both to your photographer before the shoot or as part of your enquiry.
That single accurate measurement is usually enough for a photographer or designer to scale a mock-up realistically against your actual wall, rather than you guessing from a showroom sample that looks nothing like your lounge. It saves you from the two most common mistakes: ordering a print that's technically lovely but visually lost on a big wall, or one that overwhelms a small room.
Print, material and framing options for media-wall photography
The material you choose changes how the image behaves under your lighting, and how long it lasts.
- Archival fine-art paper, behind glass or in a mat, gives the most traditional gallery look and works well in low to moderate light.
- Gallery canvas adds texture and suits larger, bolder images, particularly event or lifestyle shots with strong colour.
- Acrylic face-mount produces a glossy, almost three-dimensional depth that flatters portraits with good contrast, though it shows fingerprints and reflections in bright rooms.
- Aluminium (dibond) is the most durable option for humid spaces like bathrooms or north-facing rooms with strong sun, and it handles a matte finish well.
Frame choice matters almost as much as the print itself. A minimalist black or timber frame keeps focus on the image, while a float frame (where the print appears to sit slightly inside the frame's edge) suits canvas or thicker paper stock. If your wall catches direct light for part of the day, anti-reflective glazing is worth the extra cost. Matte finishes handle glare better in bright rooms; gloss and acrylic reward darker, more controlled lighting.
How to choose a photographer and package for media-wall work
Not every photographer who takes good portraits knows how to prepare a file for a metre-wide print. Look for a portfolio that actually shows wall-scale work, not just web-sized crops, and ask directly about print experience before booking anything.
Four questions worth asking before you commit:
- Do you supply print-ready files as well as physical prints, or just digital files?
- What retouching is included in the package, and what costs extra?
- Can you build a mock-up using a photo of my own wall?
- What are your current lead times from shoot to finished, framed print?
Standard packages typically bundle session time, a set number of finished selects, base retouching, and either digital delivery or a print ordering option layered on top. A personal branding or event photography package usually differs from a standard portrait session mainly in the number of setups and the retouching load, so it's worth clarifying exactly what's included before comparing prices across providers.
Installation and hanging tips for a confident finish
Getting the print made is only half the job. A beautifully printed piece can still look accidental if it's hung wrong.
- Set the centre of the frame at roughly 145–150 cm from the floor, and if it's going above a sofa or console, leave about 15–20 cm of breathing room above the furniture, following the same hanging height guidance used across sizing.
- For grouped pieces, keep gaps consistent at 5–8 cm and map the whole layout with painter's tape on the wall before you drill a single hole.
- For anything heavier than a standard canvas, or a salon wall with several pieces needing perfect alignment, a professional installer is worth the small fee, particularly on plaster or tiled walls where wall anchors behave unpredictably.
Pro Tip: On delivery day, unwrap everything and lay it flat on the floor in your planned layout first. It's far easier to shuffle prints around on carpet than to keep pulling nails out of the wall. For further hanging technique, Mark Gray's guide to hanging landscape prints covers similar spacing principles for larger single pieces.
Pricing expectations and what affects cost
Media-wall photography costs move on a handful of clear levers: the number of people in frame, how much retouching each image needs, the print size and material you choose, and whether framing and installation are bundled in.
Packages generally fall into three shapes:
- Digital files only, where you handle printing and framing yourself through a separate lab
- Prints included, bundling a set number of finished, ready-to-hang prints into the session price
- Full service, covering the shoot, visualisation mock-up, printing, framing and installation as one package
If budget is tight, spend where it shows most: put your money into a larger, archival-quality print for the focal piece, and build the wall outward with smaller additions over the following months rather than trying to fill the whole space in one hit. Reviewing available packages side by side makes this trade-off easier to see.
Tips for arranging photos by theme or story for impact
A media wall lands harder when it tells a story rather than just displaying a technically good photo. Group images around a theme, a single event, a family across several years, a fitness transformation, a brand's people and culture, so the eye reads a narrative rather than a disconnected set of pretty pictures.
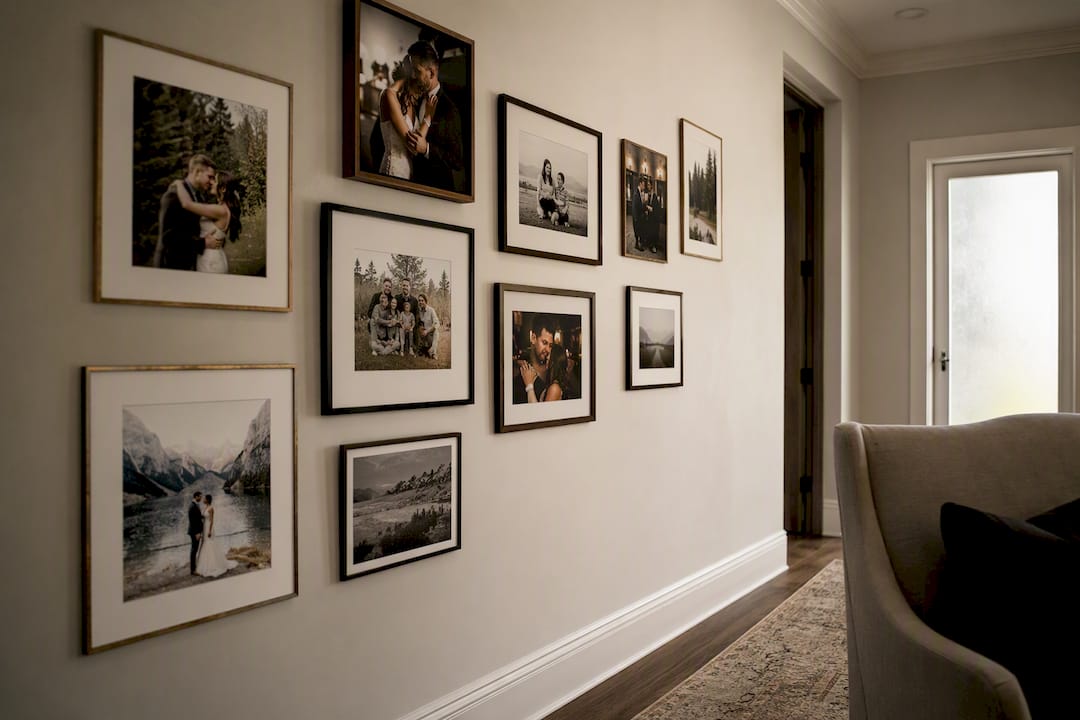
Chronology is the easiest structure to work with. A left-to-right or top-to-bottom timeline gives visitors an obvious way to "read" the wall, which matters more than people expect in a hallway or waiting area where people glance rather than linger. For a business, this might mean a founder's early workspace next to current team shots. For a family, it might be a wedding portrait beside a more recent one from the same location a decade later.
Colour consistency does more heavy lifting than most people credit. A set of images with matched tones, even if the subjects and settings differ, reads as a cohesive collection rather than a pile of separate prints. This is where briefing your photographer up front pays off: mentioning that the shots will eventually sit together on a wall lets them shoot and edit with that end result in mind, rather than treating each session in isolation.
Leave one deliberate gap in the arrangement if you can. An empty frame's worth of space, or a slightly smaller placeholder print, signals that the wall is a living collection rather than a finished, static object, and gives you somewhere to add the next chapter without redoing the whole layout.
Maintenance and care of framed photos to preserve quality
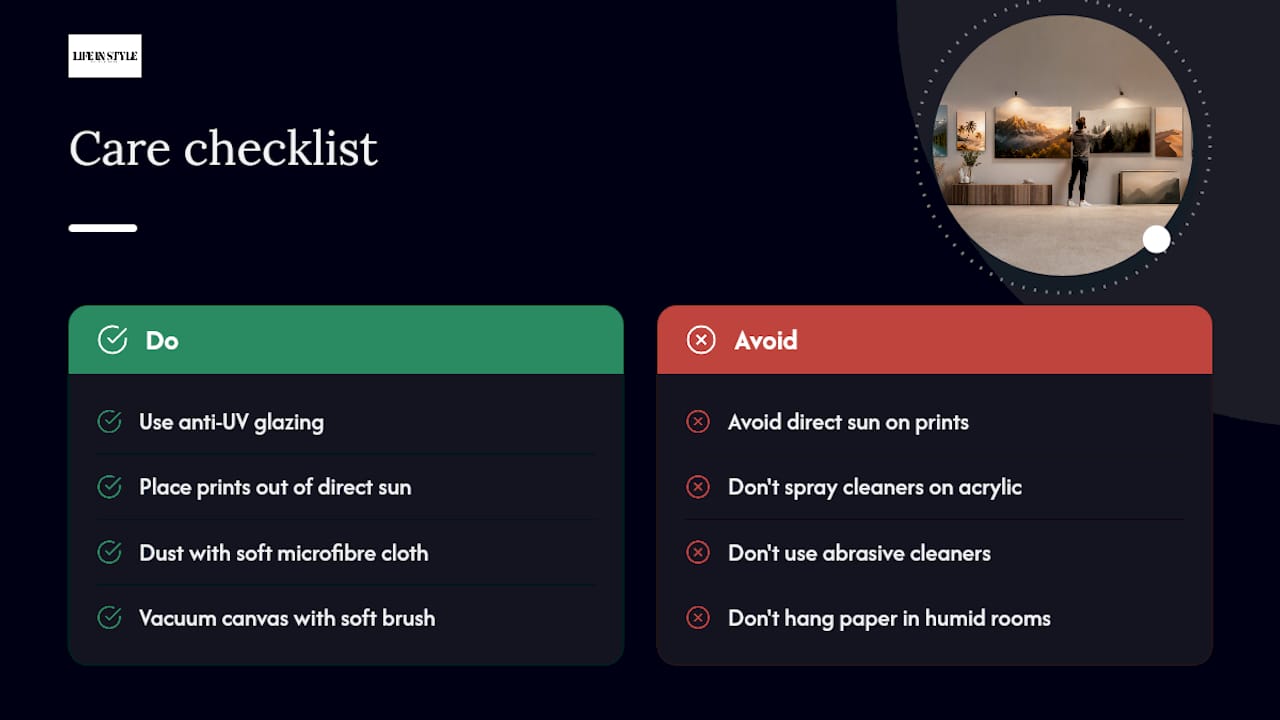
Framed photography ages faster than most people realise, mostly because of light rather than time itself. UV exposure is the biggest threat to colour and print life, so direct sun on a wall of prints, even for a few hours a day, will fade tones noticeably within a couple of years. Anti-UV glazing slows this considerably, and simply avoiding a north-facing wall in direct sun does more than any cleaning routine ever will.
Humidity is the second enemy, particularly relevant in Auckland's damper months. Bathrooms, kitchens and poorly ventilated hallways can cause paper prints to buckle or foxing (small brown spots) to appear over years. Aluminium or acrylic-faced prints handle humid rooms far better than paper behind standard glass.
Dusting is simple but often done wrong. A soft, dry microfibre cloth on glass or acrylic is fine; anything abrasive or a household glass cleaner sprayed directly onto acrylic can leave permanent haze. For canvas, a soft brush attachment on a vacuum, held a few centimetres off the surface, lifts dust without pressing it into the weave.
Check hanging hardware every year or two, particularly in older plaster walls where fixings can loosen gradually without any visible sign until a frame shifts. A five-minute check saves a cracked frame or a damaged print later.
Ideas for updating or refreshing media wall photos periodically
A media wall doesn't need to be static once it's hung. Treating it as a collection that evolves keeps it feeling current rather than like a fixed decision made once and never revisited.
The simplest refresh is seasonal or annual: swapping one or two key pieces around a birthday, an anniversary, or the start of a new year, while leaving the rest of the arrangement untouched. This works particularly well in a family home, where children's portraits or milestone event shots naturally accumulate.
For a business, refreshing team or personal branding images every 12 to 18 months keeps the wall aligned with who's actually on staff and how the brand looks today, rather than showing a team that's since moved on. This is one of the more overlooked reasons commercial clients rebook, a wall of outdated headshots in a reception area reads as neglect, even when nothing else about the space has changed.
Rotating frame sizes or swapping a colour print for a black-and-white version of the same shot is a low-cost way to change the wall's feel without a full reshoot. Keeping the original files on hand, something worth confirming with your photographer at booking, makes this kind of refresh far cheaper than starting from scratch each time.
A note on working with clients and visualisation
Most people who come to us worried about "picking the wrong photo" are really worried about picking the wrong size or feeling awkward in front of the camera. A relaxed approach on set fixes the second problem fast. Once people stop posing and start actually talking, the expressions that come through tend to sit together beautifully on a wall, even across different sessions.
We're always happy to look at a wall photo and one measurement and give a straightforward opinion on scale and layout, no obligation attached. If you want a sense of how finished projects have turned out for other clients, our portfolio has plenty of examples worth a look before you decide on anything.
— Rowan Freeman
How to book Life in Style Photography for media-wall photos
Life in Style Photography is the alternative to guessing at sizes and hoping a print works out: you get a photographer who plans the shoot around your wall from the start, rather than handing over files and leaving you to figure out scale afterwards. Enquiring is straightforward. Send through a straight-on photo of your wall and one accurate measurement, wall width or a nearby fixed feature works fine, and we'll come back with a realistic sense of what size and layout will actually suit the space before you book anything.

From there, booking is simple: choose a session type, whether that's a personal branding shoot for an office wall, a headshot session, or a full event shoot for a larger group piece, and we'll talk you through what's included: session time, number of finished selects, retouching, and print ordering options. Every package can include a complimentary visualisation on enquiry, so you can see roughly how the finished piece will sit on your wall before a single frame goes to print. Get in touch with your wall photo and measurement, and we'll take it from there.
Sources
- How to properly hang and display your wall art in NZ homes
- Digital render artwork visualisation: a guide to taking the best image of your space
- How to choose the right size for your family portrait — Pearson's Impasto Photography