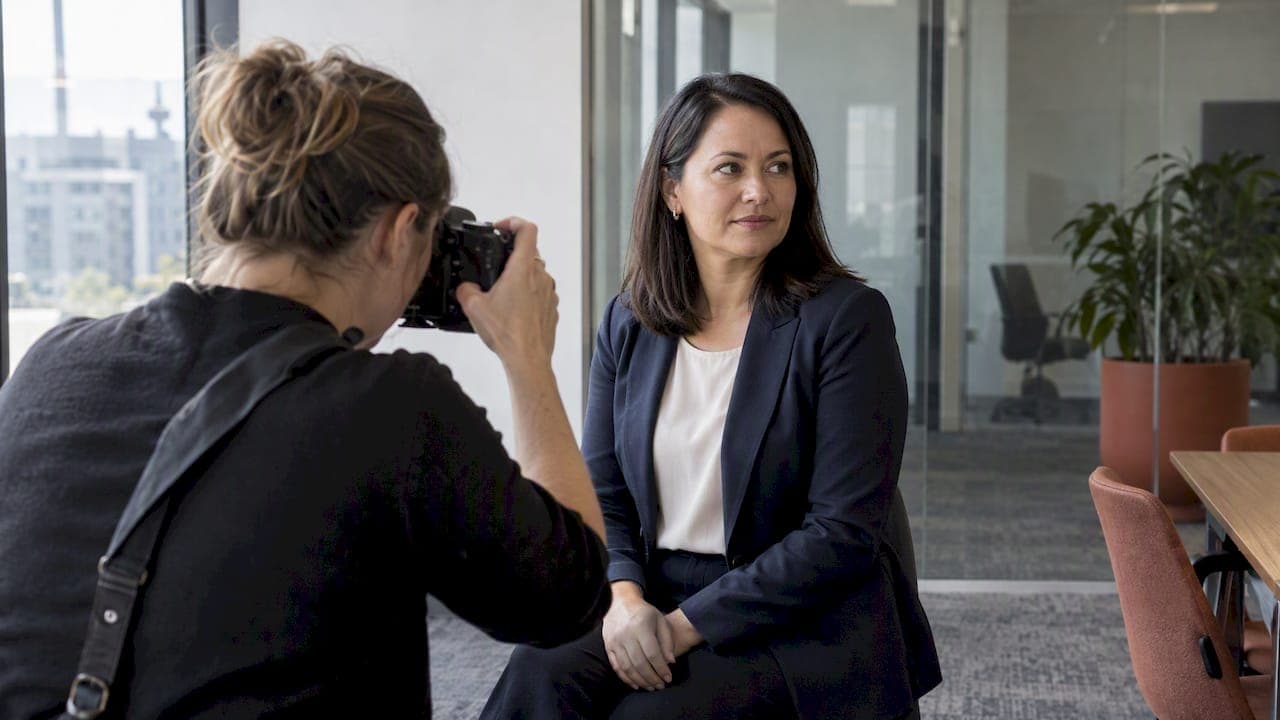
A professional headshot earns its place on LinkedIn, a website bio or a company directory when attire, expression, lighting, background and consent all line up. We build every brief around a simple idea: a photography style guide keeps those elements consistent, while clear consent practices, the kind the Office of the Privacy Commissioner recommends, keep the whole project lawful and respectful.
TL;DR:
- Consistent framing, neutral backgrounds, and matched lighting are essential to convey professionalism and adapt to different branding tones.
- Solid, mid-tone clothing with layered structures like blazers improve visual appeal and accommodate background changes.
- Relaxed, natural posing with gentle prompts produces authentic expressions, especially for leadership versus team portraits.
- Photography setups commonly use multiple lights for flattering skin tones, with a focus on maintaining color temperature and appropriate focal length.
- Proper planning, consent, and metadata management are crucial to ensure lawful, efficient, and high-quality headshot production.
Table of Contents
- Key elements of a professional corporate headshot
- What to wear and grooming tips for corporate headshots
- Posing and expression: how to look natural and credible
- Lighting, gear and basic setup photographers use for corporate headshots
- Backgrounds, composition and the 20/60/20 rule applied to headshots
- Camera settings, image formats and delivery specs you should expect
- Preparing for the session: logistics, what to bring and day-of tips
- Editing, retouching and how deliverables should be handled
- Creating and using a photography style guide to keep headshots consistent
- Privacy, consent and lawful image use in New Zealand
- Typical timeline and cost considerations for corporate headshot projects
- Delivering files and long-term image management
- Guidelines for updating and frequency of new headshots
- Tips for headshots across diverse roles and industries
- Common mistakes to avoid in corporate headshots
- How to incorporate branding elements subtly in headshots
- How Life in Style Photography approaches corporate headshots
- Book a headshot session that fits your schedule
- FAQ
- Sources
Key elements of a professional corporate headshot
A strong corporate headshot does a specific job: it signals competence and warmth in the two or three seconds someone spends looking at it. That means the face carries most of the information, so expression and eye contact matter more than any backdrop or outfit choice.
Crop and framing decide how the image behaves once it leaves the studio. A headshot cropped too tight loses room for platform overlays (LinkedIn's profile circle, a website's rounded thumbnail), while one cropped too wide wastes resolution on empty space. We generally frame from mid-chest up, leaving a little negative space above the head and to the side the subject is facing.
Lighting and background work together to set tone rather than operating as separate decisions. Soft, even lighting against a neutral backdrop reads as approachable and corporate, while harder light or a textured setting can feel more editorial or creative, depending on the industry.
- Expression: a relaxed mouth and engaged eyes beat a forced smile every time.
- Crop: mid-chest up, with consistent headroom across every subject in a set.
- Negative space: enough room on the sighted side of the frame for text overlays or cropping to a square.
- Lighting and background pairing: match the mood (corporate, creative, approachable) to the client's actual brand, not a generic template.
What to wear and grooming tips for corporate headshots
Clothing choices photograph differently than they look in person, so a few adjustments make a real difference on the day.
- Pick solid colours over busy patterns. Fine stripes and small checks can create a shimmering effect on camera called moiré, and solid mid-tones generally sit better against both neutral and coloured backdrops.
- Choose colours that complement skin tone and brand palette. Jewel tones and classic navy tend to flatter most complexions, while head-to-toe black can look flat under studio lighting.
- Layer for structure. A blazer or structured jacket adds shape to the shoulders and frames the face, even in a tighter crop.
- Check fit before the session. Clothes that are slightly fitted photograph better than anything baggy, which can read as sloppy even when it isn't.
- Bring a backup outfit. A second shirt or top in a different colour gives the photographer options if the first choice clashes with the background.
- Coordinate teams loosely, not identically. Agree on a colour family (navy, charcoal, white) rather than a single outfit, so the group looks cohesive without appearing uniformed.
Grooming fixes are usually small: a dusting of translucent powder cuts shine, a lint roller handles stray fibres, and a comb or small mirror lets people check their hair between shots. For teams photographed over several sessions, a simple written note of what each person wore helps a photographer keep the next shoot visually consistent.
Pro Tip: Lay out your outfit the night before and photograph it on your phone under indoor light, so you can spot anything that looks different from how it did in the shop.
Posing and expression: how to look natural and credible
Good posing is mostly about removing tension, not adding instructions. Most people stiffen up the moment a camera points at them, so the photographer's job is to coach that away rather than pile on more directions.
A few cues change the whole feel of a shot. Dropping the chin slightly and leaning the head a touch towards the camera avoids the harsh angle a straight-on shot can create. Rolling the shoulders back and down opens the chest and reads as confident rather than hunched. Hands, when visible, work best loosely at the sides or resting lightly rather than clenched or jammed in pockets.
- Ask the subject to shift their weight onto their back foot to create a natural, relaxed stance.
- Have them exhale before each shot, which softens the shoulders and the jaw.
- Use a quick, genuine prompt (a real question, a short joke) rather than "say cheese", which tends to produce a flat, forced smile.
- For executive portraits, aim for fewer, more deliberate expressions: a steady gaze and a closed-mouth half-smile often suit leadership profiles.
- For wider staff sessions, allow more variation and a touch more warmth, since these images often appear alongside colleagues on a team page.
Pro Tip: If someone looks stiff through the shoulders, ask them to shake their arms out for a second between shots. It breaks the tension faster than any verbal cue.
Lighting, gear and basic setup photographers use for corporate headshots

Understanding the basics of lighting helps you brief a photographer properly, even if you never touch a camera yourself. Adobe's guidance on corporate headshots points to a few setups that come up again and again in professional practice.
A common studio configuration uses two or three lights: a key light to shape the face, a fill light to soften shadows, and sometimes a rim or hair light to separate the subject from the background. On location, a single large softbox or even bounced natural light near a window can produce a similar effect without a full studio kit.
- Colour temperature should stay consistent across a session, since mixed warm and cool light sources can shift skin tones unpredictably between shots.
- Lighting ratios (how much brighter the key light is than the fill) control contrast: a lower ratio gives a softer, more corporate look, while a higher ratio adds drama.
- A focal length in the 85mm to 135mm range (on a full-frame camera) tends to flatter facial proportions, since wider lenses can distort features when the camera sits close to the face.
None of this needs to be memorised by the client, but asking a studio how they manage colour consistency across a team shoot is a reasonable question to put to any photographer before booking.
Backgrounds, composition and the 20/60/20 rule applied to headshots
Background choice is a branding decision as much as a visual one. A plain grey or white backdrop keeps attention entirely on the face and works well for formal directories, while a contextual setting (an office, a relevant industry backdrop) can suit a more personal branding campaign.
Composition benefits from borrowing ideas like the rule of thirds, placing the eyes roughly a third of the way down the frame rather than dead centre, and the 20/60/20 principle sometimes used in portrait framing: treating the top 20% of the frame as headroom, the middle 60% as the main subject area (face and shoulders), and the bottom 20% as chest and compositional base. It is a rough guide rather than a strict formula, but it helps avoid awkward, off-balance crops.
- Use neutral backdrops for directories, LinkedIn and formal bios where consistency matters most.
- Use contextual settings for personal branding or marketing material where a story matters as much as the face.
- Favour low-texture, low-chroma backgrounds for web use, since busy patterns compress poorly and distract from the subject.
Camera settings, image formats and delivery specs you should expect
A photographer worth hiring should be able to talk through their technical approach without being asked twice. Shooting in RAW format gives far more flexibility in editing than JPEG, since it preserves more detail in highlights and shadows, and a moderate aperture (commonly f/4 to f/8) keeps the whole face sharp while still softening the background.
- Request both high-resolution files (for print and large web use) and compressed, web-optimised versions (for fast-loading bios and directories).
- Ask for a square crop for LinkedIn and social profiles alongside the standard rectangular crop for websites and print.
- Confirm delivery in both colour and, if relevant, black and white, since some brand applications call for both.
- Agree on a consistent file naming convention (surname, department, date) before a team shoot, so files are easy to sort later.
- Check whether basic metadata (photographer credit, usage rights, date taken) is embedded in the files on delivery.
These specifications cost nothing to ask for upfront and save considerable rework later, particularly for larger organisations managing dozens of staff images.
Preparing for the session: logistics, what to bring and day-of tips
A smooth session starts well before anyone steps in front of a camera.
- Share reference images in advance. Sending the photographer two or three examples of the look you want avoids surprises on the day.
- Confirm outfits ahead of time. For team shoots, circulate the agreed colour palette so everyone arrives dressed appropriately.
- Lock in the schedule and send reminders. A confirmation email the day before reduces no-shows and late arrivals.
- Pack a small grooming kit. Powder, a comb, a lint roller and any personal touch-ups should travel with the group, not just the individual.
- Bring consent paperwork. Have consent forms ready to sign on arrival, covering intended use, so there is no delay once shooting starts.
- Bring brand assets if relevant. A lanyard, branded jacket or subtle prop should be on hand if it is part of the agreed look.
- Allow realistic time per person. Five to ten minutes per subject is typical for a simple headshot, with more time built in for larger groups or wardrobe changes.
- Schedule breaks for larger teams. A short pause every six to eight people keeps energy up and avoids rushed, tired-looking shots towards the end of the day.
Organisers running a team-wide shoot benefit from a single point of contact who manages the running order, so the photographer can focus entirely on the person in front of the lens.
Editing, retouching and how deliverables should be handled
Editing should refine a photo, not reinvent the person in it. Standard retouching typically covers skin smoothing, blemish removal, stray hair cleanup and minor colour correction, all kept light enough that colleagues still recognise the person instantly.
- Avoid heavy reshaping of facial features or body contouring, which can look artificial and undermines the authenticity a headshot is meant to convey.
- Request consistent colour grading and exposure across a team set, so images sit well together on a website or directory page.
- Ask whether the photographer uses batch editing or presets for team shoots, since this keeps skin tones and backgrounds uniform across dozens of files.
- Agree turnaround time before the shoot. Many studios deliver within one to two weeks, though this varies by workload and group size.
- Clarify how many rounds of revisions are included, and what happens if a subject wants a different frame selected after delivery.
Getting these expectations in writing before the shoot avoids awkward back-and-forth once files land in your inbox.
Creating and using a photography style guide to keep headshots consistent
A photography style guide is one of the most effective ways to keep headshots consistent when multiple photographers or sessions are involved over time. Rather than a lengthy document, an effective guide fits on a page or two and locks in the handful of decisions that matter most.
Core elements worth documenting include the colour palette for backdrops and wardrobe, the lighting setup and colour temperature, the standard crop and framing, the level of retouching applied, and the file naming convention used for every delivery.
- Store the guide somewhere every photographer and internal coordinator can access it, not buried in a single person's inbox.
- Include two or three reference images alongside the written notes, since examples communicate tone faster than text alone.
- Review the guide annually, or whenever the brand palette or website design changes, to keep it current.
Pro Tip: Name one person internally as the style guide owner. When a new photographer or vendor is briefed, that person signs off on the final images before they go live.
A short, well-maintained guide reduces rework dramatically when a new hire needs a headshot six months after the original team shoot, since the next photographer can match the existing look without guesswork.
Privacy, consent and lawful image use in New Zealand
Workplace photos count as personal information, and that brings privacy obligations with them. The Office of the Privacy Commissioner warns that using a photo for a purpose different from what someone originally agreed to can breach privacy principles and cause real harm, so fresh consent is needed whenever the intended use changes.
A solid consent form generally covers purpose, who will see or receive the images, how long they will be retained, a contact person for questions, and a clear way to opt out later.
- State the specific purpose (website, LinkedIn, internal directory) rather than a vague "marketing use" catch-all.
- Name who the images will be shared with, including any external agencies or partners.
- Set a retention period and a process for removing images when someone leaves the organisation.
- Note that images of children or young people call for extra care and a clear consent process, and that tikanga Māori considerations may call for additional sensitivity around certain images or contexts.
On storage, Business notes that organisations must protect personal information, with two-factor authentication and restricted access among the recommended safeguards for anywhere images are stored.
Fact: Under New Zealand privacy guidance, consent must be specific and informed, and reusing an image for a new purpose generally requires a fresh notification or consent, not an assumption based on the original shoot.
Typical timeline and cost considerations for corporate headshot projects
Planning ahead avoids the scramble that comes with a last-minute booking, particularly for larger teams.
- Book individual headshots two to three weeks ahead where possible, giving enough time to sort wardrobe and scheduling.
- Book team or company-wide shoots four to six weeks ahead, since coordinating diaries across a larger group takes longer than most people expect.
- Factor in the main cost drivers: location (studio versus on-site), number of people photographed, level of retouching requested and whether the images will be licensed for wider marketing use beyond internal directories.
- Use a simple example timeline: a small team of five might wrap an on-site session in half a day, while a company-wide shoot of fifty or more people often spans a full day with breaks built in.
Pricing varies by package and session length, so it is worth asking a studio directly for a quote once you know your group size and intended use.
Delivering files and long-term image management
Once files are delivered, how you organise them matters as much as the shoot itself. A clear folder structure (by year, team or department) paired with a consistent naming convention makes it far easier to find the right image months later.
- Keep a simple spreadsheet mapping each person to their file name and the date the photo was taken.
- Set a retention schedule that matches your privacy notice, and delete or archive images when someone leaves the organisation or consent lapses.
- Store a copy of any editing presets alongside the final files, so a future photographer can match the existing look.
- Hand over both the final retouched images and, where included, the RAW or unedited originals, along with a short note on usage rights.
Treating image delivery as an ongoing governance task, not a one-off handover, keeps the archive useful rather than becoming a forgotten folder nobody can navigate.
Guidelines for updating and frequency of new headshots
A headshot has a shelf life. As a general guide, individual headshots benefit from a refresh every two to three years, or sooner if someone's appearance changes noticeably (a new hairstyle, significant weight change, or simply visible ageing in the photo compared with the person today).
Company-wide refreshes are usually driven by events rather than a fixed calendar: a rebrand, a new website launch, or a noticeable mismatch between current staff and the people pictured in an outdated directory. New starters should ideally be photographed within their first month, using the same style guide as the original shoot, so they slot into the existing set without looking out of place.
A practical approach for larger organisations is a rolling update: rather than re-shooting everyone at once, schedule a quarterly or biannual session for new hires and anyone whose photo has aged noticeably. This spreads the cost over time and avoids the logistical strain of coordinating an entire company on one day.
Keeping a simple log of when each person was last photographed makes these decisions easy rather than reactive, and it ties neatly back to the retention and review habits already built into a good style guide.
Tips for headshots across diverse roles and industries
The same core guidelines apply across roles, but tone shifts depending on the industry and the position being represented. Executives and senior leaders often suit a slightly more formal treatment: structured jackets, a steady gaze and minimal background distraction, since these images frequently appear in press materials or annual reports.
Client-facing roles (sales, account management, hospitality) tend to benefit from warmer, more approachable expressions and slightly softer lighting, since the photo's job is to build trust with someone who has not met the person yet. Creative and technical staff sometimes suit a more relaxed, less formal styling, particularly in industries where personal branding leans casual.
Regardless of role, consistency across the organisation still matters more than individual styling preferences. A shared style guide keeps the executive team and the wider staff visually aligned, even when expression and wardrobe vary slightly by role.
Common mistakes to avoid in corporate headshots
A handful of avoidable errors show up repeatedly in corporate headshot sets, and most are easy to fix with a little forward planning.
- Inconsistent backgrounds or lighting across a team, which makes a staff directory look assembled from several unrelated shoots.
- Overly posed, stiff expressions that read as uncomfortable rather than confident, usually a result of rushing the session.
- Busy patterns or distracting accessories that pull attention away from the face.
- Poor crop choices, particularly headshots cropped too tightly for platforms like LinkedIn that overlay a circular frame.
- Skipping consent paperwork, which creates legal exposure if an image is later used for a purpose nobody agreed to.
- Over-editing, where heavy retouching makes someone look noticeably different from how they appear in person.
Most of these trace back to the same root cause: treating the headshot as a quick afterthought rather than a small, well-planned project with its own checklist.
How to incorporate branding elements subtly in headshots
Brand presence in a headshot should whisper, not shout. The goal is a photo that feels unmistakably "on brand" without looking like an advertisement.
A background colour drawn from the brand palette, used as a soft, out-of-focus backdrop, is one of the simplest ways to tie a headshot to a company's visual identity. Wardrobe is another subtle lever: a specific colour family (rather than a literal uniform) or a small branded pin or lanyard can nod to the organisation without overwhelming the portrait.
Consistent framing and retouching style across every employee photo is, in many ways, the strongest branding element of all, since it signals attention to detail at an organisational level rather than relying on a logo stamped into the frame. Where a literal logo is wanted, it generally works better placed subtly in a corner of a wider environmental shot than overlaid on a close headshot.
How Life in Style Photography approaches corporate headshots
We run every headshot session with a relaxed, engaging approach on set to help clients produce their most natural expressions. Rather than issuing a long list of posing instructions upfront, we guide people through small adjustments in real time, which tends to produce more authentic results than a rigid, overly posed sequence.
We put together a 10-step LinkedIn headshot checklist that covers the practical preparation steps worth working through before a session, from wardrobe choices to what to bring on the day. Our personal branding portfolio shows the range of styles this approach produces, from formal corporate sets through to warmer, more personal branding imagery.
Careful planning and clear, simple guidance matter more to us than expecting anyone to already know how to pose. That shows up in how we brief clients before a shoot and how we direct them once the camera comes out.
— Rowan Freeman
Book a headshot session that fits your schedule
If working through attire, lighting and consent details feels like more than you want to manage alone, we handle all of it as part of a standard booking. Our Headshot Photography Services include The Short one, The Standard one and the Half day Office photoshoot, covering everything from a single portrait to a full team session.

For professionals building a broader personal brand library rather than a single headshot, our Personal Branding Services (Starter Brand Session, Signature Brand Session, Complete Brand Session) extend the same relaxed, authentic approach across a wider set of images.
- Get in touch with your preferred date and group size for a custom quote.
- Expect a confirmation and brief within a few business days of enquiry.
- Turnaround on edited files generally follows the timeline agreed at booking; pricing varies with session type and length.
If you are weighing up a full content and personal branding strategy beyond photography itself, a marketing partner specialising in personal branding can help with the wider content side, while we focus on delivering the images themselves. Head to our Headshot Photography Services page to check availability for your team or individual session.
FAQ
What are the rules for a professional headshot?
The core rules are consistency and clarity: a simple background, even lighting, a mid-chest crop and an expression that looks approachable rather than forced. Wardrobe should favour solid colours over busy patterns, and any consent or usage paperwork should be sorted before the camera comes out.
What makes a good corporate headshot?
A good corporate headshot balances authenticity with consistency, showing a genuine, relaxed expression while matching the framing, lighting and colour treatment used across the rest of the team or organisation. It should work equally well cropped to a circle on LinkedIn and placed full-size on a website bio page.
What is the "20/60/20 rule" in photography?
It is a loose guide for balanced framing rather than a strict technical standard, and it pairs well with the more common rule of thirds.
How to dress for a corporate headshot?
Choose solid, mid-toned colours that suit both your skin tone and your organisation's brand palette, and avoid fine patterns that can create a shimmering effect on camera. A structured layer like a blazer adds shape to the shoulders, and it helps to bring a backup outfit in case the first choice does not photograph as expected.
Sources
- Business
- Care needed with image use | Office of the Privacy Commissioner
- Photography Style Guide: How To Create One for Your Brand - Shopify New Zealand
- Corporate headshots - Adobe