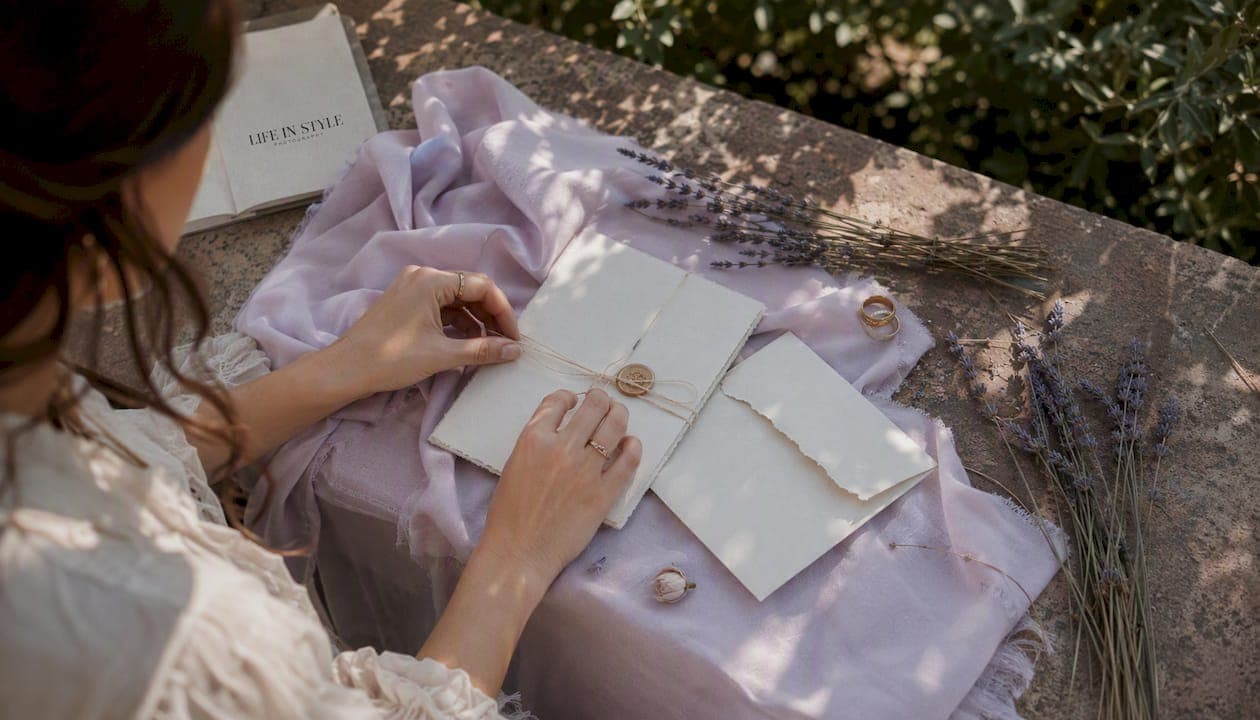
A wedding flat lay is a styled, overhead arrangement of a couple's paper goods, rings, accessories, and small heirlooms — photograph these five must-haves, and you'll get publication-quality detail frames that set the visual tone for the entire gallery. Budget some time during bridal prep for the detail block, and you'll walk away with editorial shots that often open the first spread of a wedding album.
Your immediate must-haves:
- Invitation suite (two complete copies)
- Engagement ring and wedding bands in a ring box
- Bridal shoes and one accessory (veil, hairpiece, or bracelet)
- One sentimental item (vow book, heirloom pin, or handwritten note)
- 10–15 loose floral sprigs reserved specifically for flat lays
Those five categories cover texture, scale, color, and story in a single frame. Everything else you add builds on this foundation.
Table of Contents
- What should you include in a wedding flat lay?
- How do you style flat lays to look editorial?
- What gear and settings work best for flat lay photography?
- What mistakes should you avoid with wedding flat lays?
- How should you plan the day-of flat lay workflow?
- What style inspirations work for different wedding aesthetics?
- How Life in style Photography approaches flat lays
- Key Takeaways
- Why flat lays deserve more than five minutes
- Ready to include detail coverage in your wedding package?
- Useful resources
What should you include in a wedding flat lay?
Grouping items by category before you shoot keeps the styling process fast and the final frame intentional. Here is a complete, pack-and-send checklist organized the way professional photographers think about it.
Paper goods
- Two complete invitation suites (outer envelope, inner envelope, invitation, details card, RSVP card) — having multiple copies lets you show front and back simultaneously and support layered compositions without scrambling for extras mid-shoot
- Menu cards, ceremony programs, or escort cards if the design matches the suite
- Wax seal or ribbon from the envelope (adds texture and color)
Rings and jewelry
- Engagement ring and wedding bands
- A ring box that complements the color palette
- Earrings, bracelet, or necklace (one or two pieces maximum — more crowds the frame)
Bridal accessories
- Shoes (both, arranged at a slight angle or overlapping)
- Veil or hairpiece
- Perfume bottle (especially if the bottle design is beautiful)
- Something borrowed or something blue, if it photographs well
Groom details
- Cufflinks
- Tie or bow tie
- Watch (optional, but adds a strong masculine anchor)
Sentimental and heirloom items
- Vow booklets or handwritten vows
- A family heirloom pin or brooch
- A short handwritten note between partners
Florals and styling props
- Several individual flower heads or sprigs cut from stems and reserved separately from the main bouquet
- A length of silk or satin ribbon
- A fabric swatch or small linen square for layering under paper goods
| Category | Suggested Quantity | Editorial Purpose |
|---|---|---|
| Invitation suite | two complete invitation suites | Layering, front/back display |
| Florals (loose sprigs) | 10–15 loose sprigs | Color, organic texture |
| Rings + ring box | Full set | Focal point, metallic detail |
| Accessories (jewelry, shoes) | one or two pieces maximum | Scale variation |
| Sentimental items | one or two pieces maximum | Narrative, emotional weight |
Pack everything into a single detail box the night before the wedding. Add a lint roller, a small microfiber cloth, and a ring-cleaning cloth so nothing looks dusty or smudged on camera.
How do you style flat lays to look editorial?
Composition is what separates a styled flat lay from a pile of pretty objects. A few core rules make the difference consistently.
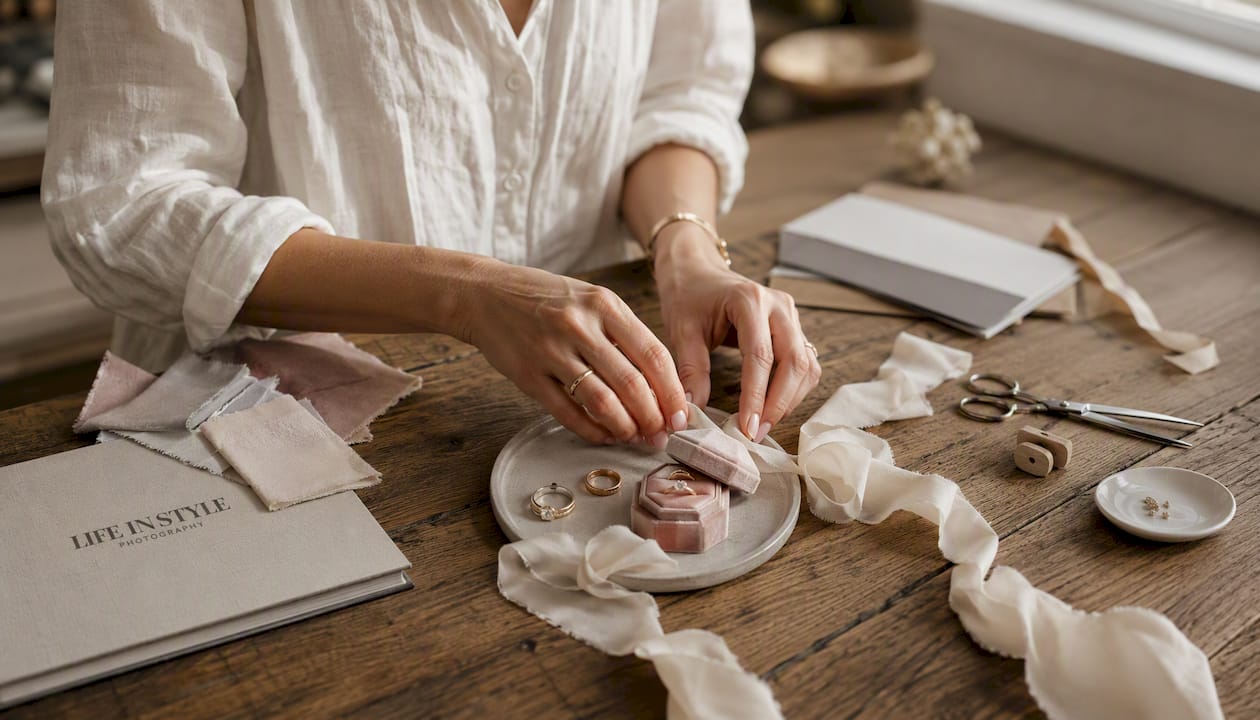
Odd-number groupings and asymmetric balance. Arrange items in groups of three or five rather than even pairs. Odd groupings feel natural to the eye, while even ones read as symmetrical and stiff. Place the hero element (usually the invitation or rings) slightly off-center, then build outward.
Negative space is not wasted space. Aim for 30–50% of the frame to remain clear. That breathing room is what gives editorial flat lays their clean, magazine-ready quality. When a frame feels cluttered, remove one element before adjusting anything else.
Layering creates depth. Slide the envelope partially under the invitation card, tuck a ribbon beneath a ring box, or let a floral sprig overlap the corner of a vow booklet. Flat lays that sit entirely on one plane look two-dimensional; layering adds a subtle sense of depth without requiring a tripod arm adjustment.
Match your layout to the aesthetic. Grid-based layouts show every suite element clearly and work well for modern or editorial styles. Organic layouts, where items are scattered with intention, suit romantic and rustic aesthetics. When time allows, shoot both.
Pro Tip: Request two invitation suites and ask the florist to set aside 10–15 loose sprigs before the ceremony. This protects the main bouquet and gives you fresh, full florals for every flat lay variation you want to try.
Style variations by aesthetic:
- Editorial/minimal: Carrara marble board, white envelope, gold ring box, single white peony
- Romantic/vintage: Aged linen, blush florals, cream ribbon, antique brooch
- Rustic/boho: Weathered wood board, dried pampas grass, twine, kraft paper envelope
- Moody/modern: Dark velvet, black ring box, deep burgundy florals, matte black stationery
What gear and settings work best for flat lay photography?
Technical choices matter here. A sharp, well-lit flat lay requires the right lens, a stable shooting position, and controlled light.
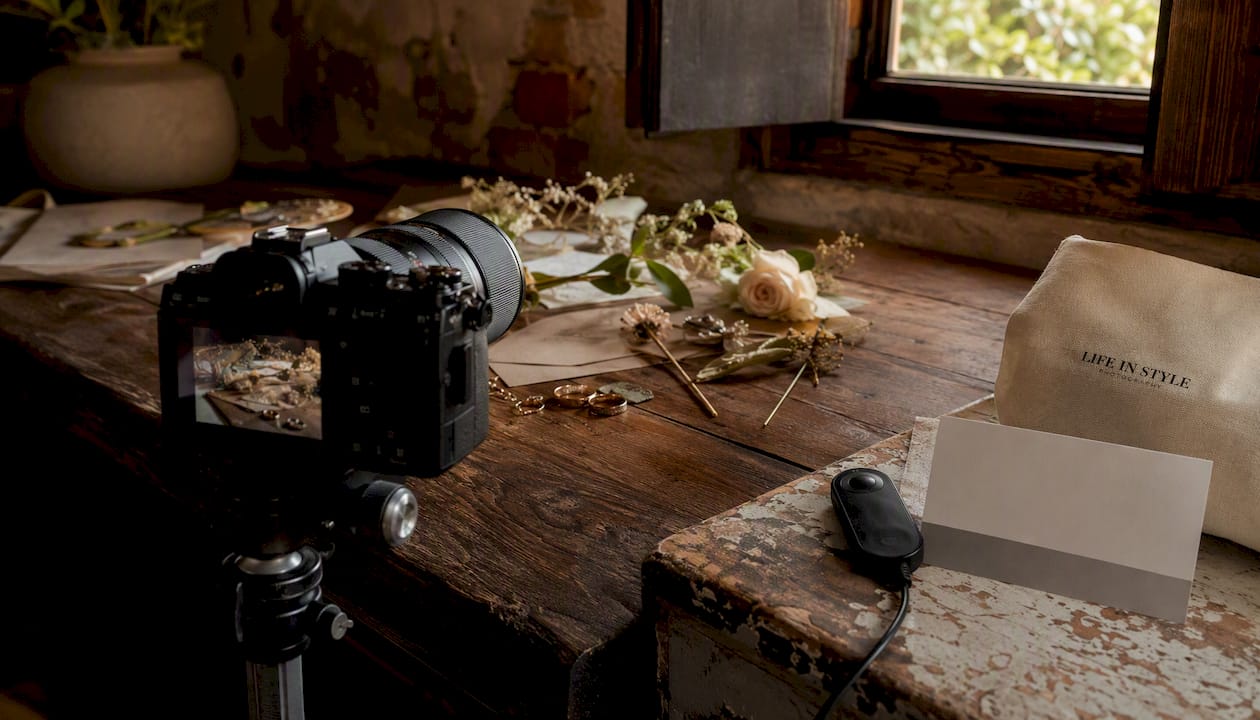
Lens choice. A 100mm macro lens is the top choice for detail work — it gives true 1:1 reproduction and enough working distance to keep the camera out of the frame. An 85mm or 50mm prime works as a backup, though you'll need to move the camera further overhead to avoid distortion.
Camera settings by scenario:
| Scenario | Aperture | Shutter Speed | ISO | White Balance |
|---|---|---|---|---|
| Bright window light | f/8 | — | — | — |
| Overcast window | f/8 | 1/100s | — | — |
| Softbox (no window) | f/8 | — | — | — |
| Subject separation | — | — | — | Match ambient |
Lighting. A north-facing window is the first choice — soft, directional, and free of direct sun that creates harsh shadows on metallic surfaces. If the prep room has no usable window, set up a single large softbox overhead with a grid and place white foam-core reflectors on the opposite side to fill shadows and control glare on rings and foil-stamped stationery.
Gear checklist:
- Tripod with a boom arm or horizontal extension (keeps the camera directly overhead)
- Two styling boards, approximately 20×24 inches (marble and linen are the most versatile)
- Small acrylic risers (create floating shadows under ring boxes and envelopes)
- Lint roller, microfiber cloth, ring-cleaning cloth
- Foam-core reflectors (white, 20×24 inches)
Avoid mixing light sources. Combining window light with tungsten room lamps creates color casts that are difficult to correct in post, especially on white stationery and metallic rings. Turn off overhead room lights and work with one controlled source.
What mistakes should you avoid with wedding flat lays?
Most flat lay problems fall into a short list of repeatable errors — and each one has a straightforward fix.
- Overcrowding the frame. Too many elements compete for attention and reduce editorial clarity. Remove items until the focal point is obvious, then add back one piece at a time.
- Mixed light sources. Tungsten lamps and window light produce different color temperatures in the same frame. Turn off artificial lights and work with a single source.
- Shooting handheld overhead. Even a slight angle introduces perspective skew and camera shake. A tripod with a boom arm solves both problems at once.
- Forgetting extra stationery copies. If you only have one invitation suite, you cannot layer or show front and back simultaneously. Always request two sets.
- Glare on jewelry and foil details. Direct light bouncing off metallic surfaces blows out fine detail. Diffuse window light with a sheer curtain or a 5-in-1 reflector's diffuser panel, and angle the ring box slightly to redirect the reflection.
Pro Tip: Before you finalize the frame, take one test shot and zoom in on the ring on your camera's LCD. If the engraving or stone detail is soft, stop down to f/8 and reshoot before moving on.
How should you plan the day-of flat lay workflow?
Timing is the variable most couples and photographers underestimate. Pro photographers often arrive 60–90 minutes ahead of portrait time specifically to capture flat lays and detail shots without rushing.
Recommended schedule:
- Arrive 60–90 minutes before portraits begin
- Spend the first 20–30 minutes on a dedicated detail block while the bride is in hair and makeup
- If the couple can spare items the day before, a rehearsal-evening shoot removes all time pressure
Roles on the day:
- Couple or bridesmaid: Gather all detail items into the pre-packed box before the photographer arrives
- Planner: Confirm the detail block is on the timeline and that the florist has set aside loose sprigs
- Photographer: Set up the styling board and lighting before opening the detail box
Shooting sequence. Start with the invitation suite (most time-consuming to arrange), move to rings (quick to style but require returns to the couple promptly), then finish with shoes and accessories. This sequence minimizes disruption to the getting-ready flow and keeps the most fragile items in hand for the shortest time.
Communicate the detail block to the planner in writing at least two weeks before the wedding. A verbal mention rarely survives the day-of timeline.
What style inspirations work for different wedding aesthetics?
Matching the flat lay's surface and props to the wedding's visual identity makes the detail frames feel like a natural part of the gallery rather than a separate shoot.
| Style | Surface | Props | Color Palette |
|---|---|---|---|
| Editorial/minimal | Carrara marble | Gold ring box, white envelope, single bloom | White, gold, ivory |
| Romantic/vintage | Aged linen or silk | Antique brooch, blush ribbon, cream florals | Blush, cream, dusty rose |
| Rustic/boho | Weathered wood | Dried pampas, twine, kraft envelope | Terracotta, sage, warm brown |
| Moody/modern | Dark velvet or slate | Black ring box, dark florals, matte stationery | Burgundy, charcoal, black |
A few quick prompts for briefing a second shooter or testing during a practice session:
- Editorial: "Clean marble, one ring box centered, invitation suite fanned to the left, single white peony at the lower right corner."
- Rustic: "Weathered wood board, dried grasses scattered loosely, invitation suite slightly overlapping, twine ribbon looped near the base."
- Moody: "Dark velvet, black ring box at center, deep red rose petals scattered, matte black envelope angled at the top left."
Both grid and organic layouts have a place in any style. Grid arrangements suit editorial and modern aesthetics; organic placements feel more natural for romantic and rustic looks.
How Life in style Photography approaches flat lays
Styling boards, acrylic risers, and neutral backdrops are standard kit for studios that treat flat lays as the opening chapter of a wedding gallery rather than an afterthought. At Life in style Photography, the detail block is built into the wedding day schedule from the first planning conversation, not squeezed in around portraits.
The studio's portable styling kit includes two 20×24-inch boards (one marble, one linen), a set of acrylic risers, silk ribbons in neutral tones, a ring-cleaning cloth, and a tripod arm extension. Each item has a specific purpose: risers create the floating shadow that gives ring boxes their three-dimensional quality; silk ribbons add a soft color note without competing with the stationery; the tripod arm keeps the camera perfectly overhead so every line in the frame stays parallel.
Flat lays are storytelling tools that preserve sensory memory — texture, paper weight, and metallic shine become narrative elements, not just inventory. The first spread of a wedding album commonly opens with a detail flat lay, and those frames set the visual palette for everything that follows.
Pro Tip: Block the detail time with your planner in writing, not just verbally. Include it as a named item on the day-of timeline so it survives last-minute schedule changes.
Couples working with Life in style Photography are encouraged to share the checklist in this article with their planner and florist at least two weeks before the wedding. That single step consistently raises the quality of detail coverage across every venue and lighting condition.
Key Takeaways
Editorial wedding flat lay photos require the right items, deliberate styling, and a protected block of time on the wedding day timeline.
| Point | Details |
|---|---|
| Pack a detail box in advance | Include two invitation suites, rings, shoes, one sentimental item, and 10–15 loose sprigs. |
| Block 20–30 minutes for details | Schedule this during bridal prep, ideally with the photographer arriving 60–90 minutes early. |
| Apply the negative-space rule | Keep 30–50% of the frame clear to achieve an editorial, magazine-ready composition. |
| Use a 100mm macro and tripod arm | Shoot at f/8 with a single controlled light source to avoid color casts and soft detail. |
| Brief your planner and florist | Confirm the detail block in writing and ask the florist to reserve loose sprigs before the ceremony. |
| Life in style Photography | Includes a dedicated detail block and portable styling kit as part of its wedding photography service. |
Why flat lays deserve more than five minutes
Most couples I speak with have seen beautiful flat lay detail shots in wedding magazines or on Pinterest, but they assume the photographer handles everything spontaneously. The reality is that the best detail frames come from preparation that happens days before the wedding, not minutes before the shoot.
What gets overlooked most often is the florist conversation. Asking for 10–15 loose sprigs reserved specifically for flat lays costs almost nothing and takes thirty seconds to request, yet it is the single change that most dramatically improves the organic, layered look couples want. Without it, photographers either dismantle the main bouquet (which no one wants) or work with whatever stray petals are available.
The other underestimated factor is the styling board. A plain hotel carpet or a busy bedspread as a background competes with every element in the frame. Two neutral boards in a kit bag weigh almost nothing and transform the quality of every detail shot regardless of venue.
Flat lays are not a secondary deliverable. They are the visual introduction to a wedding gallery, and the frames that couples return to most often when they want to remember the specific, tactile details of their day.
Ready to include detail coverage in your wedding package?
Life in style Photography builds detail time directly into every wedding photography package — no add-ons, no last-minute scrambling. The studio arrives with a full styling kit, a pre-planned detail sequence, and the experience to work quickly in any prep-room lighting condition. Couples receive a pre-wedding checklist so the detail box is ready when the photographer walks in.

If you want to see how detail frames integrate with the full wedding gallery, browse the wedding and event portfolio or reach out to discuss your date and what you'd like included in your detail coverage.
Useful resources
A short list of trusted references for couples and photographers who want to go deeper on flat lay technique and styling:
- What Is a Wedding Flat Lay? Here's Everything to Know — Brides
- Flat Lay Wedding Detail Shots: Complete Guide — ShutterReview
- Wedding Detail Shots: A Photographer's Guide — SLR Lounge
- What Is a Wedding Flat Lay? (And What to Include) — WeddingWire
- Life in style Photography wedding portfolio — browse styled detail frames alongside full wedding galleries
Recommended
- Auckland Wedding and engagement photographer - Auckland Portrait, Branding & Wedding Photographer | Life in Style Photography
- Auckland Engagement photography - Auckland Portrait, Branding & Wedding Photographer | Life in Style Photography
- 5 Tips to Look Your Best in Professional Headshots - Auckland Portrait, Branding & Wedding Photographer | Life in Style Photography
- Professional Photography Blog - Auckland Portrait, Branding & Wedding Photographer | Life in Style Photography