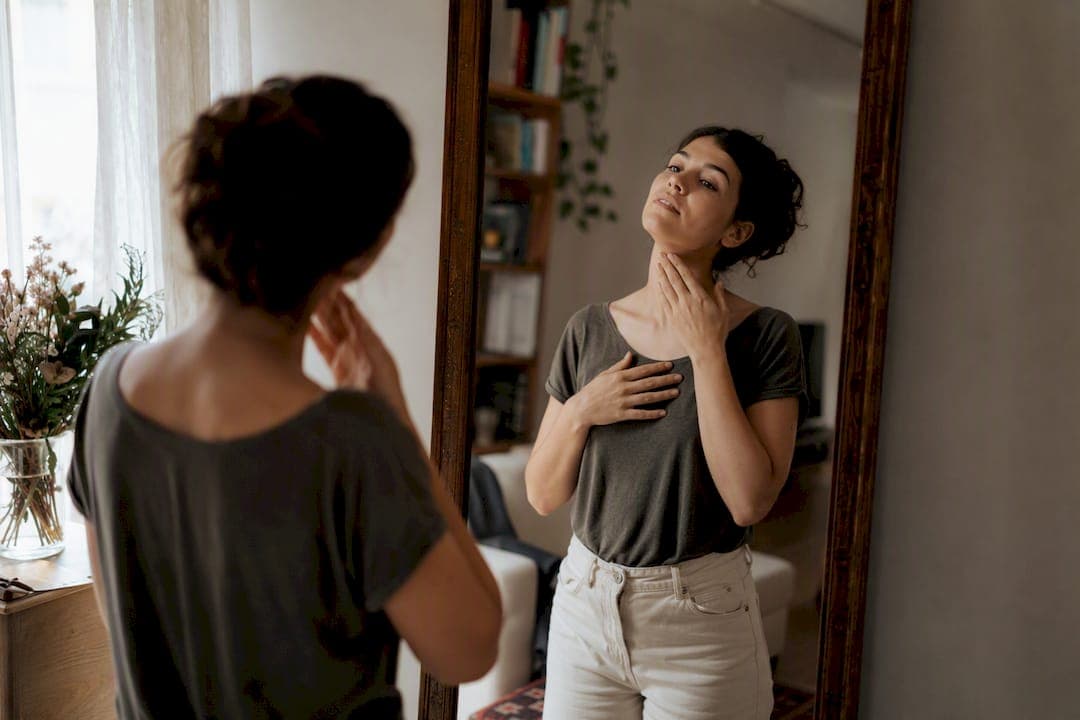
Being photogenic is a skill you can learn, and it starts with three fixable things: light, angle and expression. Fix those and most people notice a real difference within a few photos, not a few years. Photogenic ability improves with targeted practice of angle, light and expression, and most people see change within two to three weeks of brief, regular effort.
If you want results today, try this:
- Face the light. Turn towards a window rather than standing with it behind you.
- Turn your body, push your chin forward. A soft 3/4 angle with your chin slightly forward and down sharpens your jawline instantly.
- Trigger a real smile. Recall a genuinely happy memory a second or two before the shot, rather than saying "cheese."
Test it yourself: take one selfie with your usual habits, then one applying all three fixes, using your phone's portrait mode both times. Compare them side by side. The gap is usually bigger than people expect.
Key Takeaways
Photogenic results come down to technique, mainly light, angle and genuine expression, and most people improve noticeably within two to three weeks of regular practice.
| Point | Details |
|---|---|
| Light comes first | Face soft, frontal daylight and avoid overhead or fluorescent lighting wherever possible. |
| Angle changes everything | Use a 3/4 body turn with a forward, slightly lowered chin to define the jaw. |
| Genuine smiles beat posed ones | Recall a real happy memory just before the shot instead of forcing an expression. |
| Practice compounds quickly | Ten minutes of mirror drills twice a week builds noticeable improvement within weeks. |
| A guided session removes the pressure | Life in Style Photography directs posture, expression and movement throughout the shoot so you don't have to manage it yourself. |
Table of Contents
- How to be photogenic: the pose and expression basics
- What lighting and camera settings actually flatter your face?
- Clothing and grooming choices that photograph well
- A quick practice routine that actually builds photogenic habits
- Why a photographer changes what's possible in your photos
- Getting your head right before the camera comes out
- Body language, relaxation and why stiffness reads instantly
- A photographer's honest note on nerves and getting it right
- Book a session and let the guesswork disappear
- Frequently asked questions
- Sources
How to be photogenic: the pose and expression basics
Most unflattering photos come down to two things: a flat, square-on pose and a forced expression. Both are fixable in seconds once you know the mechanics.
- Turn your body to a 3/4 angle. Stand with your shoulders angled away from the camera rather than facing it directly. This creates a slimmer silhouette and adds visual depth instead of a flat, passport-photo look.
- Drop one shoulder lower than the other. Perfectly level shoulders read as stiff. A slight asymmetry, weight on one leg, one shoulder dipped, looks relaxed and natural.
- Push your chin forward, then tilt it down slightly. This sounds odd until you try it. Pulling your chin forward and down (rather than tucking it back) elongates the neck and sharpens jaw definition, which is why photographers repeat this instruction constantly.
- Use a squinch, not a wide-eyed stare. Slightly narrow your lower eyelids while keeping your upper lids relaxed. It reads as warm and confident rather than startled.
- Recall a specific happy memory just before the shot. This memory-recall technique produces more genuine eye engagement, the kind associated with a real, or Duchenne, smile, because you're reacting to an actual feeling instead of performing one.
A simple script works well here: think of a moment that made you laugh unexpectedly, hold that image in your head, then let the smile happen rather than forcing it.
Between frames, shift your weight, turn your head slightly, or laugh at something. Micro-movements between frames tend to look more natural than a held, static pose, and you can ask a friend, or yourself on a timer, to fire off several shots while you move rather than freeze.
Pro Tip: Before a shoot or selfie session, practise the chin-forward-and-down movement in a mirror for 30 seconds. It feels unnatural until it becomes muscle memory, then it becomes automatic.
What lighting and camera settings actually flatter your face?
Lighting does more heavy lifting than almost anything else in a photo. It's the single biggest controllable variable in how photogenic a shot looks, and soft, frontal light is the most universally flattering option available to anyone with a phone and a window.
- Face a window rather than standing with your back to it. Soft daylight from the front or a slight side angle fills in shadows evenly and defines your features without harshness.
- Avoid overhead lighting. Ceiling downlights and small-room fluorescents cast shadows under the eyes and nose, ageing the face and flattening skin tone.
- Use portrait mode and step back. Smartphone portrait mode approximates a longer focal length, which reduces the distortion you get from holding a phone too close. Stand further away and zoom in slightly rather than shooting at arm's length.
- Hold the camera slightly above eye level. A downward angle from above elongates the face and minimises a double chin; shooting from below usually does the opposite.
- Improvise a diffuser or reflector. A sheer white sheet over a lamp softens harsh light, and a plain white card or piece of paper held below your face bounces light back up to soften shadows.
Small adjustments to where you stand and how far the camera sits from your face often matter more than the photo editing you do afterwards.
Clothing and grooming choices that photograph well
What you wear and how you groom sets the frame before the camera even fires.
- Choose solid colours over busy patterns. Bold prints compete with your face for attention; block colours that suit your skin tone keep focus where it belongs.
- Pick necklines that open up the collarbone. V-necks and scoop necks visually lengthen the neck; high, tight collars can shorten it.
- Keep jewellery simple. One statement piece beats several competing for attention in a small frame.
- Groom brows and manage shine before the shoot. A light dust of powder on the forehead and nose stops flash or daylight from bouncing back too brightly.
- Tame flyaways with a little product or water on your fingertips, and add volume at the roots if your hair tends to flatten under light.
- Think about your background before your outfit. A cluttered backdrop can undo a well-chosen outfit, so a plain wall or soft greenery lets clothing and composition work together instead of against each other.
These are small, quick fixes. None of them need a stylist, just five minutes of attention before you pick up the camera.
A quick practice routine that actually builds photogenic habits
Photogenic skills build the same way any physical skill does, through short, repeated practice rather than one long session. Most people notice real improvement within two to three weeks of doing this twice a week for ten minutes at a time.
- Minute 1 to 3: Practise the chin-forward-and-down movement and the squinch in a mirror.
- Minute 4 to 6: Run the memory-recall technique three times, checking your eyes look engaged, not glazed.
- Minute 7 to 10: Take five selfies varying only one thing each time, angle, then distance, then light source, so you learn what your own face responds to.
A simple test matrix helps you see what's actually working rather than guessing.
| Variable tested | What to change | What to look for |
|---|---|---|
| Lighting direction | Front light vs side light vs overhead | Shadow placement under eyes and nose |
| Camera distance | Arm's length vs one metre with portrait mode | Facial distortion around nose and jaw |
| Body angle | Square to camera vs 3/4 turn | Silhouette width and shoulder line |
Keep the best shot from each session as your benchmark, and compare new attempts against it rather than against someone else's photos entirely.
Why a photographer changes what's possible in your photos
A big part of looking photogenic is not having to think about it, and that's exactly what a photographer is there for. Professional photographers direct posture, expression and movement continuously through a shoot, using prompts and small adjustments so you're reacting rather than performing. That's also echoed in how experienced commercial photographers approach directing clients on set.
"Turn your shoulders a touch more towards me. Good, now drop that chin down for me and give me a real laugh." Small, constant direction like this is how a session moves from stiff to natural, and it's the core of how Rowan Freeman and the team at Life in Style Photography approach every shoot.
If you've practised the drills above and still feel stuck in front of a lens, a guided session usually gets you further, faster, than solo practice alone. Booking one removes the guesswork entirely.
Getting your head right before the camera comes out
Nerves show up on camera before anything else does. A tense jaw, a held breath, shoulders creeping towards your ears, none of it reads as relaxed, no matter how well you've nailed your angle.
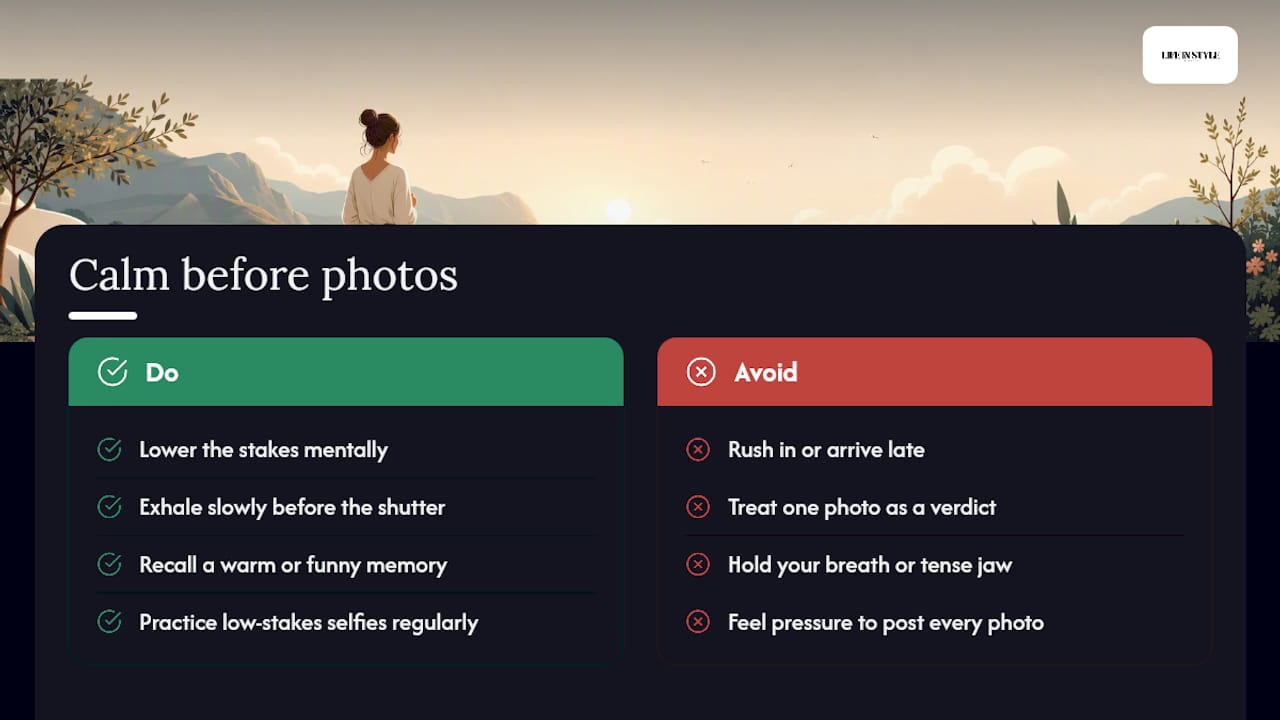
Start by lowering the stakes in your own head. One photo isn't a verdict on how you look; it's one frame out of dozens, and you get to choose the one that goes anywhere. Reminding yourself of that before a shoot takes real pressure off.
Breathing helps more than people expect. A slow exhale right before the shutter clicks softens your shoulders and drops any tension sitting in your face. Pair that with the memory-recall technique already covered, thinking of something genuinely funny or warm, and you're working with your nervous system instead of against it.
Familiarity matters too. Regular, low-stakes selfie practice with no pressure to post anything builds comfort in front of a lens over time, which is why people who take photos often tend to look more at ease in them. The camera stops feeling like a spotlight and starts feeling ordinary.
If you're heading into a booked session, arrive a few minutes early rather than rushing in. Rattled and relaxed produce very different photos, and the extra five minutes to settle usually shows up in the results.
Body language, relaxation and why stiffness reads instantly
Cameras are unforgiving about tension. A locked jaw, clenched hands, or shoulders pulled up towards the ears will show up clearly in a still image, even when the rest of the pose is right.
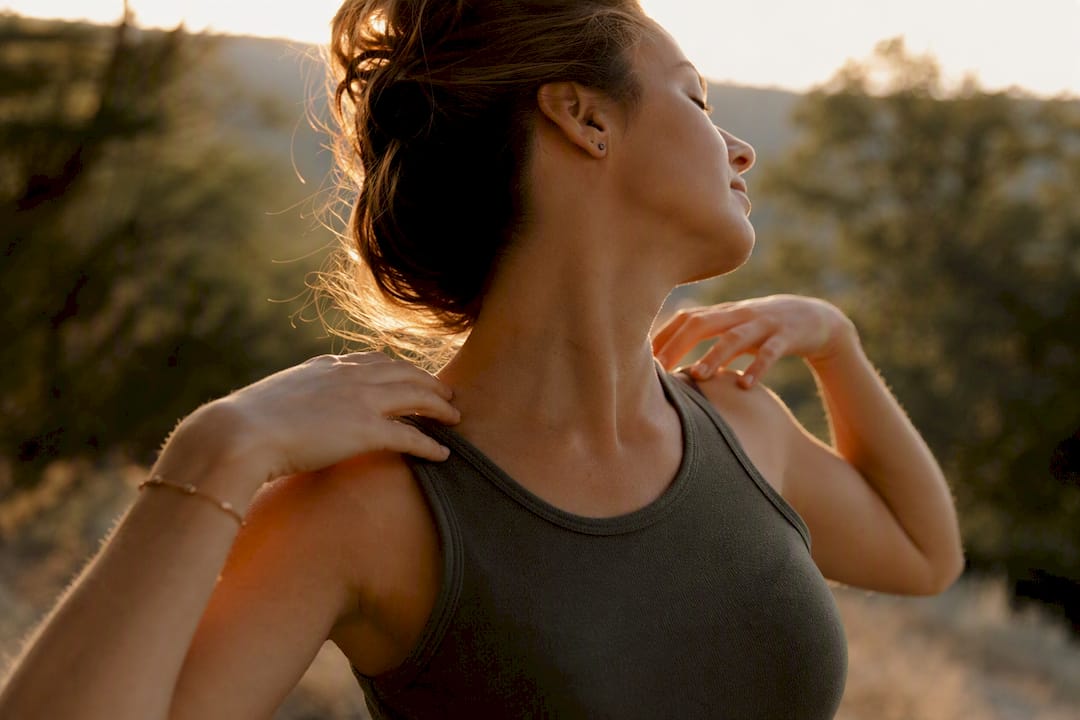
Relaxation starts in the body, not the face. Shake out your hands before a photo, roll your shoulders back and down, and unclench your jaw deliberately. These small physical resets change how the rest of your posture reads, because tension in one area tends to spread through the whole frame.
Open body language photographs better than closed. Crossed arms, hunched shoulders and hands jammed in pockets can read as guarded, while a slight forward lean, an open chest, and weight shifted onto one hip generally read as confident and approachable. None of this needs to look staged. It's about releasing tension rather than adding effort.
Technique, including expression, posture, and general comfort in front of a camera, explains most of the variation in who looks photogenic, more than facial structure ever does. That's genuinely good news: it means the skills covered in this guide matter more than the face you were born with.
Movement helps too. Standing dead still for a photo often produces a stiffer result than a candid moment caught mid-motion, a small step, a turn, a laugh. That's part of why photographers keep shooting through movement rather than asking for one frozen pose.
A photographer's honest note on nerves and getting it right
We've had clients arrive convinced they're "just not photogenic," visibly tense before we've even picked up the camera. Within a few minutes of relaxed direction and a laugh or two, that tension usually disappears completely.
The mindset shift that helps most: stop trying to look good and just react to what's happening around you. Practise the small drills in this guide regularly, not obsessively, and trust that the improvement compounds.
Book a session and let the guesswork disappear
Practising angles and lighting on your own gets you a long way, but a guided session removes the pressure entirely. Life in Style Photography specialises in exactly this: putting camera-shy people at ease so the natural, relaxed moments this guide describes happen without you having to manage your own lighting, angle and expression at the same time.

A typical session covers headshots, personal branding portraits, couples and family photography, all shaped around the same principles covered above, soft natural light, considered angles, and genuine expression drawn out through conversation rather than instruction. If you're after a polished professional image, the headshot photography services page outlines what's included, and the personal branding portfolio shows real results from clients who started out just as unsure in front of a camera as anyone reading this. For more on what to expect before you arrive, the blog on looking good on camera walks through preparation in more detail.
Ready to see what a guided session looks like for you? Get in touch to check availability and book a time that suits.
Frequently asked questions
Is being photogenic something you're born with? Not mostly. Technique, lighting and expression explain most of the variation in who photographs well, which means it's a trainable skill rather than a fixed trait.
How long does it take to get better at looking good in photos? Many people notice a real difference within two to three weeks of short, regular practice, roughly ten minutes twice a week.
Why do I always look tense or stiff in photos? Tension in the jaw, shoulders or hands shows up clearly on camera. A slow exhale before the shot and a deliberate shoulder roll usually soften this within seconds.
What's the single fastest fix for a bad photo? Fixing your light source first, facing a window rather than standing with your back to it, typically makes the biggest visible difference of any single change.
Should I hire a photographer if I've already practised these tips? If you've worked through the drills and still feel stuck, a guided session with continuous direction on posture and expression usually gets more natural results faster than solo practice alone.
Sources
- How to Be Photogenic: Is It a Skill or a Myth? (2026 Guide) — PoseOverlay
- Am I Photogenic? The Science Explained | Smile Tracker
- The ultimate posing guide for anyone hiring a photographer — Total Exposure
- What makes people photogenic — CamerasGuru
- You can learn to be photogenic — The Atlantic
Recommended
- 5 Tips to Look Your Best in Professional Headshots - Auckland Portrait, Branding & Wedding Photographer | Life in Style Photography
- Auckland Fashion Photographer - Auckland Portrait, Branding & Wedding Photographer | Life in Style Photography
- Personal Branding Photography portfolio - Auckland Portrait, Branding & Wedding Photographer | Life in Style Photography
- Professional Photography Blog - Auckland Portrait, Branding & Wedding Photographer | Life in Style Photography