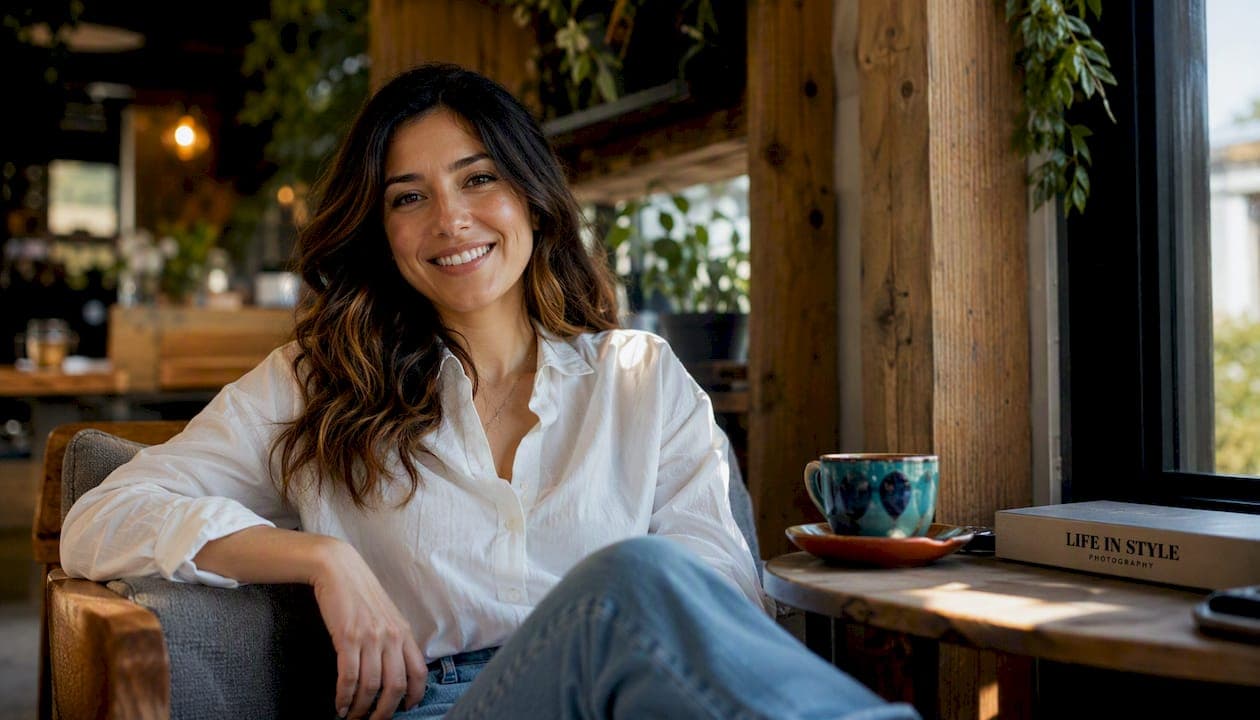
Your lead photo should be a clear, well-lit close-up with direct eye contact and a genuine smile. That single image carries more weight than everything else in your profile combined, and a large majority of initial pass decisions on dating apps are driven by photos alone. Get the lead shot right first, then build out your lineup.
Your six-shot checklist:
- Lead close-up: sharp face, natural light, eye contact, genuine expression
- Half-body shot: waist up, relaxed pose, shows personality through outfit or setting
- Full-body shot: standing or in motion, full context, no cropping at the knees
- Activity or hobby shot: doing something you love, candid energy preferred
- Group or social shot: one only, and you must be clearly identifiable
- Date-preview or lifestyle shot: a coffee shop, a walk, a casual evening out
Swap your lead photo to your best close-up today, then add three to five supporting shots from that list. Delete anything with a mirror, a heavy filter, sunglasses covering your eyes, or a photo more than 12 months old. Those are the four biggest profile killers, and removing them costs you nothing.
Table of Contents
- What types of dating profile photos should you include?
- Framing, lighting, and composition basics that make photos work
- What to wear for your dating profile shoot
- How to pose and what expressions actually work
- Which backgrounds and locations work best for dating photos?
- How much editing is too much for dating photos?
- How to actually get the photos: DIY, friend, or pro?
- How should you order and test your photo lineup?
- Why do better photos actually get more matches?
- Key Takeaways
- What photographers actually fix on set (and what you can learn from it)
- Ready for a professional dating profile session with Life in style Photography?
- Useful sources and further reading
What types of dating profile photos should you include?
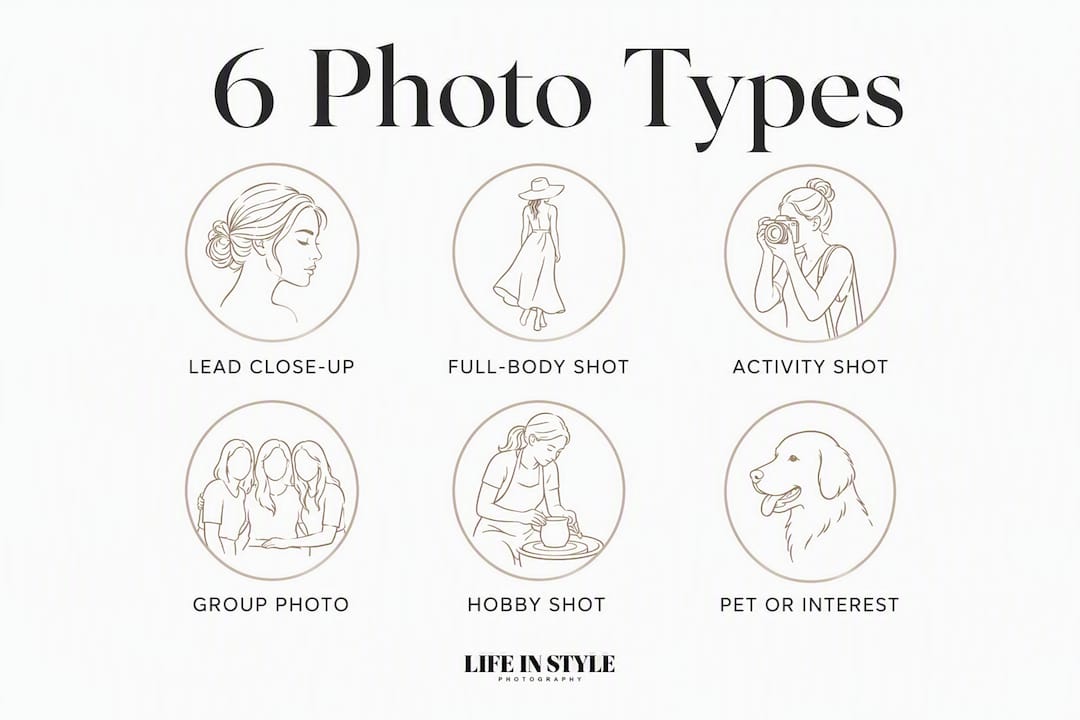
Each photo in your lineup answers a silent question your potential match is asking. The lead close-up answers: Do I find this person attractive? The full-body shot answers: What do they actually look like? The activity shot answers: Do we have anything in common? When you think of your profile as a short visual story rather than a random collection of images, the right shots become obvious.
Six photos is the practical target: three is the minimum to avoid looking sparse, and six covers all the archetypes without padding the lineup with weak images. More than eight photos rarely helps and often hurts, because every additional weak image pulls down the average impression.
Here is what each shot should accomplish:
- Lead close-up: Face fills 50–60% of the frame. Soft natural light, eyes toward the camera, a relaxed smile. This is your first impression and your most important asset.
- Half-body shot: Waist to head, ideally in a setting that adds context (a café table, a park bench, a doorway with interesting architecture). Shows your style and proportions without the full reveal.
- Full-body shot: Standing naturally, weight on one leg, arms relaxed. Outdoor settings work well. This photo answers the question every viewer has but no one says out loud.
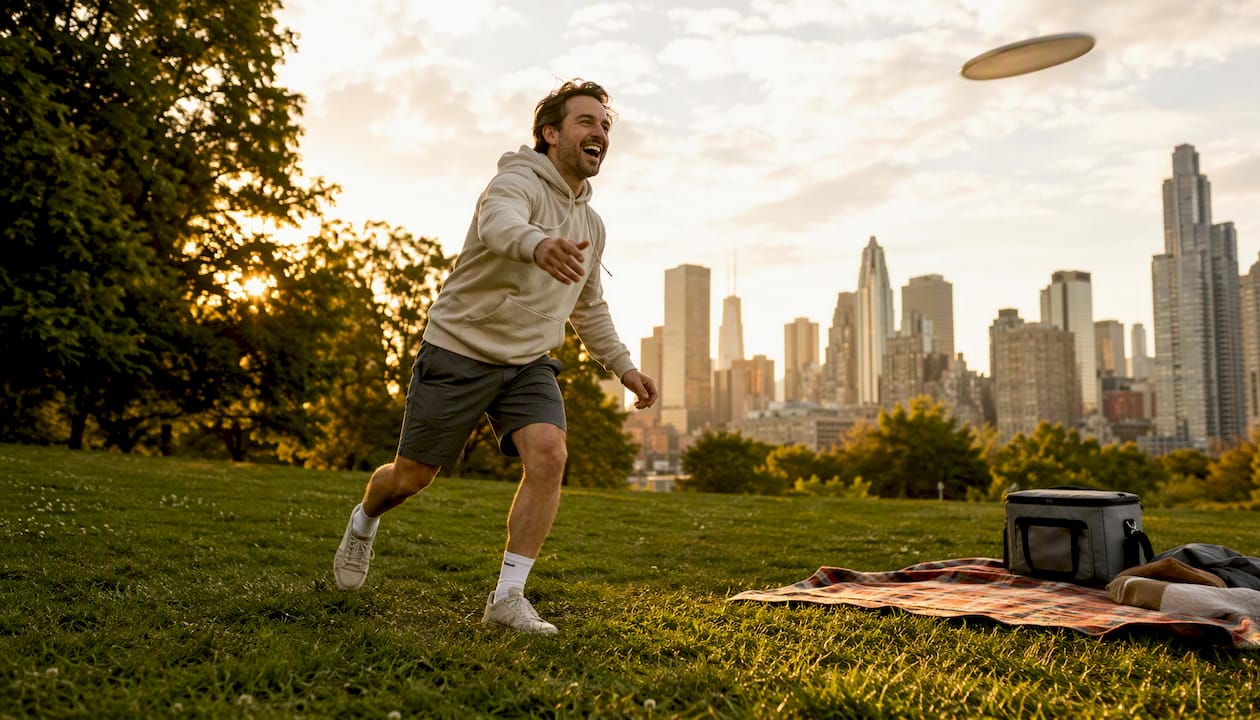
- Activity or hobby shot: Hiking, cooking, playing guitar, at a gallery opening. The activity itself is secondary; what matters is that you look genuinely engaged and happy.
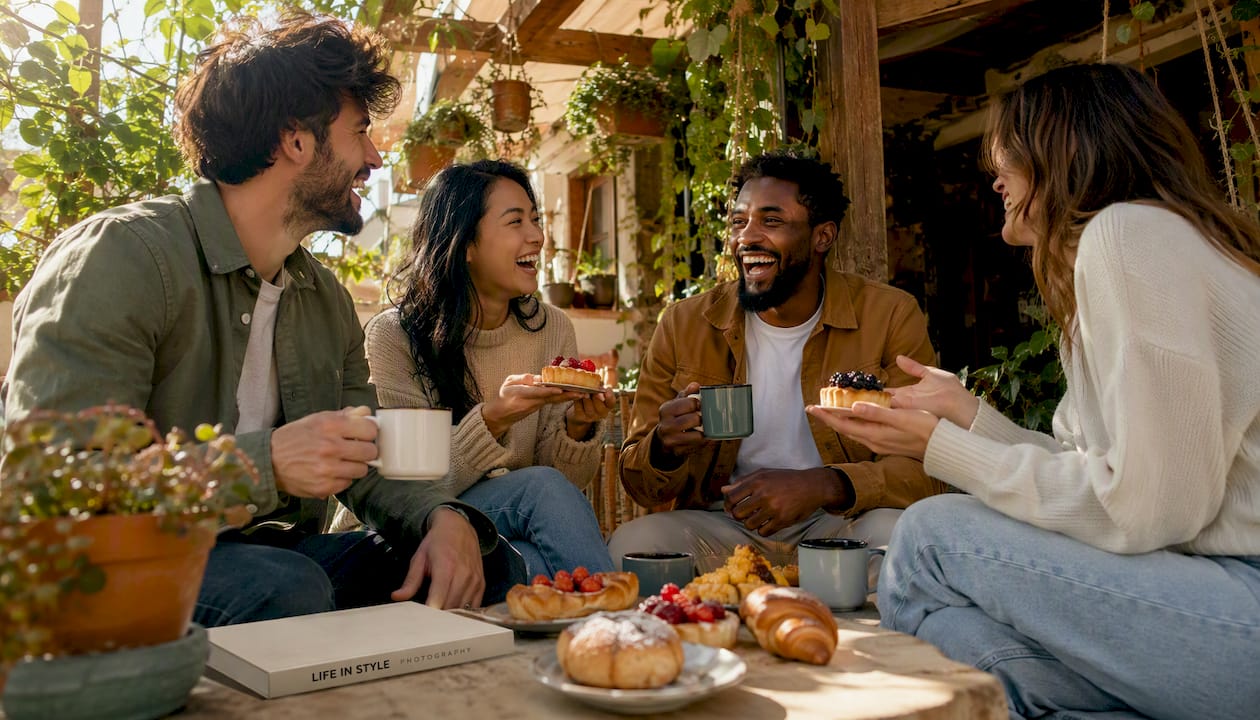
- Group or social shot: One group photo maximum, and you should be easy to identify immediately. A 60/40 solo-to-group ratio keeps the focus on you while signaling that you have an active social life.
- Date-preview or lifestyle shot: Think of this as showing what a first date with you might look like. A rooftop bar, a farmers market, a weekend hike. It gives a potential match something to picture themselves in.
No pet? Swap the activity slot for a second hobby or interest shot. No group photo you like? Skip it rather than include one where you are hard to spot. A tight, honest lineup of five beats a padded, confusing lineup of nine.
Pro Tip: Write a one-line caption for each photo before you upload it. If you cannot describe what the photo communicates in one sentence, it probably does not belong in your lineup.
Framing, lighting, and composition basics that make photos work
A sharp, unobstructed face with good lighting and eye contact is the primary determinant of a successful lead photo. Everything else, including your outfit, your background, and your pose, is secondary to that single requirement.
For lighting, soft and directional beats harsh and flat every time. The most reliable options are golden hour (the hour after sunrise or before sunset), open shade outdoors, and window light indoors. All three produce a warm, even glow that flatters skin tones without the blown-out highlights or deep shadows that overhead midday sun creates. Avoid shooting with a bright window or sky directly behind you; backlight turns your face into a silhouette.
Framing your lead close-up: your face should occupy roughly 50–60% of the frame. Center your eyes in the upper third of the image. A slight tilt of the chin downward (not dramatically, just a few degrees) tends to sharpen the jawline and reduce the distortion that comes from a camera held below eye level.
For half-body and full-body shots, keep the camera at eye level or just slightly above. Shooting from below elongates the body but often makes the face look unflattering. Shooting from above can make you look shorter than you are. Eye level is neutral and honest.
Rear-camera photos taken by another person consistently outperform front-camera selfies. The rear camera on most modern phones has a significantly better sensor, and having someone else hold the camera means you can focus on your expression rather than the mechanics of the shot.
Pro Tip: A $15–$25 collapsible reflector bounced toward your face from below fills in shadows under the eyes and chin without any additional lighting equipment. It is the single cheapest upgrade you can make to a DIY shoot.
Quick composition checklist:
- Face fills 50–60% of the frame in the lead shot
- Camera at eye level or slightly above
- Light source in front of or beside you, never directly behind
- Background is clean and uncluttered
- Eyes are sharp (tap the screen to focus on your eyes before shooting)
What to wear for your dating profile shoot
The core rule is simple: dress one step up from your everyday look. If you normally wear a T-shirt and jeans, wear a clean button-down or a well-fitted crewneck. If you usually wear smart casual, add a blazer or a dress. The goal is to look like the best version of yourself, not a different person.
Dos:
- Solid or subtly textured colors (navy, forest green, warm white, burgundy, charcoal)
- Well-fitted clothing that shows your actual shape
- One outfit per photo type: casual for the activity shot, smart casual for the lead close-up, something slightly elevated for the date-preview shot
- Clean, pressed, and lint-free on the day of the shoot
Don'ts:
- Busy patterns, large logos, or graphic tees (they distract from your face and date poorly in photos)
- Overly trendy pieces that will look dated in 12 months
- Sunglasses in your lead shot or any close-up (covering your eyes is one of the most common match-killers)
- Matching outfits with other people in your group shot (it makes you harder to identify)
For grooming, the standard is clean and intentional. Hair styled the way you would wear it on a first date. Minimal but polished for makeup. Facial hair trimmed and deliberate. You want to look like someone who made an effort without looking like someone who spent three hours getting ready.
For practical tips on looking your best in front of the camera, the on-camera styling guide from Life in style Photography covers the specifics well.
What to pack for a 30–60 minute shoot:
- Two to three outfit options (casual, smart casual, one elevated)
- A small grooming kit (comb, lip balm, blotting papers)
- A neutral or white T-shirt as a backup base layer
- Any props tied to your hobbies (a book, a coffee cup, a sport item)
- Comfortable shoes you can walk in between locations
How to pose and what expressions actually work
Genuine expressions beat forced smiles every time. A Duchenne smile, the kind that reaches your eyes and involves a slight squint, reads as warm and trustworthy. A wide, teeth-baring grin held for too long reads as performative. The difference is subtle in person but obvious in a still photo.
Smiling with genuine warmth and maintaining forward-facing eye contact significantly increases engagement. For your lead close-up, look directly into the lens, relax your jaw, and think of something that actually makes you happy rather than trying to construct the expression manually.
Simple pose templates by shot type:
- Close-up: Face the camera directly or at a slight angle. Relax your shoulders away from your ears. Breathe out slowly before the shot is taken.
- Half-body: Turn your shoulders 15–20 degrees away from the camera, then turn your face back toward the lens. This creates a natural diagonal line and avoids the flat, passport-photo look.
- Full-body: Weight on one leg, the other slightly forward. Arms relaxed at your sides or one hand in a pocket. Avoid crossing your arms, which closes off your body language.
- Activity shot: Do the activity. Interact with the environment. The best activity photos are taken mid-motion, not posed in front of the activity.
Common mistakes to fix:
- Stiff arms held flat against the body (bend one elbow slightly, or put a hand in a pocket)
- Shoulders squared directly to the camera in every shot (vary the angle)
- Chin tucked too far down, creating a double chin effect (bring it forward and slightly down, not back)
- Hands hidden behind the back or gripping each other awkwardly
Pro Tip: Ask your photographer or friend to take a burst of 10–15 frames while you move between positions. The best expressions almost always happen between poses, not during them.
Which backgrounds and locations work best for dating photos?
The background should either stay neutral or add a contextual signal about your life. It should never compete with your face for attention.
A clean, slightly textured wall in a warm tone, a park with soft greenery in the background, a café interior with warm ambient light: these all add atmosphere without distraction. A busy bar at night, a cluttered bedroom, or a parking lot does the opposite. The background tells a story whether you intend it to or not.
Top location choices and why they work:
- A park or tree-lined street in open shade: Soft, even light. Natural color. Works for close-ups, half-body, and full-body shots.
- A café or coffee shop: Warm tones, lifestyle signal, natural indoor light near a window. Ideal for the date-preview shot.
- A beach in the early morning or late afternoon: Flattering golden light, strong lifestyle signal, works for full-body and activity shots.
- A minimal textured wall (brick, painted concrete, wood paneling): Clean background that keeps focus on you. Works for close-ups and half-body shots.
- A bookshelf or home library: Signals intelligence and interests. Works well for a casual, relaxed close-up or half-body shot.
Backgrounds to avoid:
- Busy restaurant or bar scenes where the background competes with your face
- Messy or personal spaces (bedrooms, home offices with clutter)
- Parking lots, gas stations, or generic commercial interiors
- Bright windows or skylights directly behind you (backlight problem)
For indoor shoots with limited space, position yourself facing a window. Move any clutter out of the frame. A single lamp behind the camera adds warmth without creating harsh shadows. You do not need a large space; you need a clean foreground and a light source in front of you.
How much editing is too much for dating photos?
The direct answer: adjust exposure, crop, and color balance. Stop there for most photos. The goal is to look like yourself on a good day, not a polished version of someone else.
Safe edits:
- Exposure and brightness (correct underexposed or overexposed shots)
- White balance and warmth (remove harsh blue or green casts from artificial light)
- Slight contrast and clarity (adds definition without looking processed)
- Crop to the recommended aspect ratio (4:5 or 1:1 for most apps)
- Remove a temporary blemish or a distracting object in the background
Edits to avoid:
- Skin smoothing beyond a light touch (heavy smoothing removes texture and looks artificial)
- Face reshaping, jaw slimming, or eye enlarging tools
- Fake background replacement (Photoshop cutouts are usually obvious and feel deceptive)
- Heavy color filters that change your skin tone significantly
- Sharpening applied to the whole image (it creates a harsh, over-processed look)
The authenticity penalty for overediting is real. Photos that look significantly different from how you appear in person create a trust gap on a first date, and that gap tends to end things before they start.
Pro Tip: For phone exports, save at the highest JPEG quality your app allows, at a minimum resolution of 1080 x 1350 pixels for a 4:5 crop. Compressing too aggressively before upload adds artifacts that make even a well-lit photo look cheap.
Third-party apps like Lightroom Mobile (free tier), Snapseed, or VSCO handle exposure and color grading well without pushing you toward the heavy-filter presets that age poorly. For skin retouching, Facetune is useful for removing a temporary blemish but should be used at the lowest intensity setting.
How to actually get the photos: DIY, friend, or pro?
DIY works if you follow the checklist carefully. A friend with your phone is better. A professional session is the fastest route to a polished, complete lineup, especially if you are camera-shy or have struggled to get good results on your own.
A 30–60 minute session using natural light, a tripod or a friend, and 30–40 frames gives you enough material to curate a strong six-shot set without needing professional equipment. The key is shooting more frames than you think you need and editing ruthlessly afterward.
DIY shoot plan (30–60 minutes):
- Choose two outdoor locations with good natural light (park, café exterior, textured wall)
- Shoot during golden hour or in open shade
- Set your phone to the rear camera, portrait mode off for close-ups (portrait mode can blur the background too aggressively)
- Take 30–40 frames per location, moving between poses
- Change outfits between locations for variety
- Review and select your best six before uploading
Friend brief (send this before the shoot):
- "I need a close-up (face fills most of the frame), a half-body, a full-body, and one or two candid shots of me doing something natural."
- "Keep the camera at eye level. Shoot in shade or with the sun to the side, not behind me."
- "Take bursts of 10–15 frames at a time. I'll pick the best ones."
For a professional session, typical US pricing for a freelance portrait photographer ranges from $150–$400 for a 30–60 minute session with 10–20 edited images delivered. A dedicated headshot session (often 45–90 minutes, 20–40 edited images) tends to run $200–$500 depending on the photographer's experience and your location. Turnaround is usually 5–14 days.
Six questions to ask a photographer before booking:
- How many retouched images are included in the package?
- What is the typical turnaround time for edited photos?
- Do you shoot on location, in a studio, or both?
- What are the usage rights for the images (personal use, social media)?
- Can I see examples of your natural-light portrait work?
- What is the cost for additional edited images beyond the package?
For professional headshot photography services that translate directly to a strong dating profile lead shot, a short session with an experienced photographer removes the guesswork from lighting, posing, and expression coaching entirely.
How should you order and test your photo lineup?
Lead with your strongest close-up. Follow it with your full-body shot. Alternate between face-forward and context shots for the remaining slots, and close with your best lifestyle or date-preview image. That sequence gives viewers a complete picture of you in the first three swipes.
The six-photo sweet spot holds across most platforms. Four photos is acceptable if all four are strong. Eight or more works only if every image adds something new; most people do not have six genuinely different, high-quality shots, and a weak seventh or eighth photo pulls down the average impression of the whole profile.
Three example lineups:
- Casual dater: Close-up (warm smile, outdoor light) → Full-body (park, relaxed) → Activity shot (sport or hobby) → Group shot → Date-preview (café or bar)
- Long-term relationship seeker: Close-up (direct eye contact, genuine expression) → Half-body (smart casual, interesting background) → Full-body → Lifestyle shot (travel or cultural activity) → Group shot → Date-preview
- Active outdoors type: Action shot (hiking, cycling, surfing) as the lead if the face is clearly visible → Close-up → Full-body in nature → Activity variety shot → Group shot → Lifestyle (campfire, farmers market)
Testing your lineup:
Swap one photo at a time, not the whole set. Rotate images every 4–8 weeks and note whether your match rate changes. Most platforms do not offer native A/B testing, but Hinge's photo prompts and Tinder's Smart Photos feature (where available) give you some data on which images perform. On platforms that allow captions, keep them to one line: a short context note ("hiking the Appalachian Trail") or a light invitation ("always up for a coffee recommendation").
Why do better photos actually get more matches?
Pictures convey attractiveness plus social, economic, and cultural signals. Together, those signals drive matching success far more than attractiveness alone.
Research summarized by Xder found that profiles combining facial attractiveness with visible social, economic, and cultural capital (activities, friends, travel, lifestyle cues) produced the highest match rates. A photo of you at a gallery opening or on a hiking trail does not just show what you look like; it signals your interests, your social world, and the kind of experiences you offer a potential partner.
The numbers behind photo quality are striking. High-quality photos are up to 21x more likely to lead to a date compared to poor-quality images, based on conversion data from SwipeStats (8.4% vs. 0.4% in their cited dataset). That gap is not about having a professional photographer; it is about having clear, well-lit, honest images that answer the viewer's questions quickly.
| What the research shows | Practical takeaway |
|---|---|
| ~80% of pass decisions are photo-driven | Fix your photos before rewriting your bio |
| High-quality photos are up to 21x more likely to lead to a date | Invest time (or money) in getting the lead shot right |
| Six photos covers all required archetypes | Aim for six; never pad with weak images |
| Social and cultural capital signals multiply attractiveness | Include at least one activity and one lifestyle shot |
| Rear-camera photos outperform selfies | Ask a friend or hire a photographer for key shots |
On authenticity: overedited or outdated photos may generate short-term matches but tend to reduce long-term success. When your photos look significantly different from how you appear in person, the first meeting starts with a trust deficit that is hard to recover from. Photos from the last 6–12 months, edited lightly and honestly, serve you better over time.
Key Takeaways
Strong dating profile photos combine a clear, well-lit lead close-up with five supporting shots that together answer every silent question a potential match is asking.
| Point | Details |
|---|---|
| Lead with a close-up | A sharp face, natural light, and genuine eye contact is the single most important photo in your lineup. |
| Use six photos | Three is the minimum; six covers all archetypes without padding the profile with weak images. |
| Light and composition first | Soft natural light, camera at eye level, face filling 50–60% of the frame in the lead shot. |
| Show social and lifestyle signals | Activity, group, and date-preview shots multiply the persuasive power of attractiveness alone. |
| Life in style Photography | A professional session produces a complete, polished six-shot lineup with lighting, posing, and expression coaching included. |
What photographers actually fix on set (and what you can learn from it)
The single most common fix on a dating profile shoot is not the outfit or the location. It is the expression. Most people arrive holding a practiced smile that looks fine in a mirror and flat in a photo. The first thing a good photographer does is get you moving, talking, or laughing so the camera catches something real.
The second most common fix is lighting position. Clients often choose a spot they like aesthetically (a dramatic urban wall, a moody bar interior) without realizing the light there is working against them. Moving three feet to the left to catch a shaft of window light or stepping into open shade changes the shot entirely.
A few patterns come up repeatedly on set:
- Stiff posture: Asking someone to shake out their arms and walk toward the camera for a few frames almost always produces a more relaxed body position than any pose instruction.
- Forced smile: Telling a joke, asking a question, or having the subject look away and then back at the lens on a count of three produces a genuine expression far more reliably than "say cheese."
- Wrong outfit for the light: A dark top in a dark environment disappears. Swapping to a lighter layer, even mid-shoot, can rescue a location that seemed like it was not working.
- Too few frames: Clients who are nervous tend to want to stop shooting after a few frames. The best images almost always come from frames 20–40, once the initial self-consciousness has worn off.
The before-and-after is usually not about dramatic transformation. It is about a relaxed jaw, a genuine laugh, and a light source that is doing its job. Those three things together are what separate a photo that gets a swipe from one that gets passed over.
Ready for a professional dating profile session with Life in style Photography?
A 30–90 minute session with Life in style Photography gives you a complete, polished six-shot lineup without the trial and error of a DIY shoot. You arrive, we handle the lighting, location scouting, posing guidance, and expression coaching. You leave with images that are ready to upload.

Life in style Photography offers on-location portrait and personal branding sessions that translate directly to a strong dating profile. Sessions include outfit guidance, multiple location options, and retouched image delivery. For readers who want a strong lead close-up specifically, the headshot photography service is a focused, efficient option: 45–60 minutes, natural light or studio, with a set of polished images delivered within the week. Browse the photography packages to find the session length and deliverables that fit your needs, then reach out to book your date.
Useful sources and further reading
The advice in this article draws on published research and practical photography guides. The sources below are worth reading in full if you want to go deeper on any specific topic.
- Dating Profile Pictures: How to Pick the Right Ones — eHarmony
- How to Take Photos of Yourself for Dating Apps — Photofeeler Blog
- Life in style Photography portfolio — real examples of natural-light portrait work across headshot, lifestyle, and personal branding sessions
A downloadable one-page photo checklist covering the six-shot lineup, composition rules, and a DIY shoot plan will be available on the Life in style Photography blog. Check back for the link, or reach out directly and we will send it to you.
Recommended
- 5 Tips to Look Your Best in Professional Headshots - Auckland Portrait, Branding & Wedding Photographer | Life in Style Photography
- Auckland Fashion Photographer - Auckland Portrait, Branding & Wedding Photographer | Life in Style Photography
- Portfolio - Auckland Portrait, Branding & Wedding Photographer | Life in Style Photography
- Auckland Headshot Photography portfolio - Auckland Portrait, Branding & Wedding Photographer | Life in Style Photography